
Part 18: Building Our Trailerable Dreamboat
WHOOPEE! —A Windshield Frame at Last…and Three More Things…
In this episode we cover four small but challenging accomplishments: 1) Building a three-panel windshield frame; 2) Coming up with a pattern for pilothouse side walls; 3) Using a new-to-me fiberglass product to form a molding around the cabinsides, and 4) Playing with different paint schemes for the cabin and pilothouse, knowing we should be doing “real work” instead, and ending with a big, fat “No Decision.”
So, taking our four subjects in order…
1. The Windshield Frame
Readers usually know best, including my buddy Jeff Patrick, who recently asked why in heck I’d chosen a backwards approach to windshield construction—(meaning, we somehow decided to set the pilothouse hardtop loosely in place, propped up by a temporary forward bulkhead, before undertaking design and construction of the three-panel wooden windshield.) Jeff, who’s constructed some terrific boats including a modified Ninigret skiff we featured in the column last year (photo below),
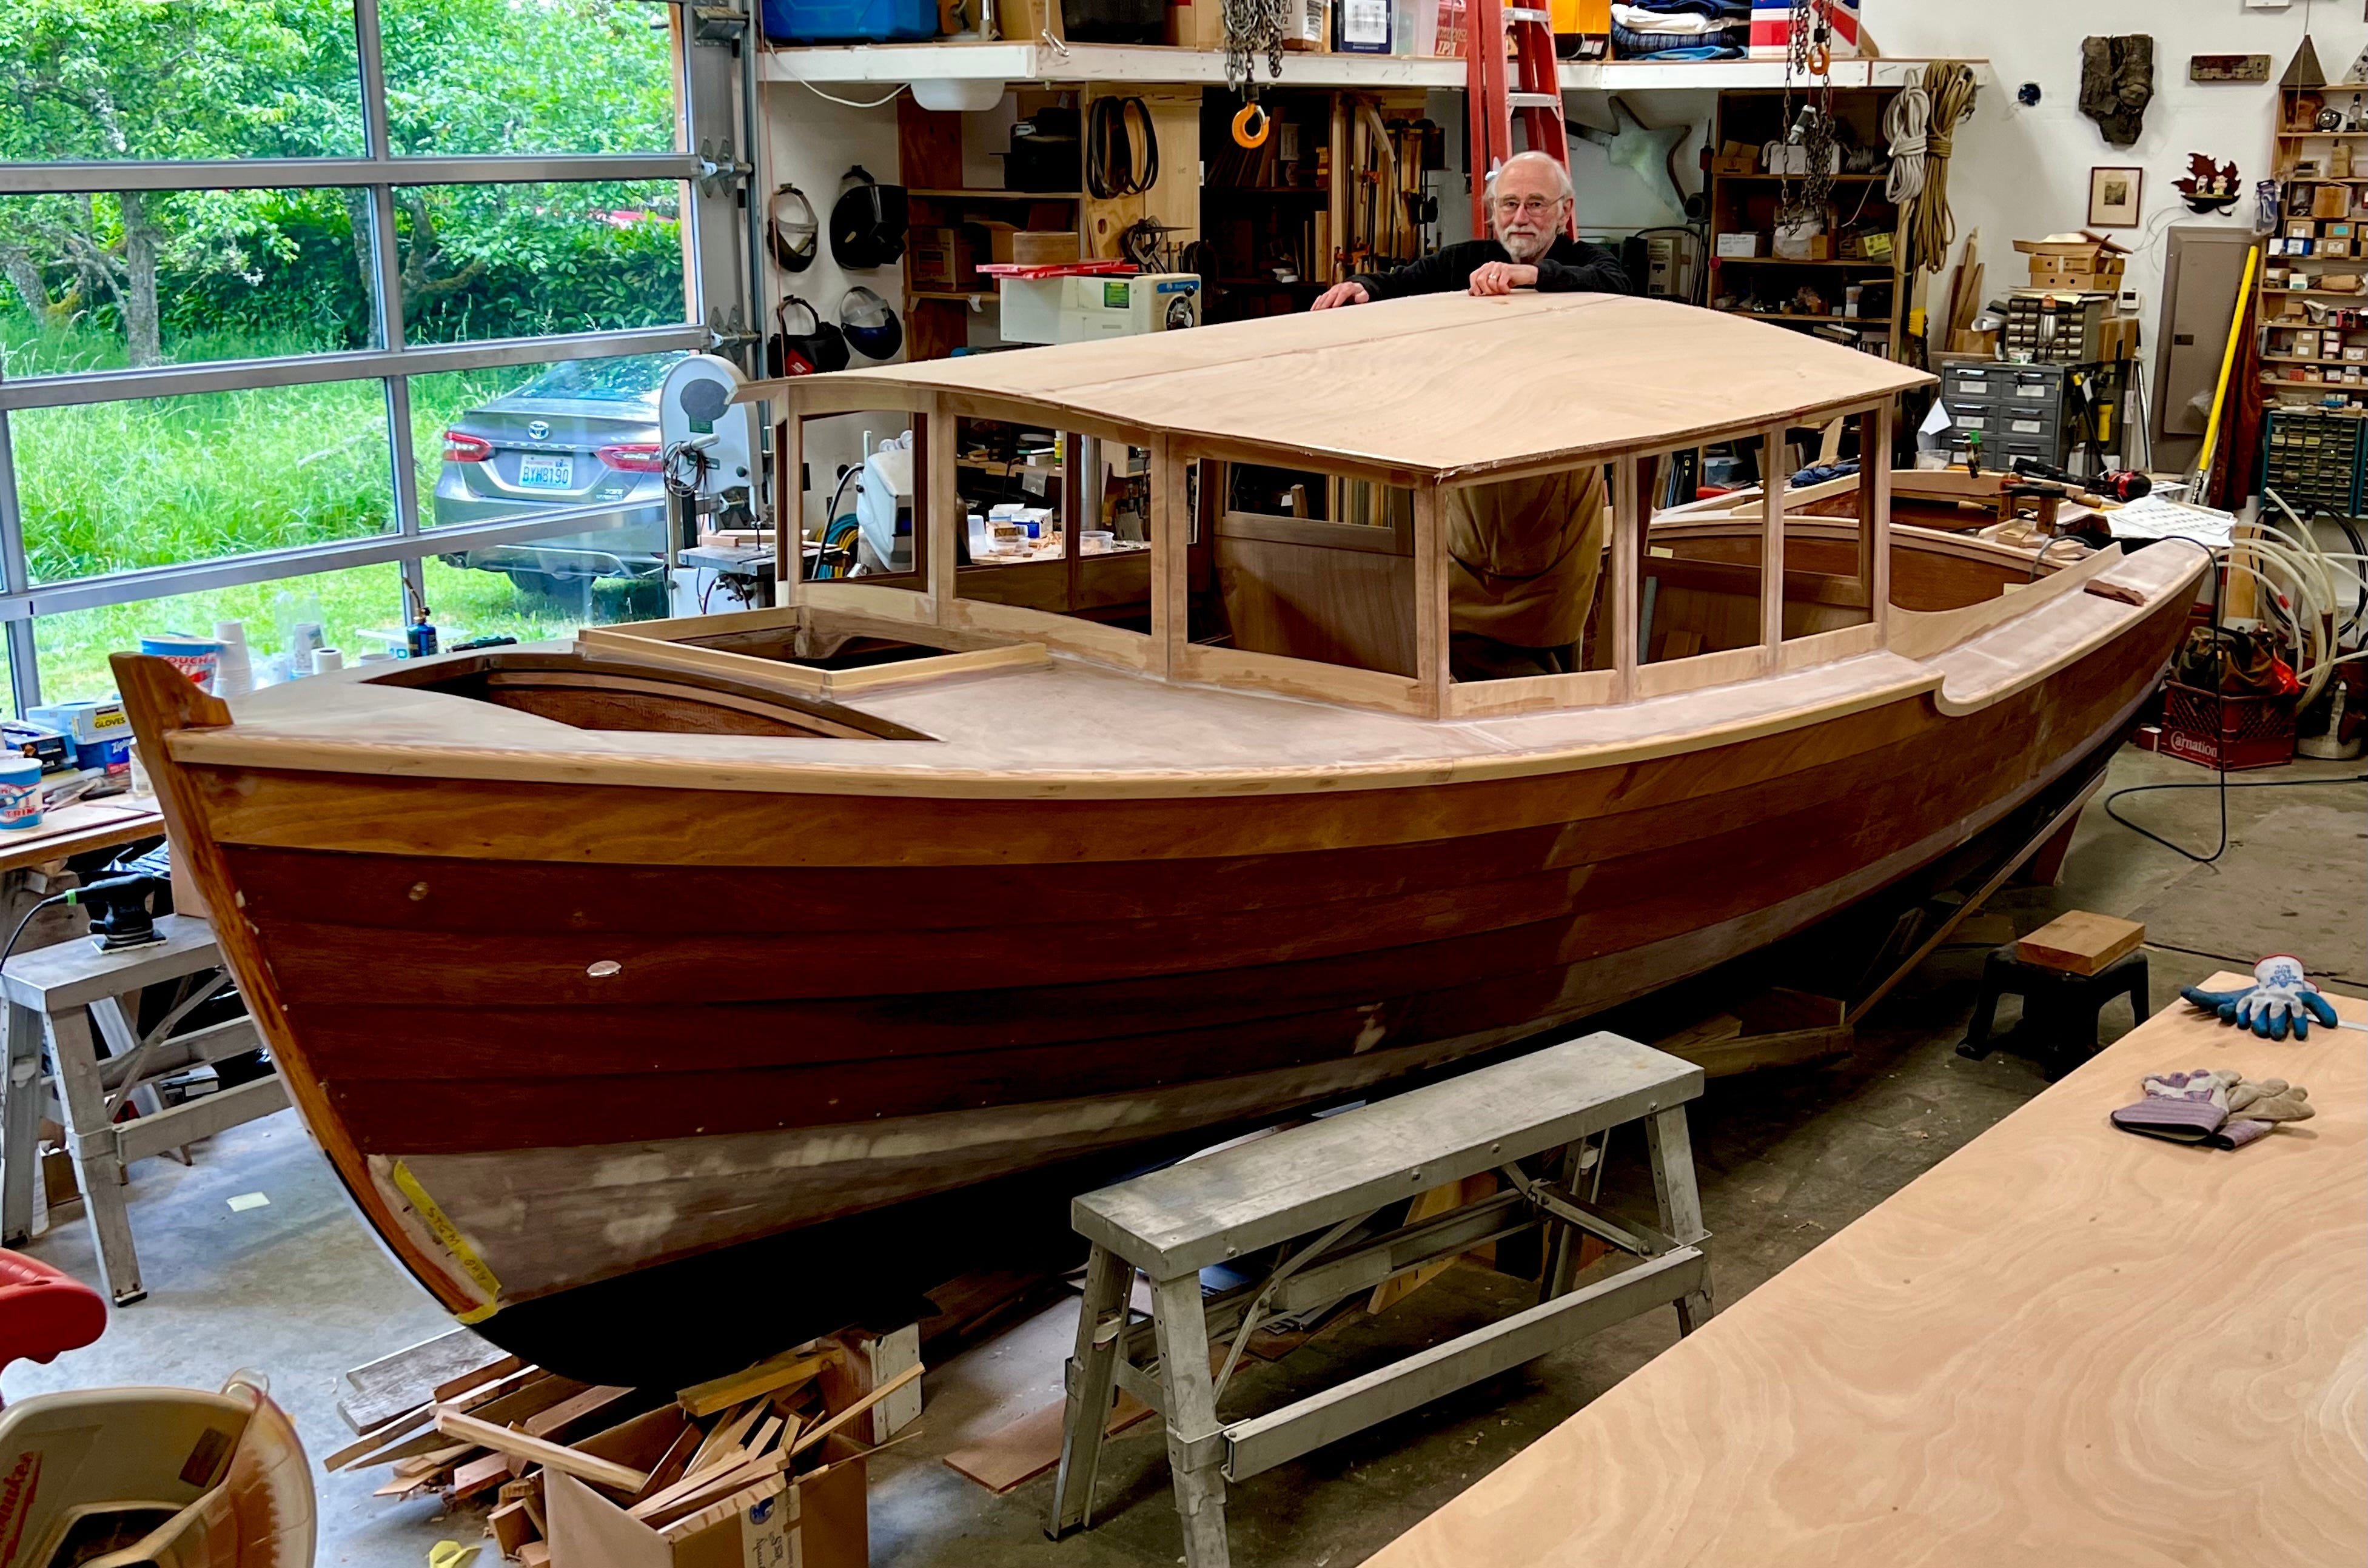
wisely wondered if we were losing our marbles since savvy builders would normally construct the windshield frame and then—only then—make sure the hardtop fit to the existing windshield, rather than vice-versa. (Thanks, Jeff…you were so right.)
After offering a lame response to Jeff’s question, I stubbornly continued reverse-engineering the windshield frame so that, with difficulty, it came close to snuggling under and supporting the hardtop. By that point, I knew Jeff was correct, so yes, yes, it would have made more sense to construct the damnable windshield first, and then form the laminated top to fit the frame.
Oh, well…we stumbled along doing it our way, which was harder and took longer. And we continued on to the next building steps so I guess we survived, and the boat doesn’t know the difference.
Here are a few step-by-step photos of our windshield project…
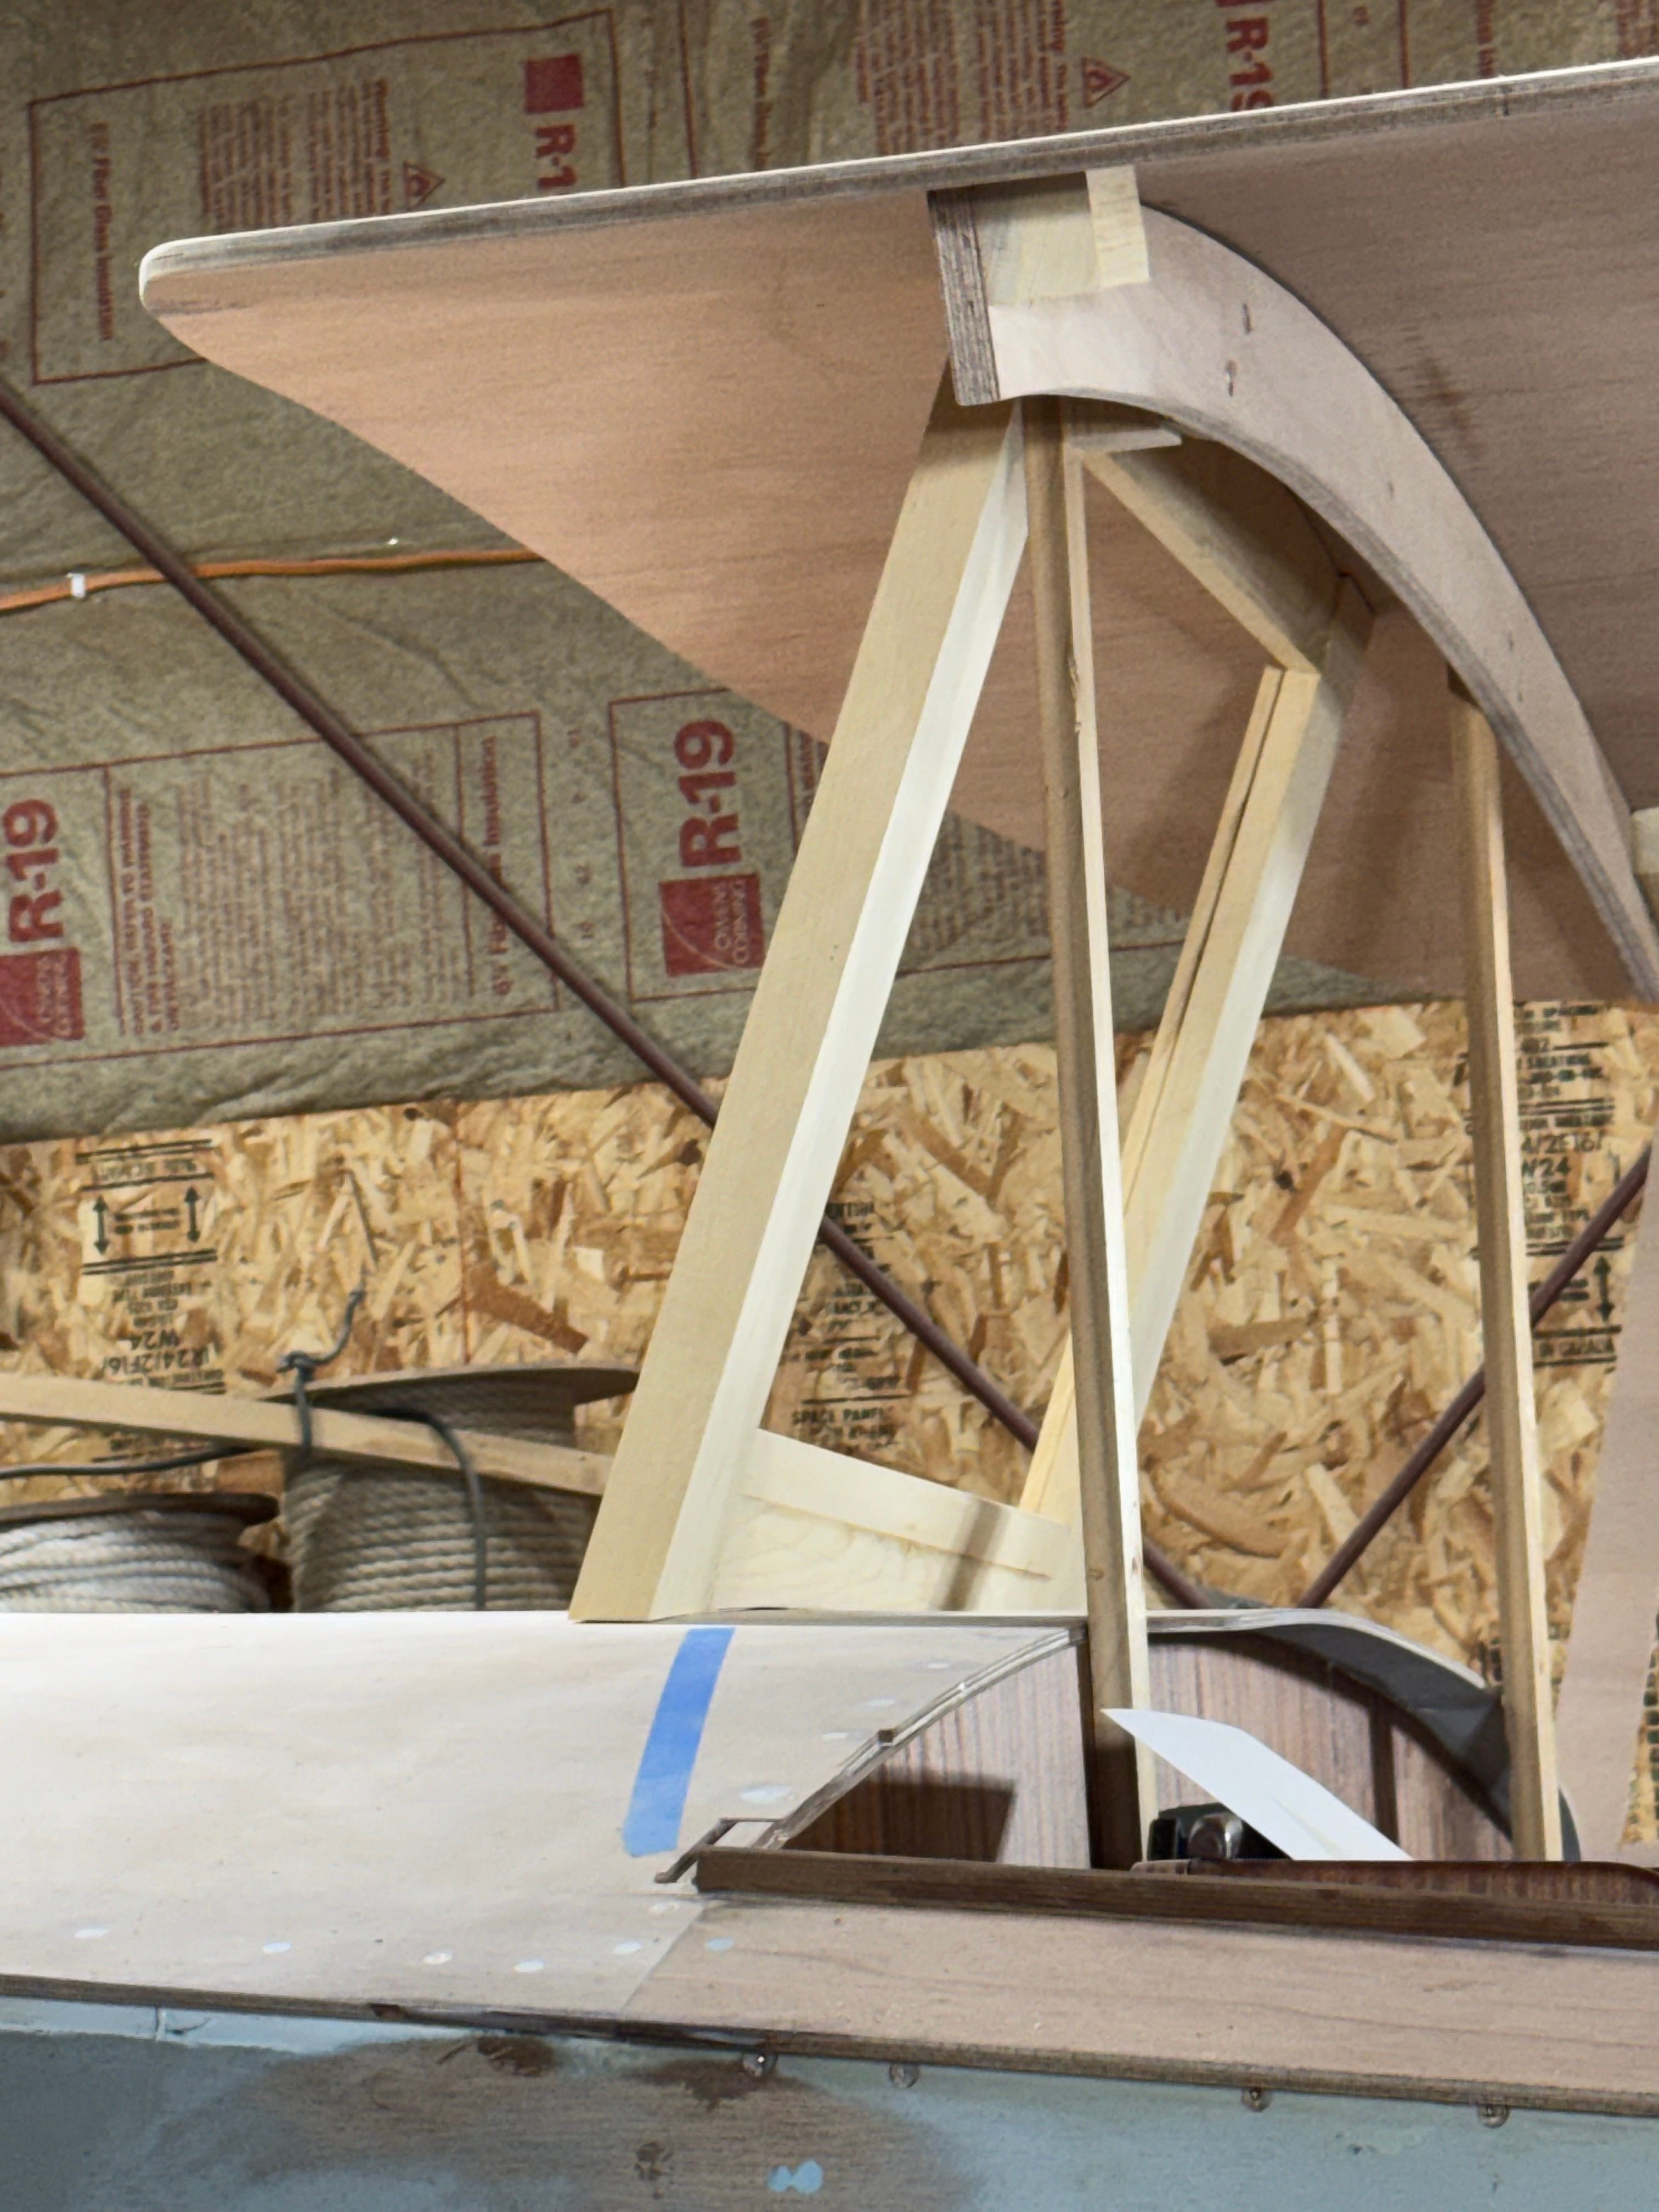
Above - Using skinny clamped-together beams and a throwaway plywood form to temporarily support the pilothouse roof, I started by patterning, milling, cutting and attaching a center windshield frame of Alaska Yellow Cedar, figuring the straightforward middle section would be easier than the trickier side frames, since they had to angle back to intersect with pilothouse side panels—all before we’d even figured out how the side-panel design might connect to the windshield frame. (So, in other words, we followed our customary design-as-you-build meander and somehow got through it.)
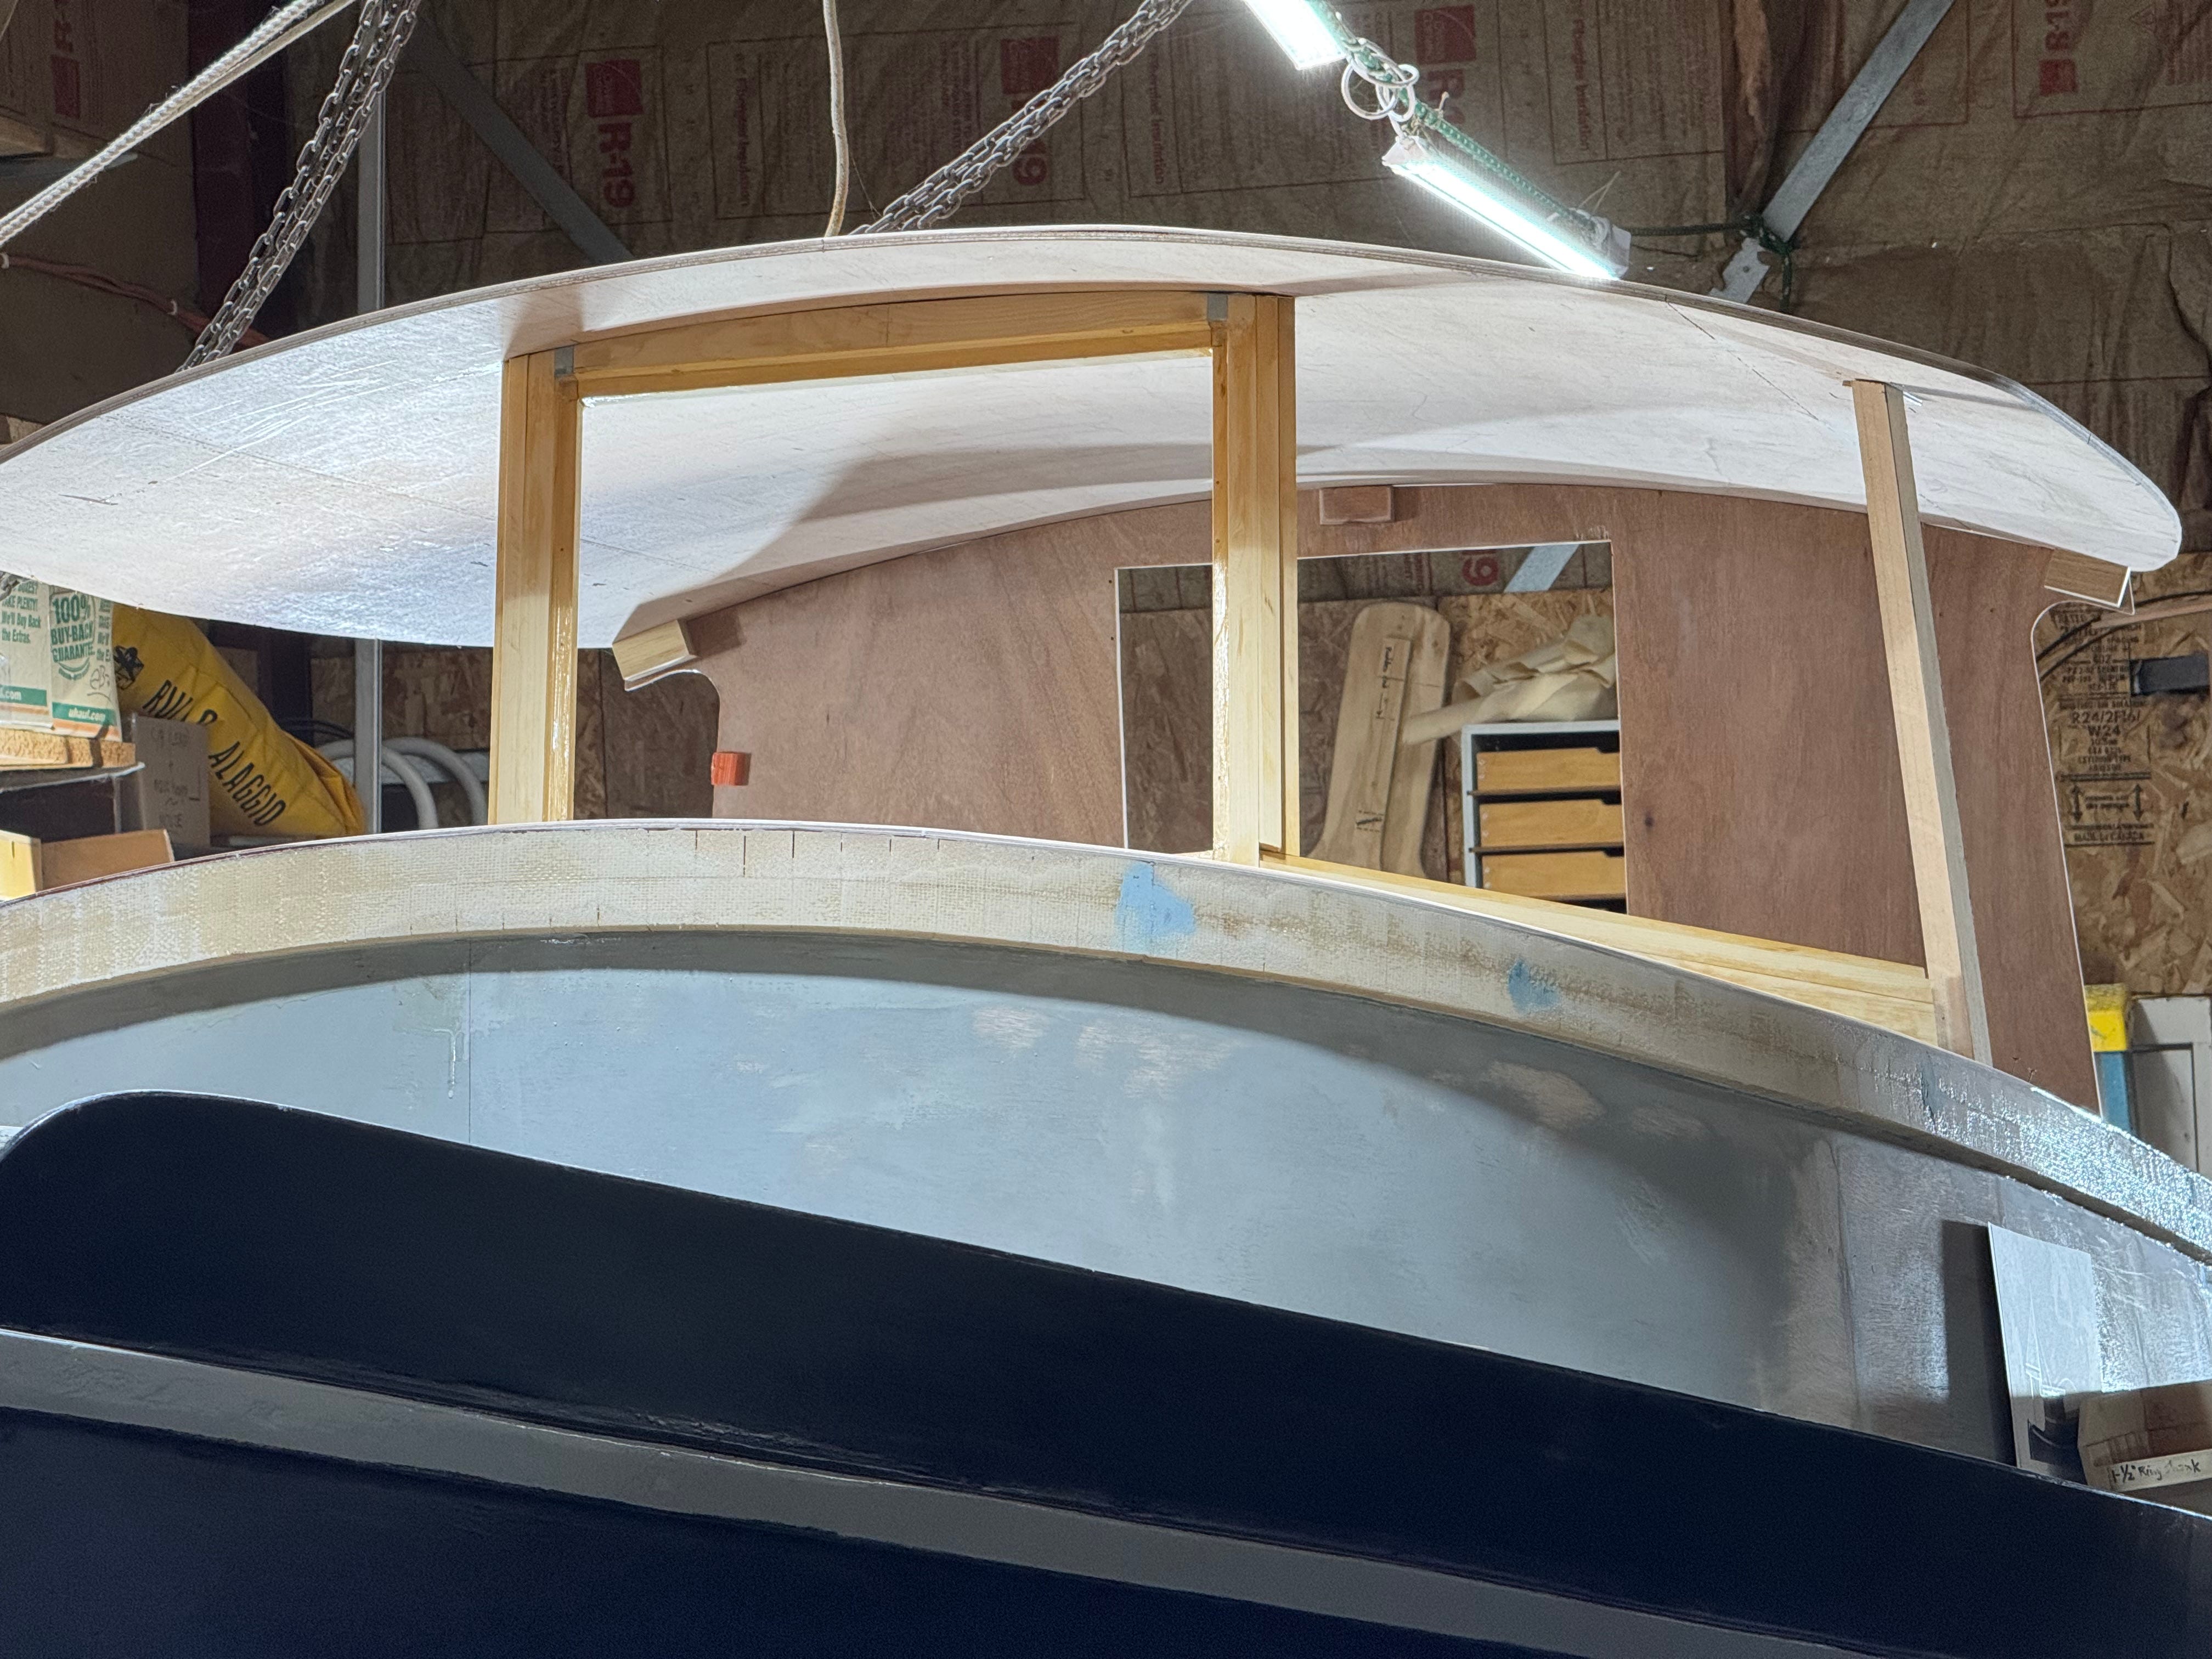
Above - The center section of windshield stands in place, as we begin to form the portside frame.
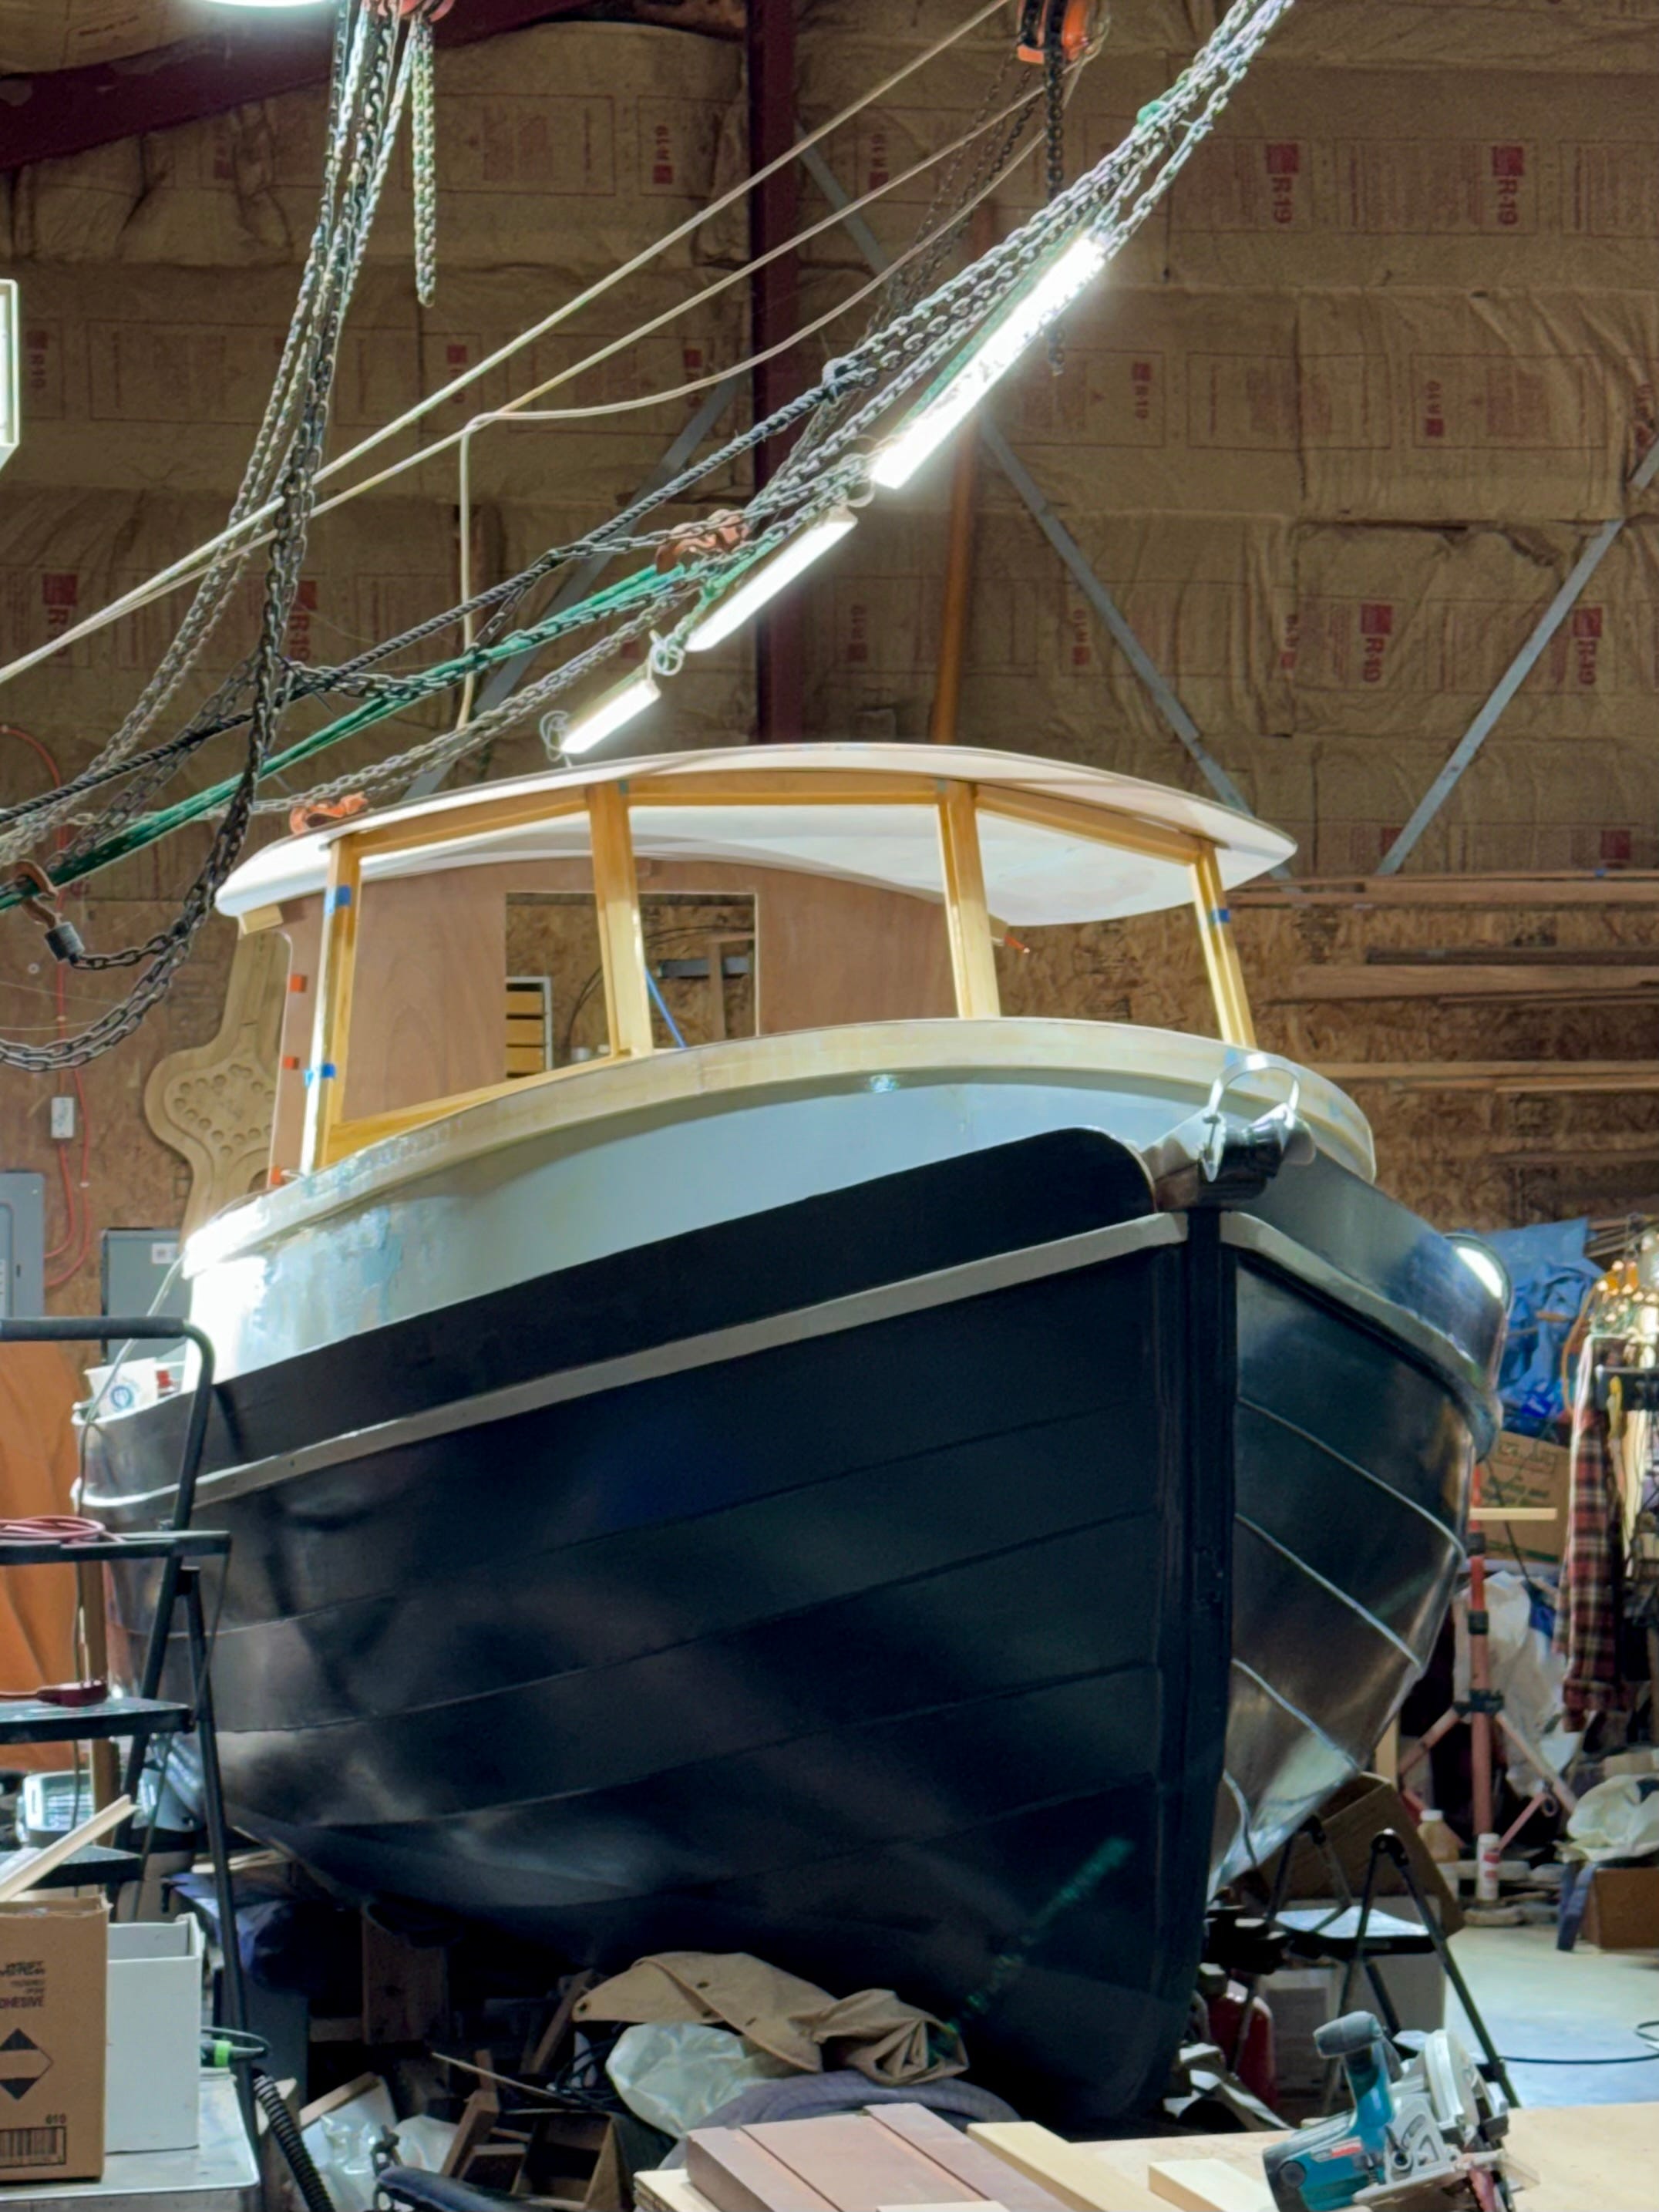
Above - All three of the windshield panels are epoxied to one another, using System Three’s Gel Magic, our favorite caulking-gun adhesive since it’s thick and won’t sag on vertical surfaces, and it’s great at filling small gaps.
2. Pilothouse Side Windows
This is at the patternmaking stage, but we’re close to a plan for the side panels, and how they’ll be married to the forward windshield frame and aft pilothouse bulkhead.
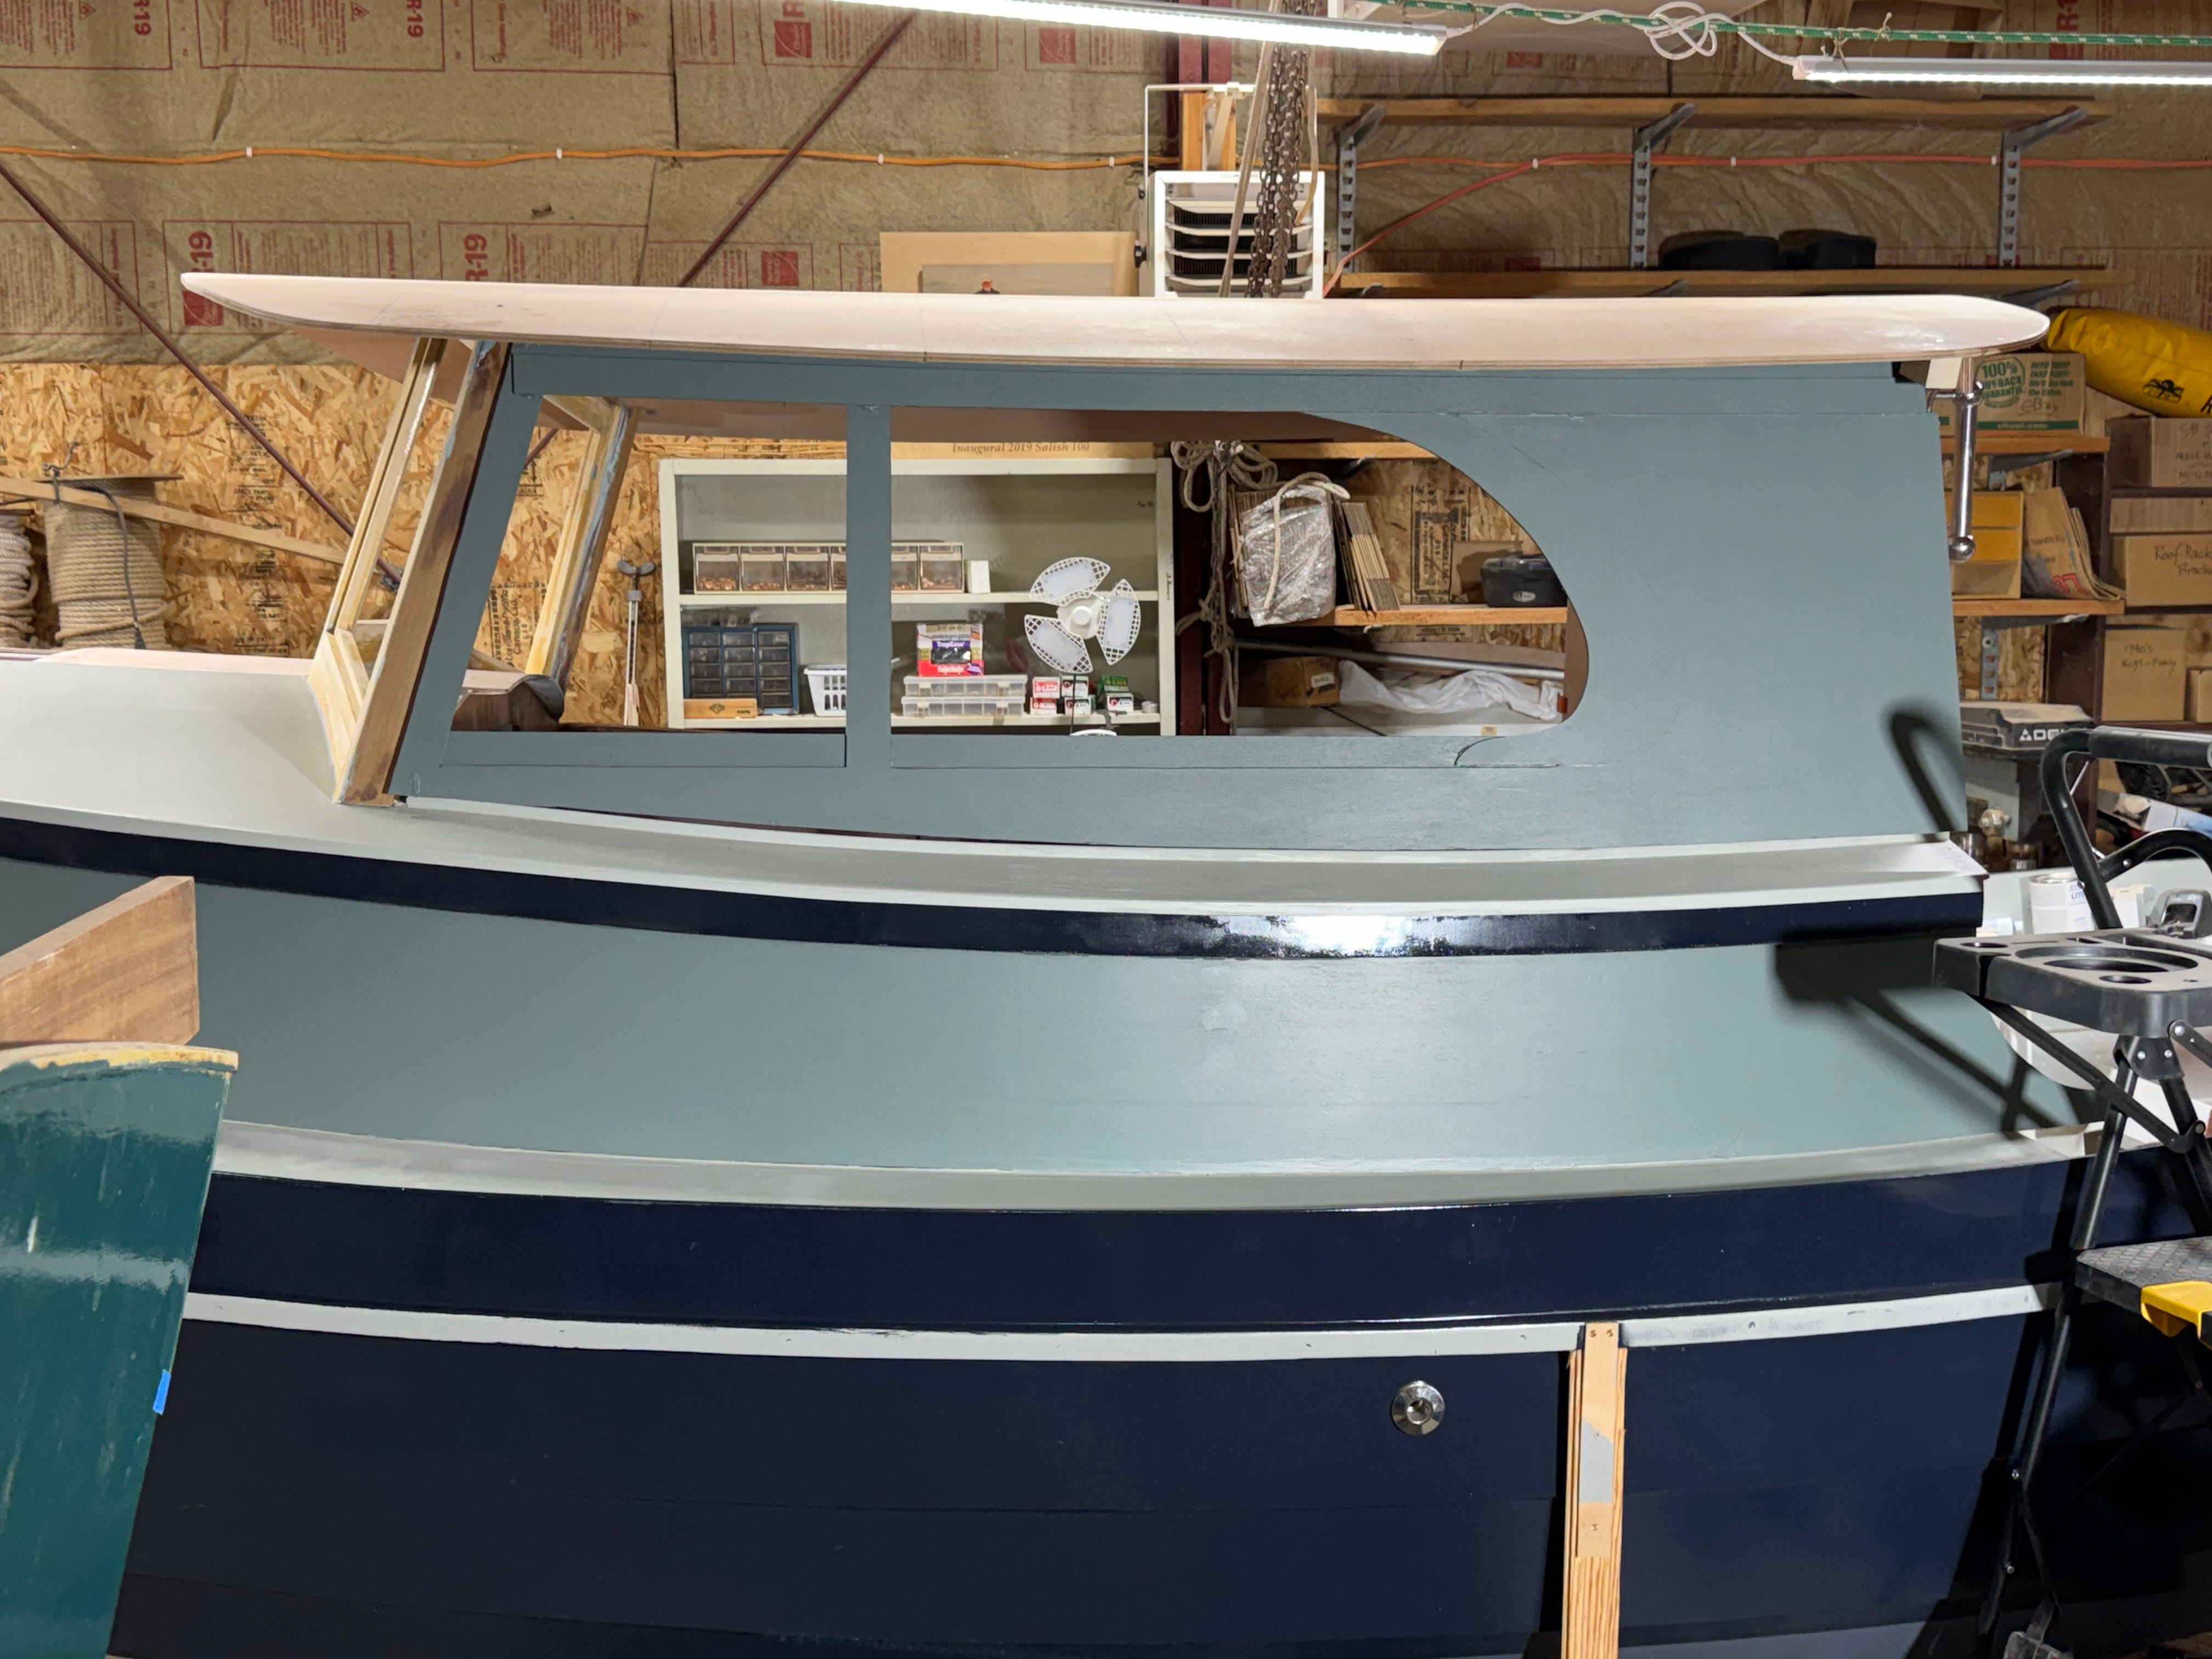
Above - Our doorskin pattern suggests a forward side window that’ll open (next to the helm), and a somewhat larger fixed side window, with a post in between. The side panels will be built using an inner layer of 6mm (1/4”) marine ply, laminated to a 9mm (3/8”) outer layer that supports the windows. (All pilothouse windows will be shaped from 6mm (1/4”) polycarbonate—commonly referred to by the Lexan brand—which is stronger than glass and yet is easy to cut with a jigsaw, or drill holes into for things like sliding-window knobs.)
3. Molding Around the Cabintop
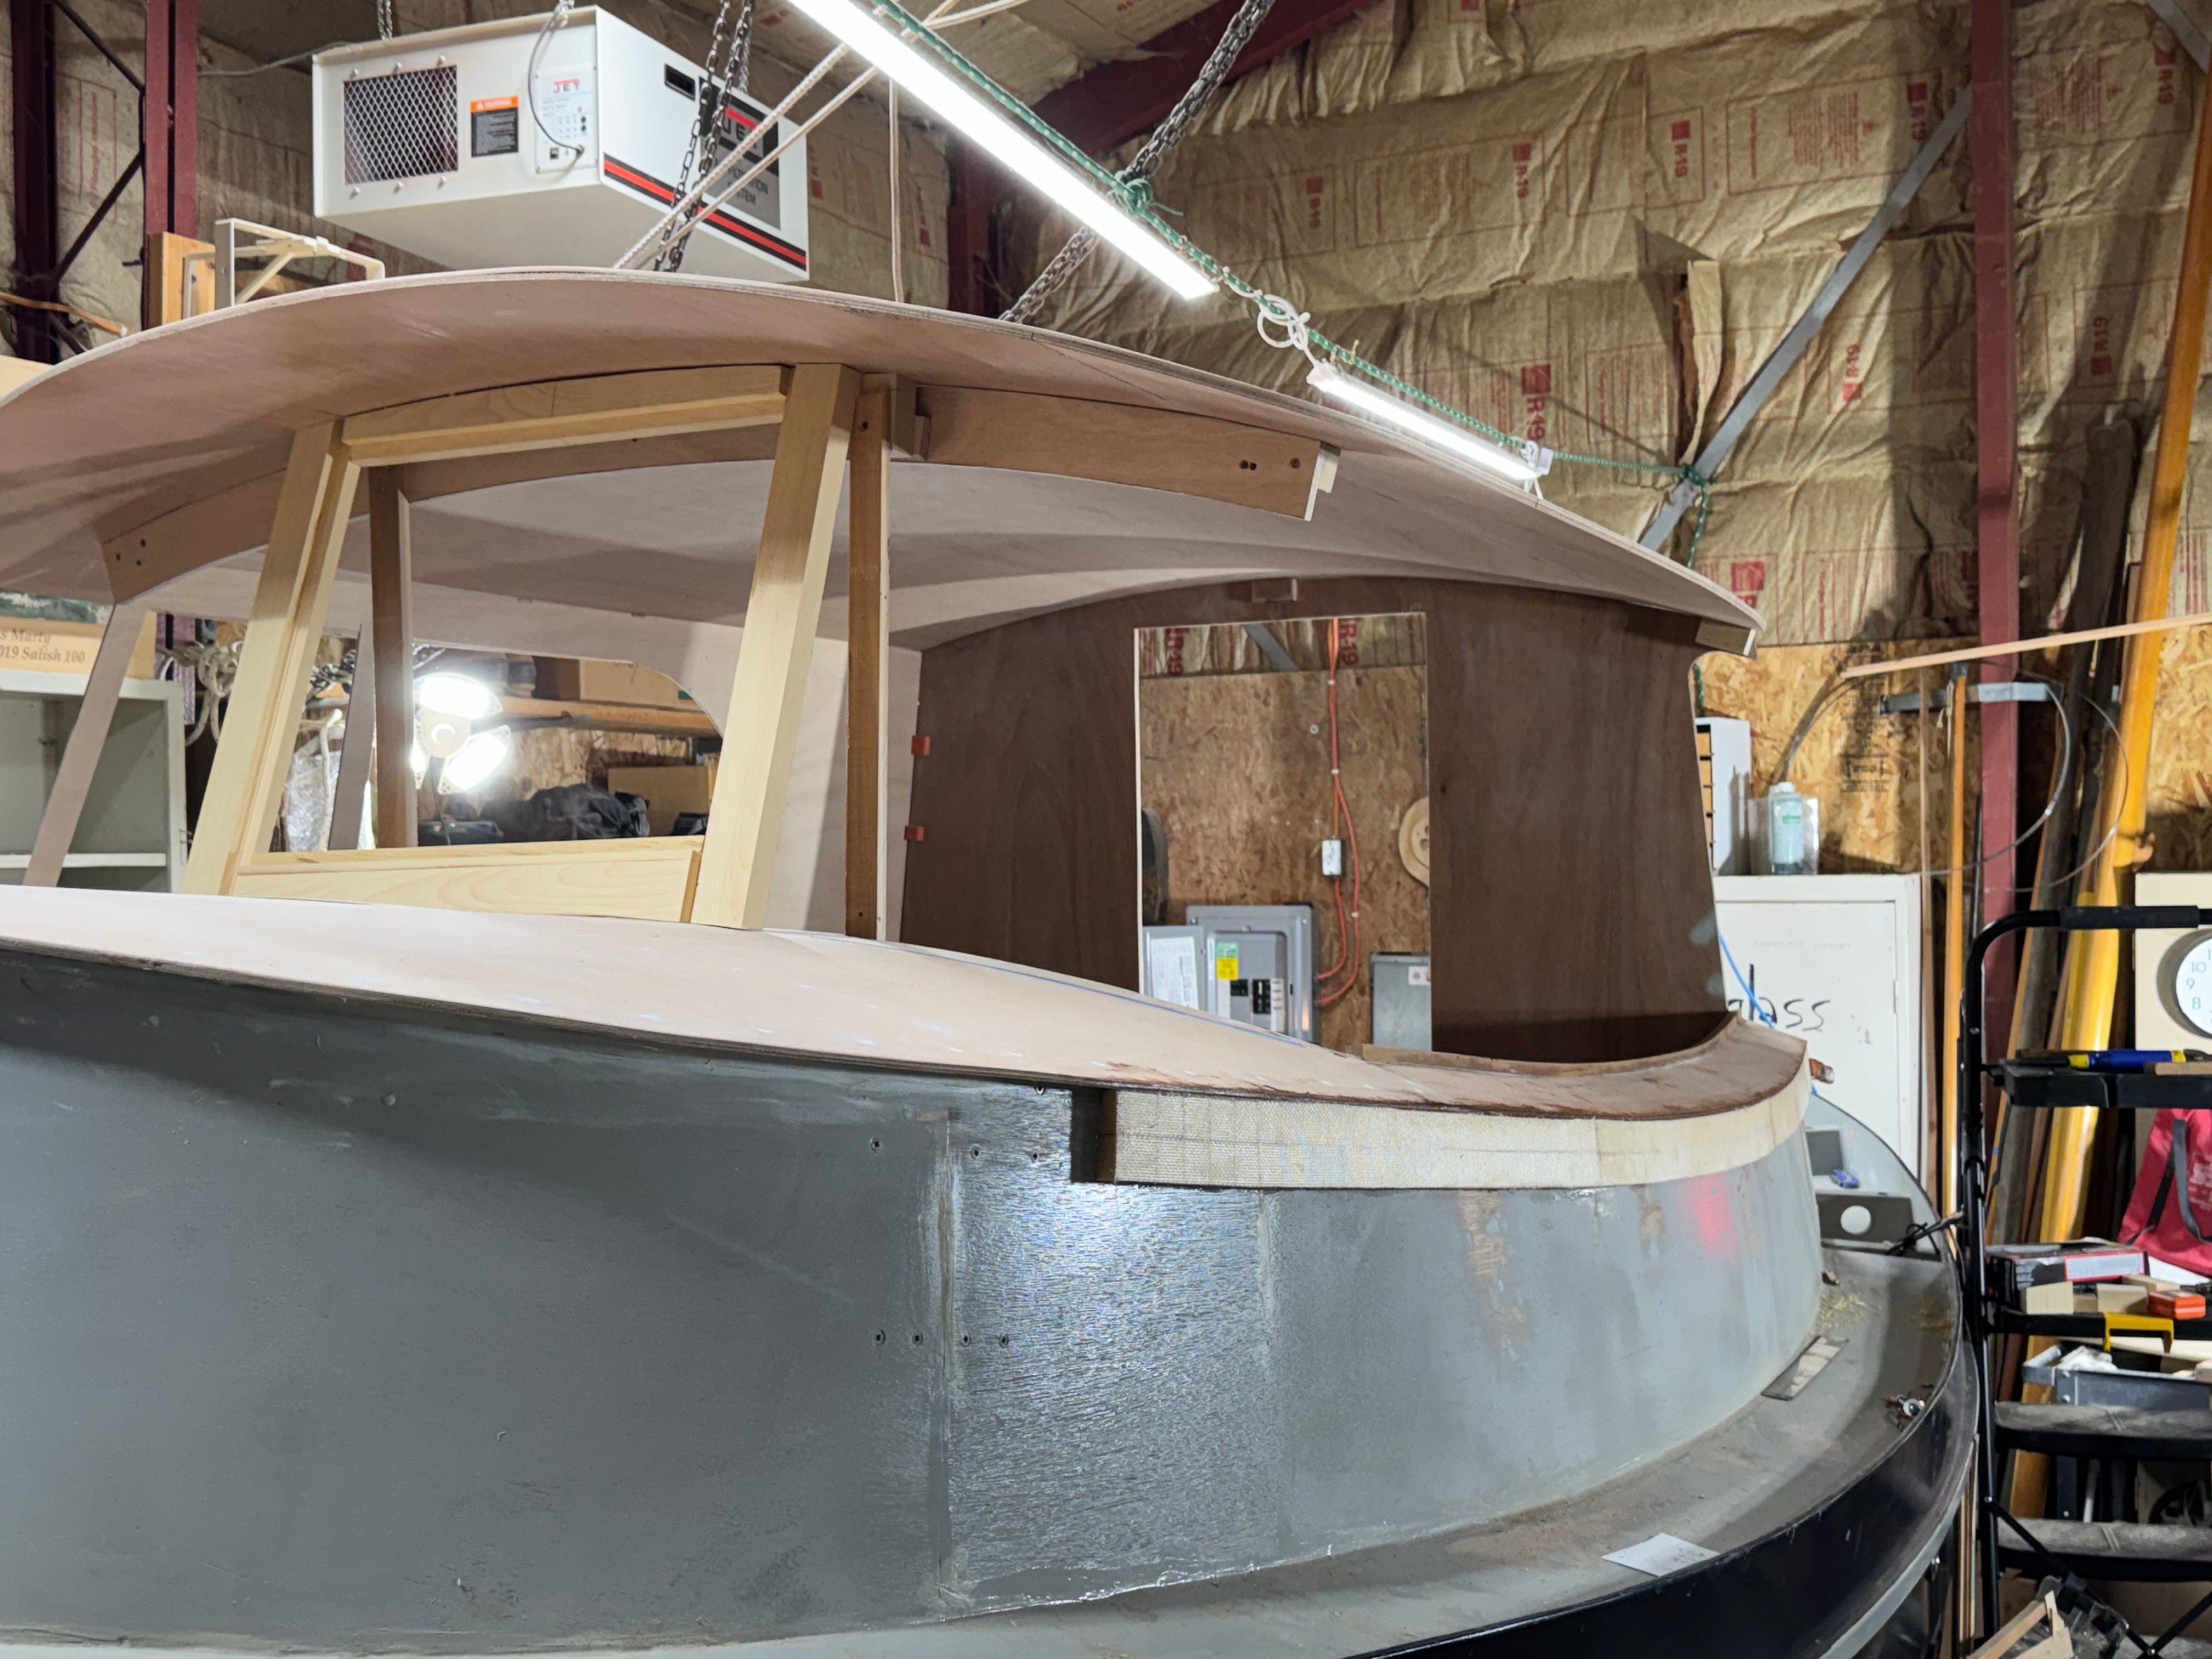
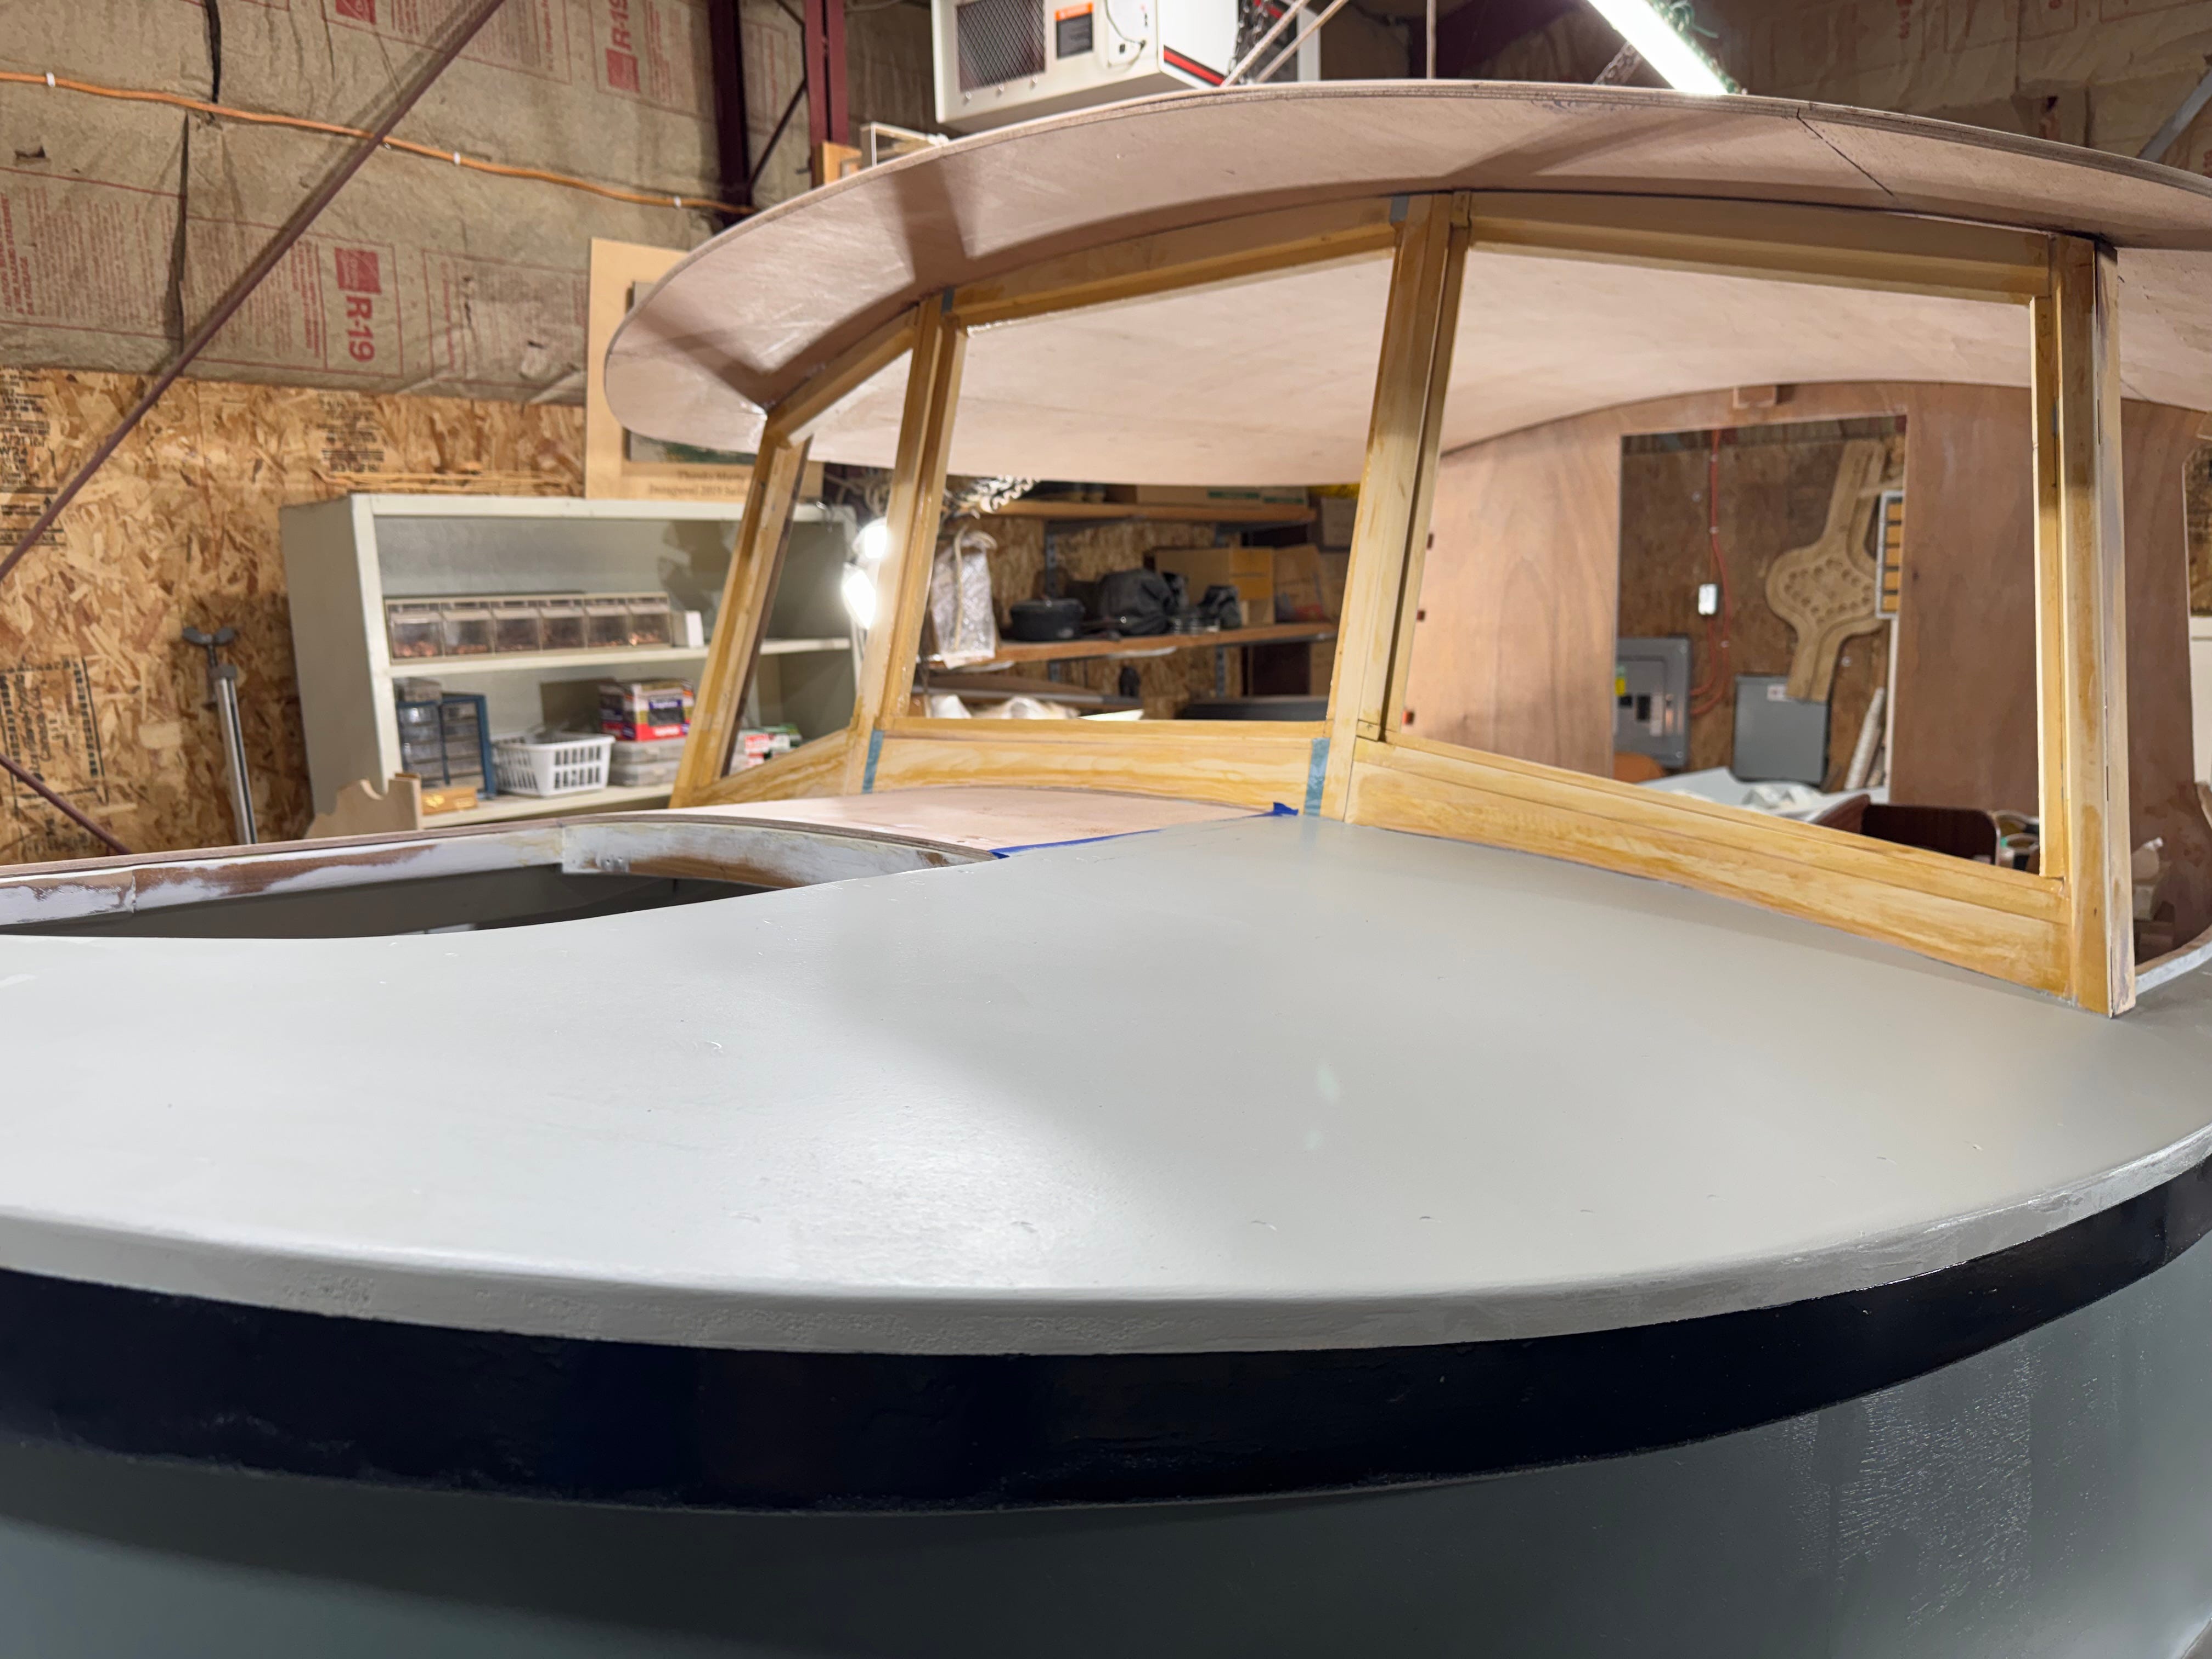
Above - As we were starting work on the pilothouse windshield, we were also running a band of Divinycell’s dense foam, with fiberglass-cloth outer skin, around the overhanging lip of the cabintop and narrower aft side decks. This was something new to me, but we liked Divinycell’s ability to easily bend around compound curves, simply glued onto the cabinsides and up under the overhanging cabintop edge using Gel Magic, which held the lightweight band of 3/4” x 2” foam to the cabinsides. (The jury is still out on vertical edge height of our cabinside band—which we can make narrower if need be—but one thing is true: Using Divinycell saved untold hours of shaping solid wood around the compound curves, or laminating thin strips of cedar or steam-bent oak, and then dealing with trimming and smoothing-out the laminated layers in preparation for paint.)
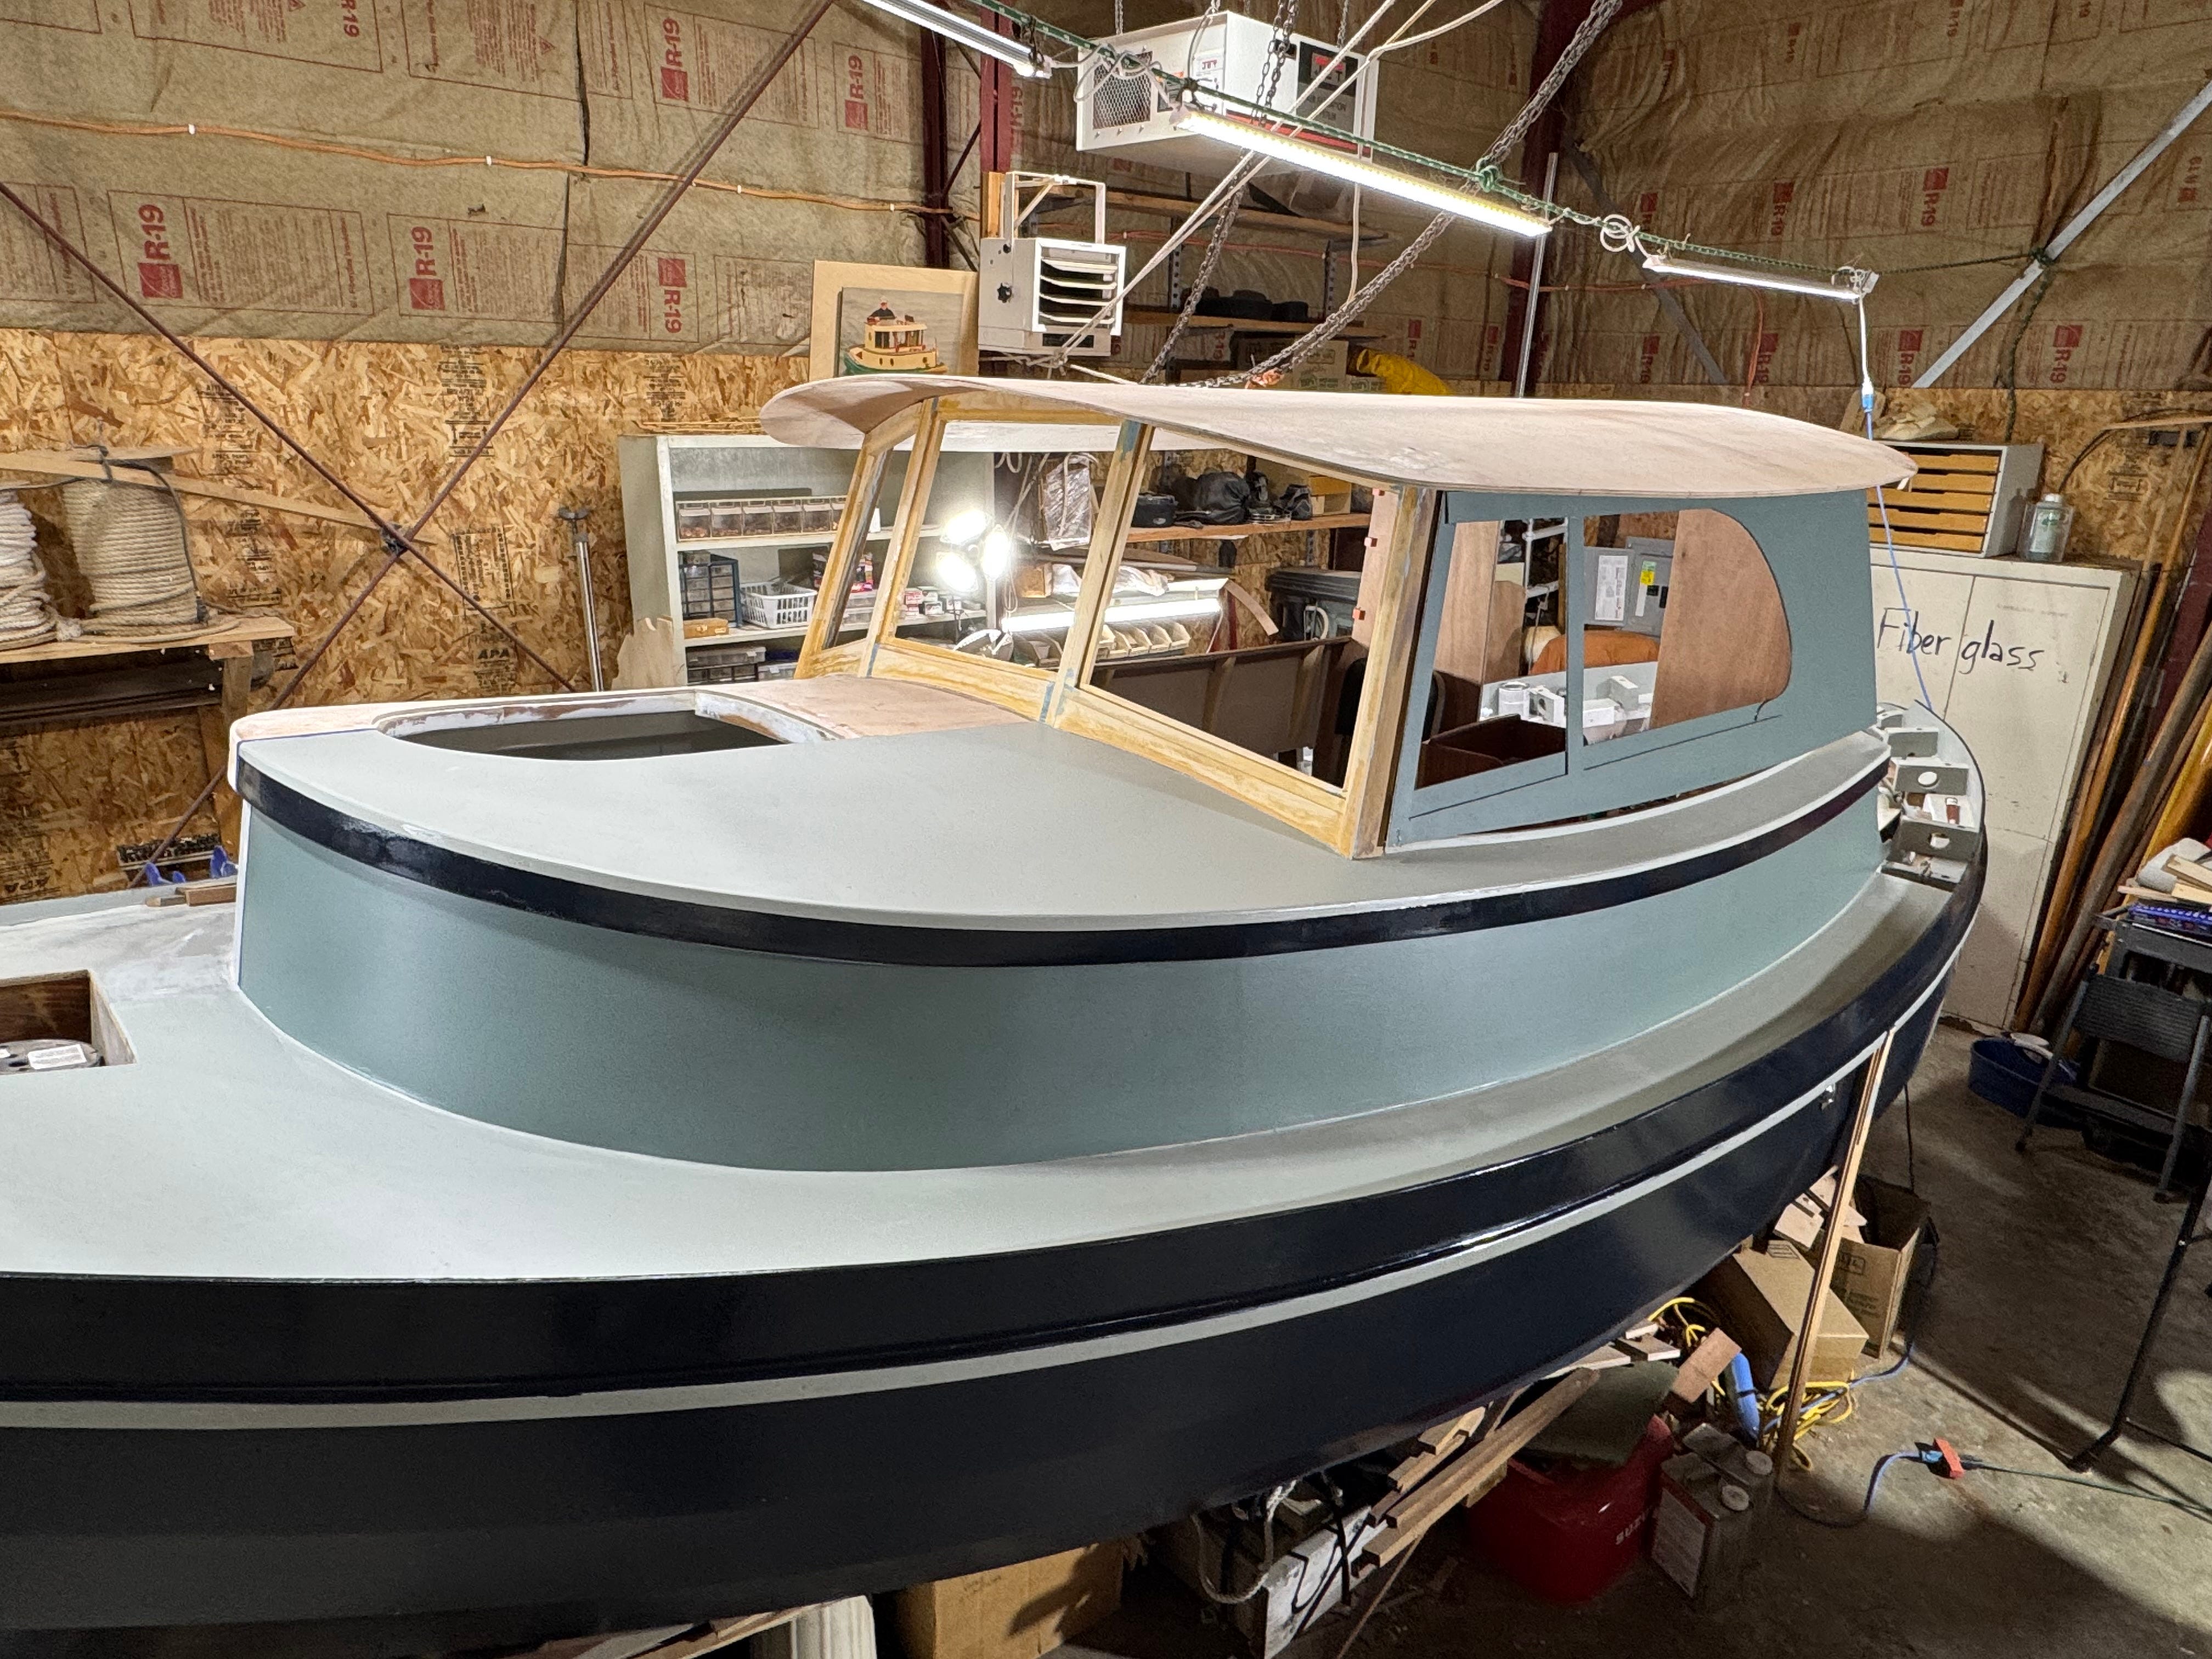
Above - The band of Divinycell foam with one coat of paint (Raven Blue, appearing black), following installation. Please ignore the wide-angle distortion, but in our crowded shop it’s hard to step back far enough to get “normal” shots.
4. And, the Challenge of a Paint Scheme…
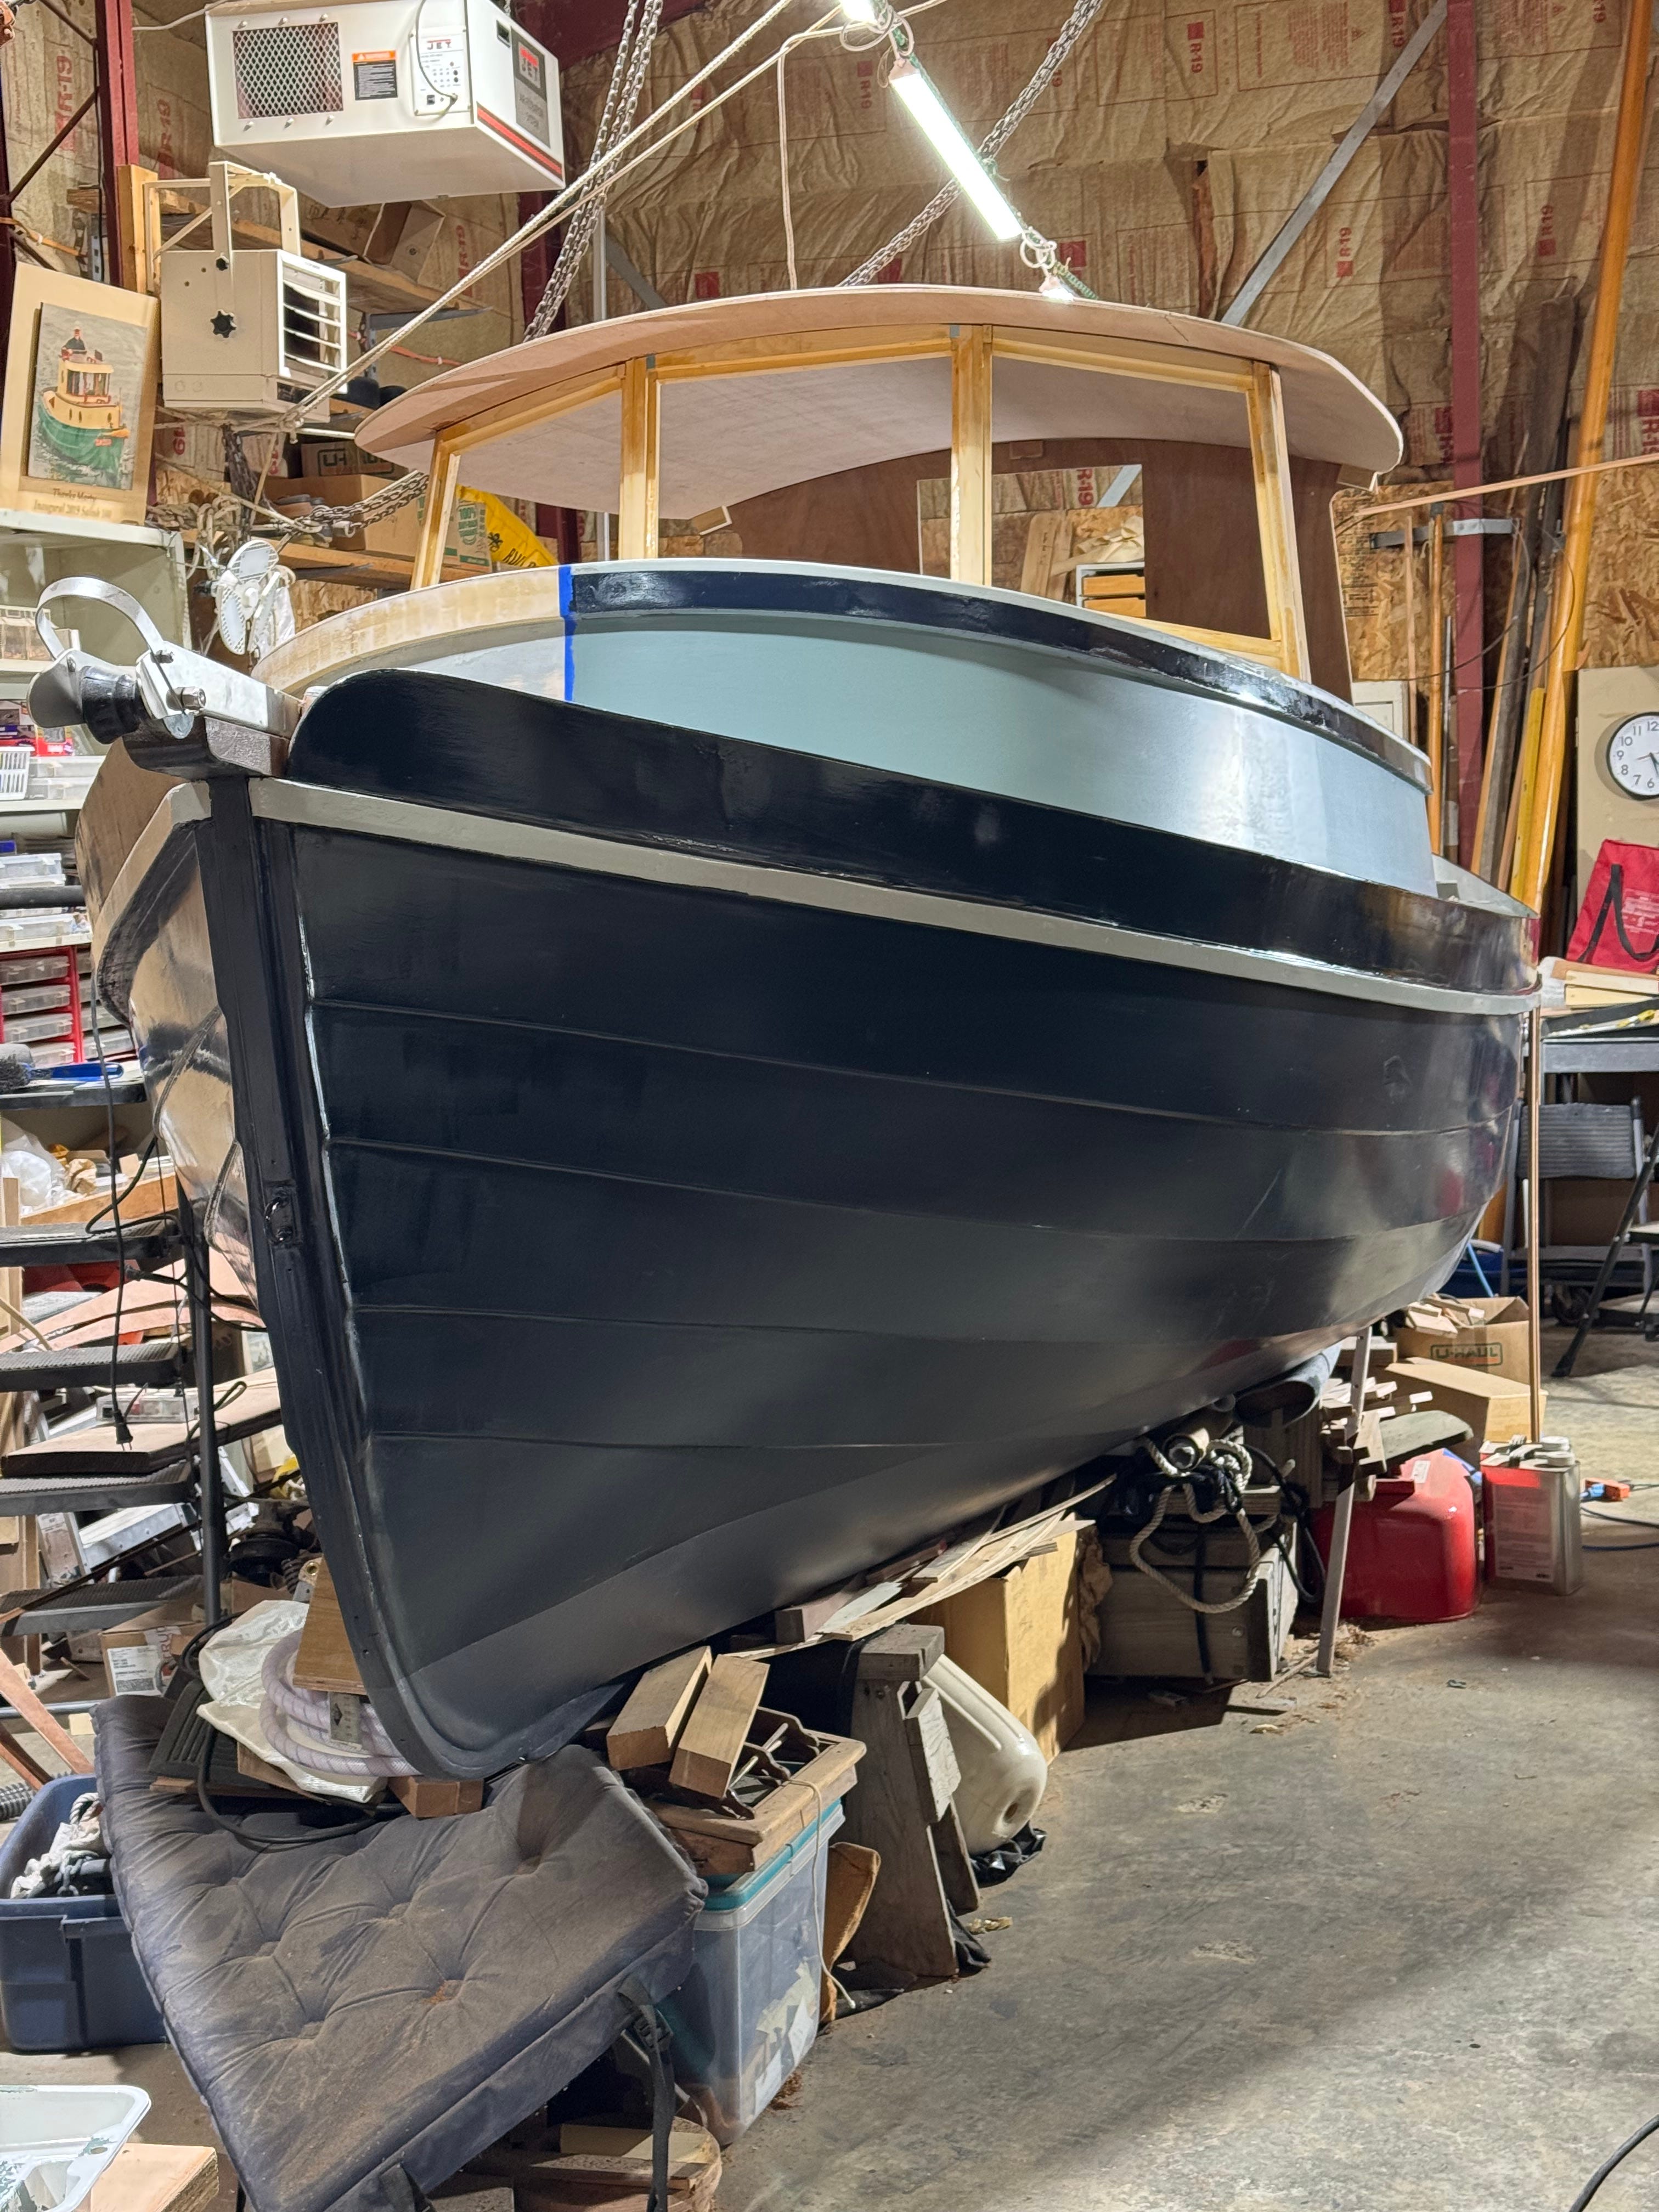
Above - We’ll continue messing with different paint colors, maybe until the very end, but for now we thought we’d try to replicate colors suggested on the current drawing of the boat, shown below. (When viewed in person, the cabinside in this photo looks a LOT more like the drawing below—not so bright and generally more subdued.)
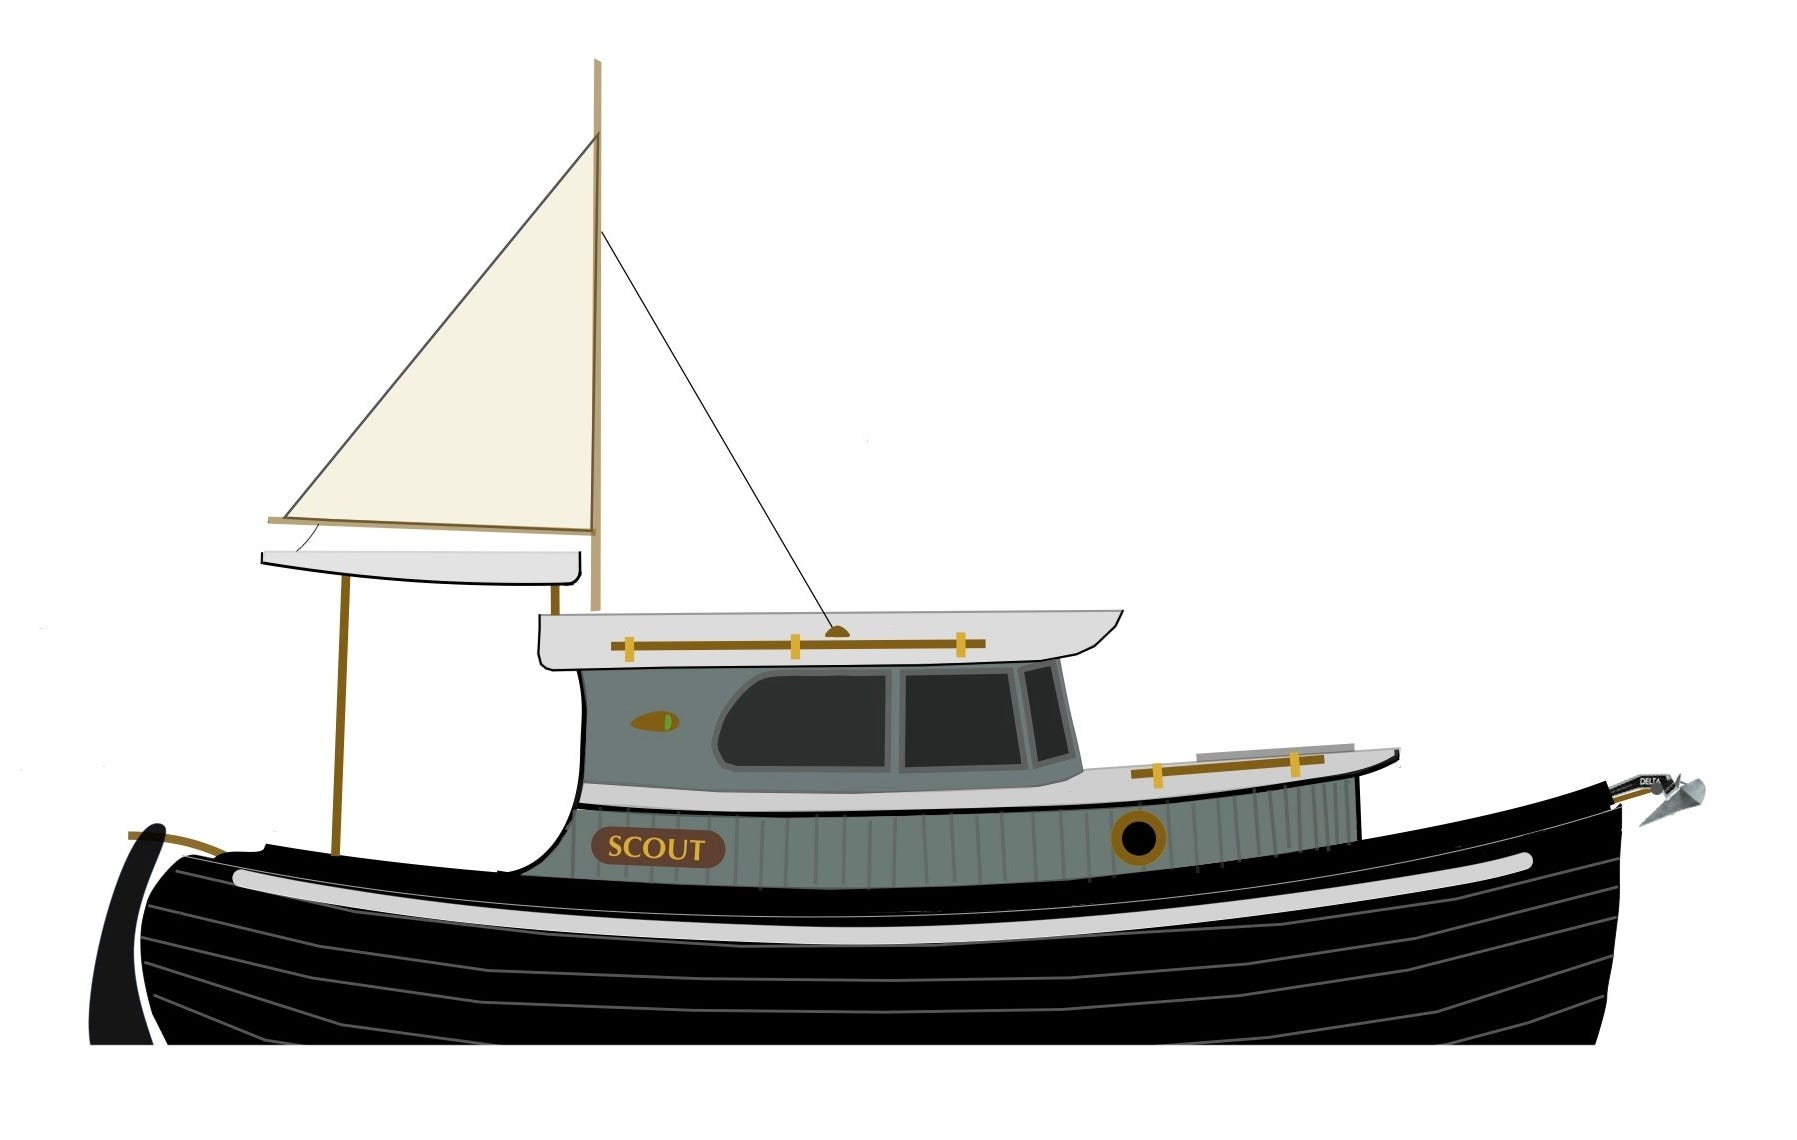
Above - In photos we’ve taken inside the shop, the color never looks like the drawing, as mentioned above. (Oh, well, it doesn’t matter because we remain unsettled on the whole subject. If readers have any creative recommendations, or like where we’re headed at the moment, please let us know in the Comments section below. Our goal is to come up with a top-to-bottom color scheme that has a salty workboat feel…reserved and businesslike, not too bright or “cute,” and definitely all in satin finishes.)
So that’s it for today. We’re relieved to have gotten past construction of the windshield frame with its compound curves and umpteen pieces, so in the next installment we’ll hopefully share completion of basic pilothouse construction, including the side-window panels and final shaping and attachment of the hardtop.
One final comment: We’re sometimes asked, in supportively hushed tones, if we still have the energy or enthusiasm needed to finish this build. It’s hard to tell if folks think we might croak trying, or if we maybe lack whatever it takes of get the job done. (Well, okay, here’s our answer: The deeper we stumble into geezerhood the slower we work through certain steps in the process but at age 83 we continue to roll out at 4 a.m. every day we work on SCOUT. We dearly love the creative challenge and we’ll greet all well-meaning questioners at the launch ramp next Spring, happily taking everyone for a ride. So yes, we’ll finish the build and then we’ll be off adventuring for as long as we can crawl aboard…and we’ll hope to share some cruising experiences right here.)
Thanks, as always, for reading! - Marty
Marty, you are an inspiration to this 80 yr. old. You help keep me on the water when it feels hard.
Marty. I look forward to every installment you share.
I have looked at your color scheme. Perhaps consider making the rub rail dark red—adding emphasis on the beautiful sheer line.