
Part 17: Building Our Trailerable Dreamboat
Back to Work, At Last! Next Stop, Months from Now—the Launch Ramp.
It’s Sunday morning, June 14, and I’m motivated.
Why? Because after a month away from our small-boat build—mainly preparing for and completing transfer of our 30-foot cabin cruiser to her new custodian—I’m finally at work on RAVEN’s smaller replacement, eager to stay focused until the little guy slides into the water.


Above - Our trailerable cruiser, 20’ on deck and about 23’ overall, alongside RAVEN, the 1930 John Alden-designed cruiser we restored earlier and lived aboard for almost three years. While it was hard to let RAVEN go, we’re clearly excited about her little replacement.
In my first few days back on the job I reached another one of those small, symbolic crossroads, building narrow pilothouse side decks that’ll hold up outer walls of the structure, along with the pilothouse roof.
So, in other words, a foundational, feel-good bit of work.
Here are a few photos of the process…
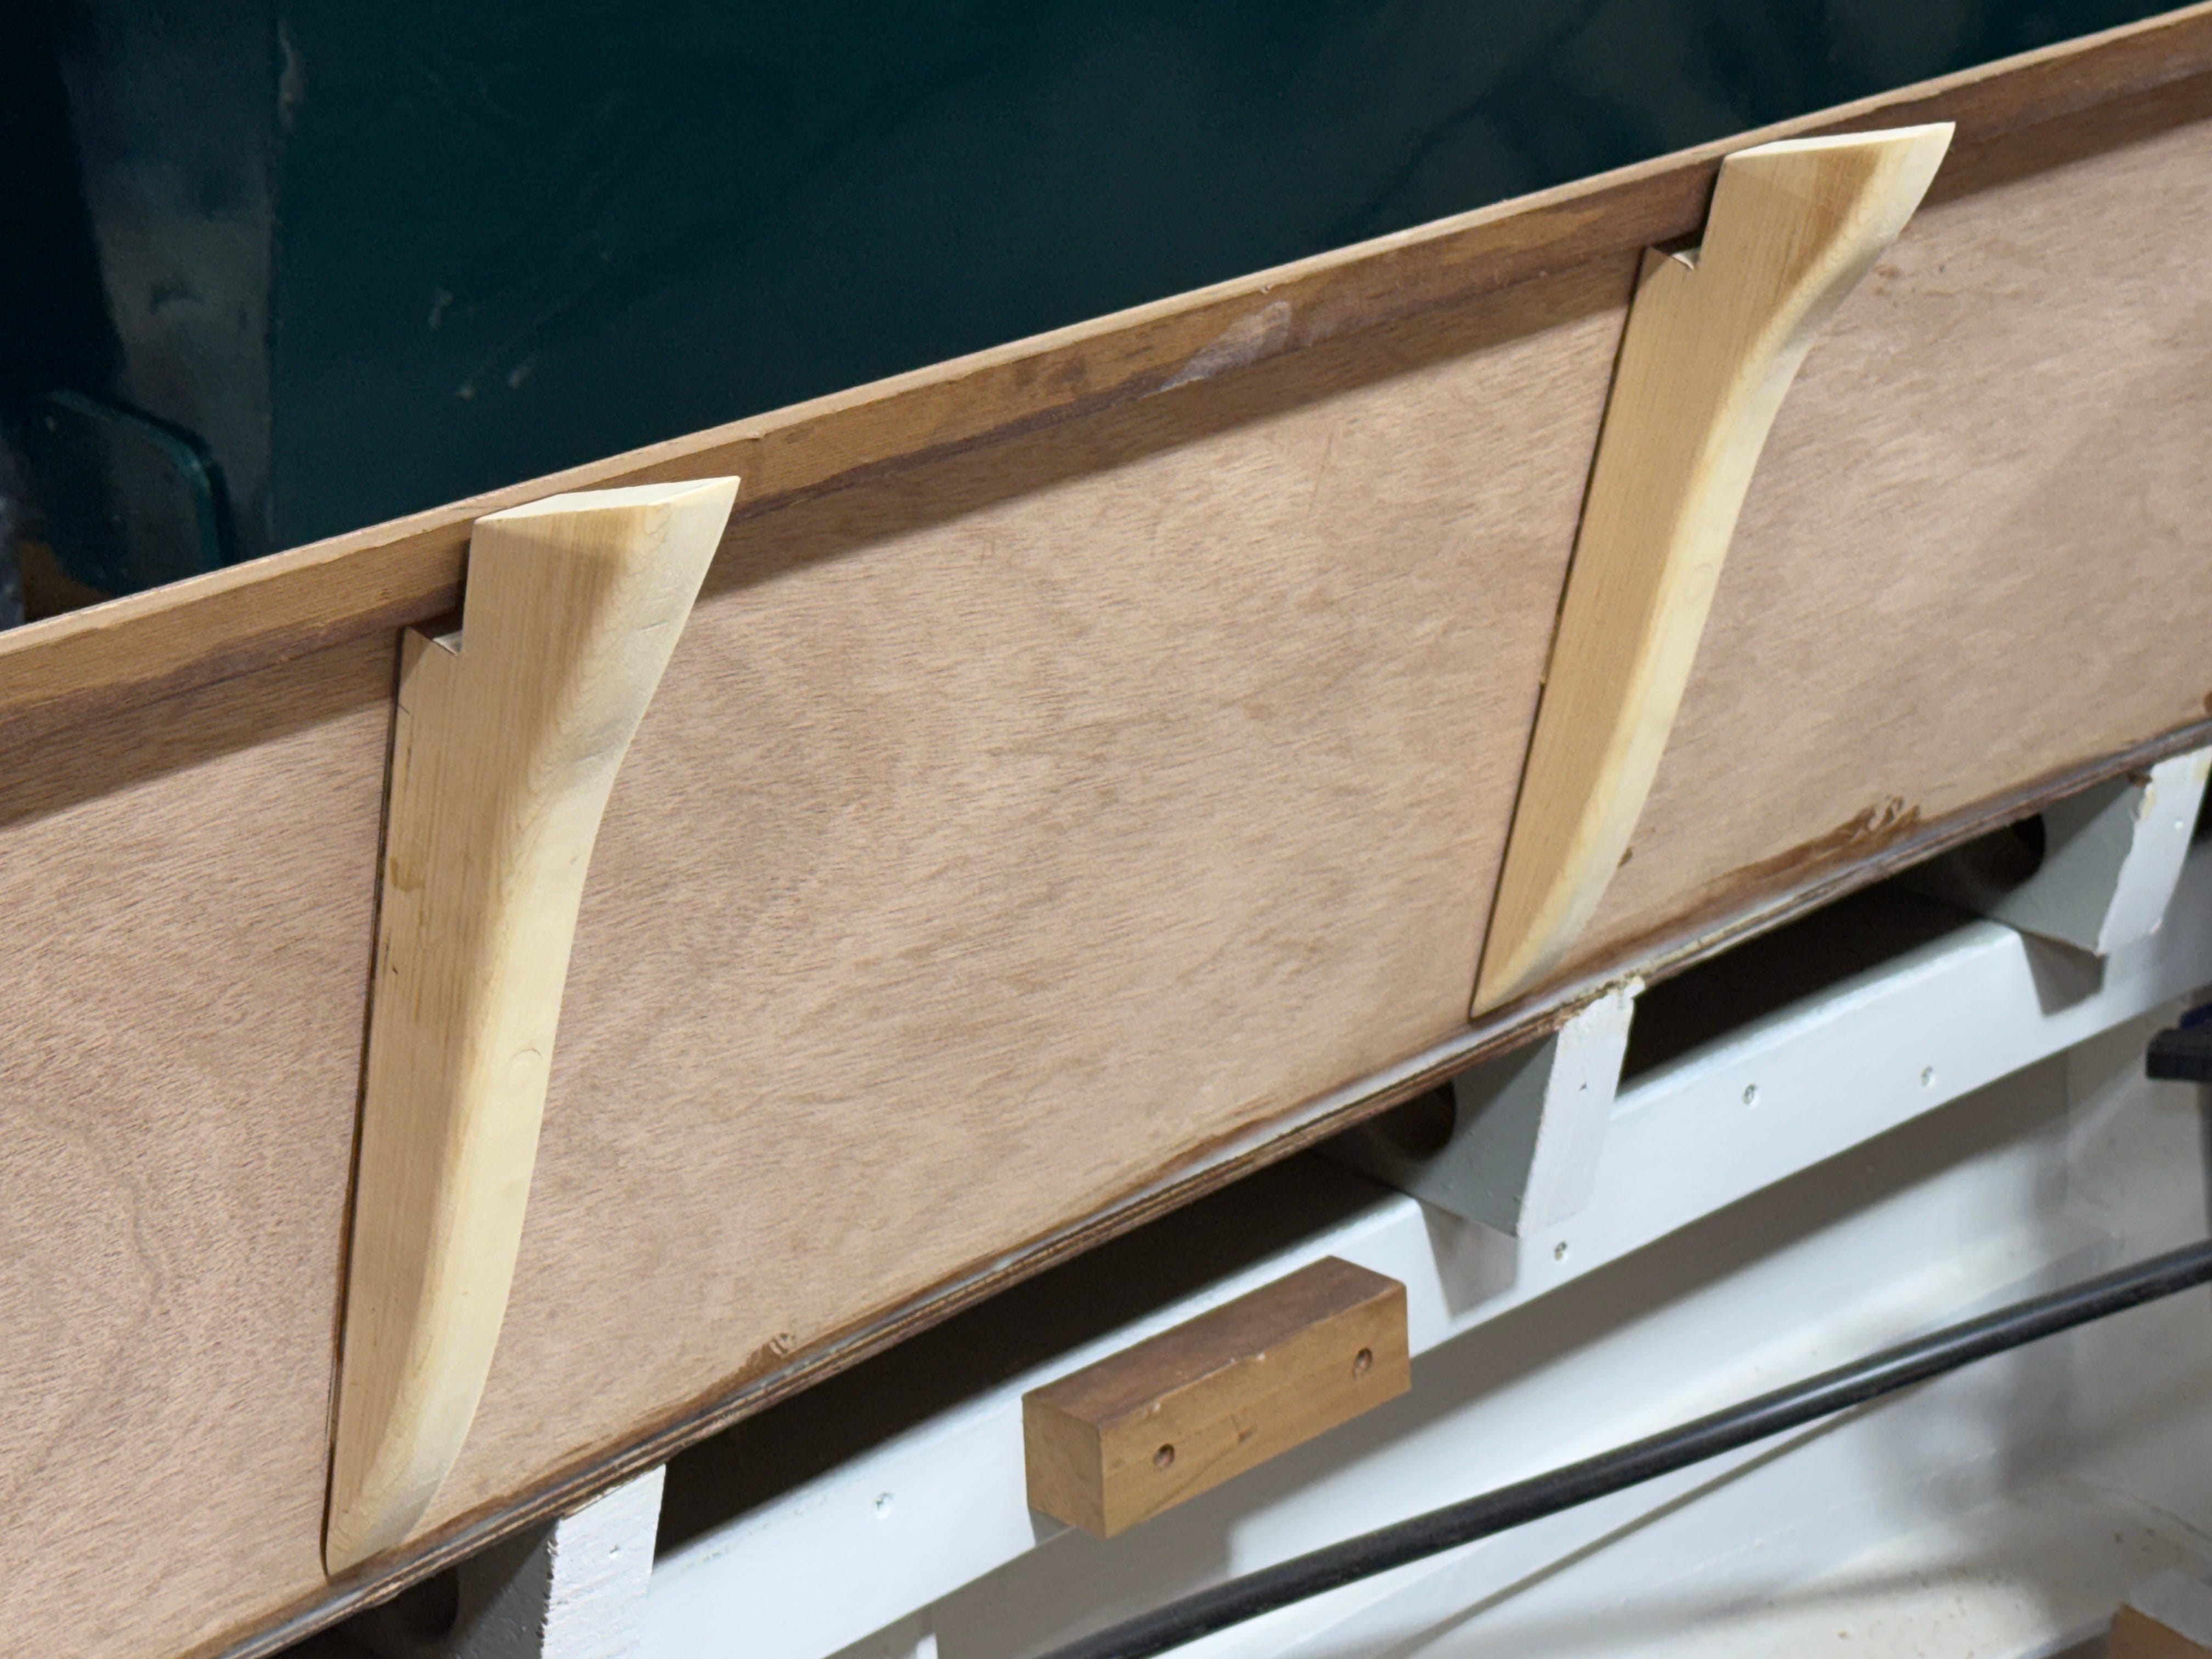
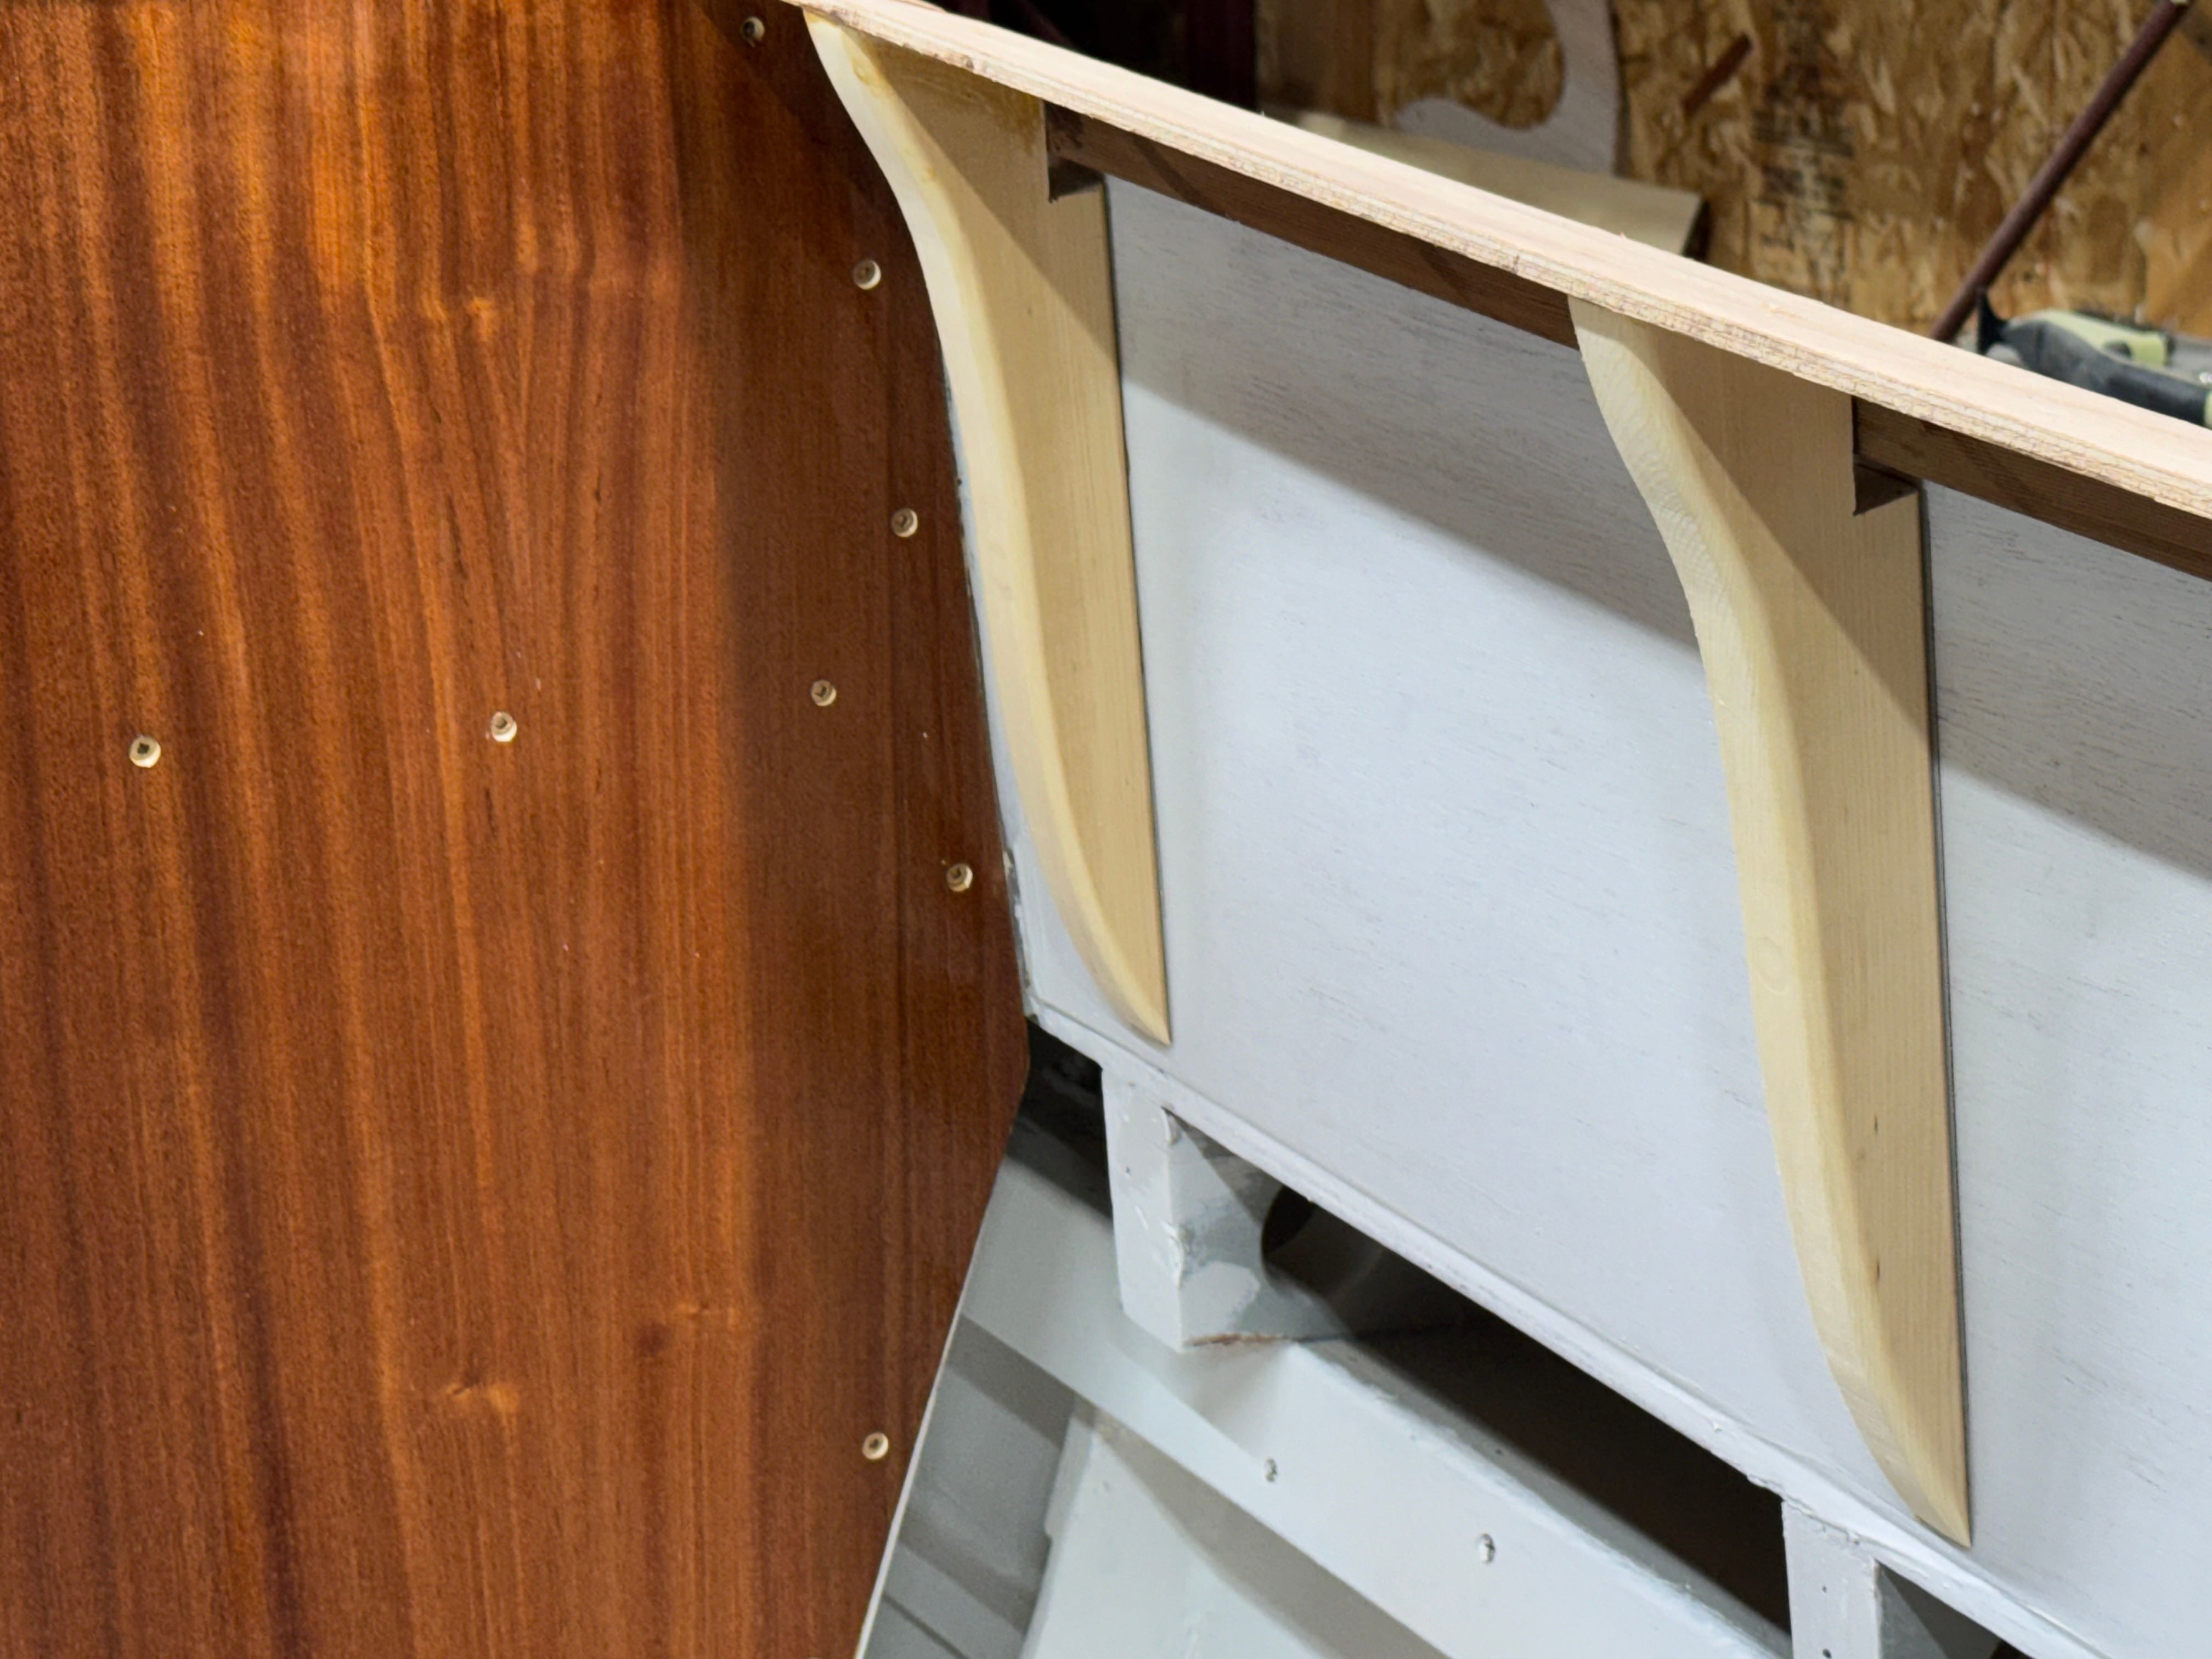
Above - The lower 6mm side walls of the pilothouse already existed, but they needed greater strength so I began by screwing and glueing a beveled length of red cedar along the upper edges, followed by five yellow cedar knees that would support the 4”-wide pilothouse side decks. (The knees were cut on the bandsaw, then bevel-edged on the router table before being screwed and glued to the side walls.)
Above - Another view of the knees and red cedar trim that helped stiffen the thin side walls. (Bevels of the side decks were identical to the forward cabintop’s outer edges, so that the narrow side decks will flow smoothly aft to the stern cockpit. Length of the pilothouse will be exactly 6 feet, bulkhead to bulkhead.)

Above - After making patterns for the 6mm side decks, using 2.5mm pattern stock and a hot-glue gun, I transferred the pattern and cut side decks on the bandsaw. (This was one of those “measure twice, cut once” situations.)
Above - The port side deck after being glued and screwed down, and before the outer edge was trimmed back to a one-inch overhang, like the forward cabintop. The inner edge needed only a slight bit of fairing and sanding.
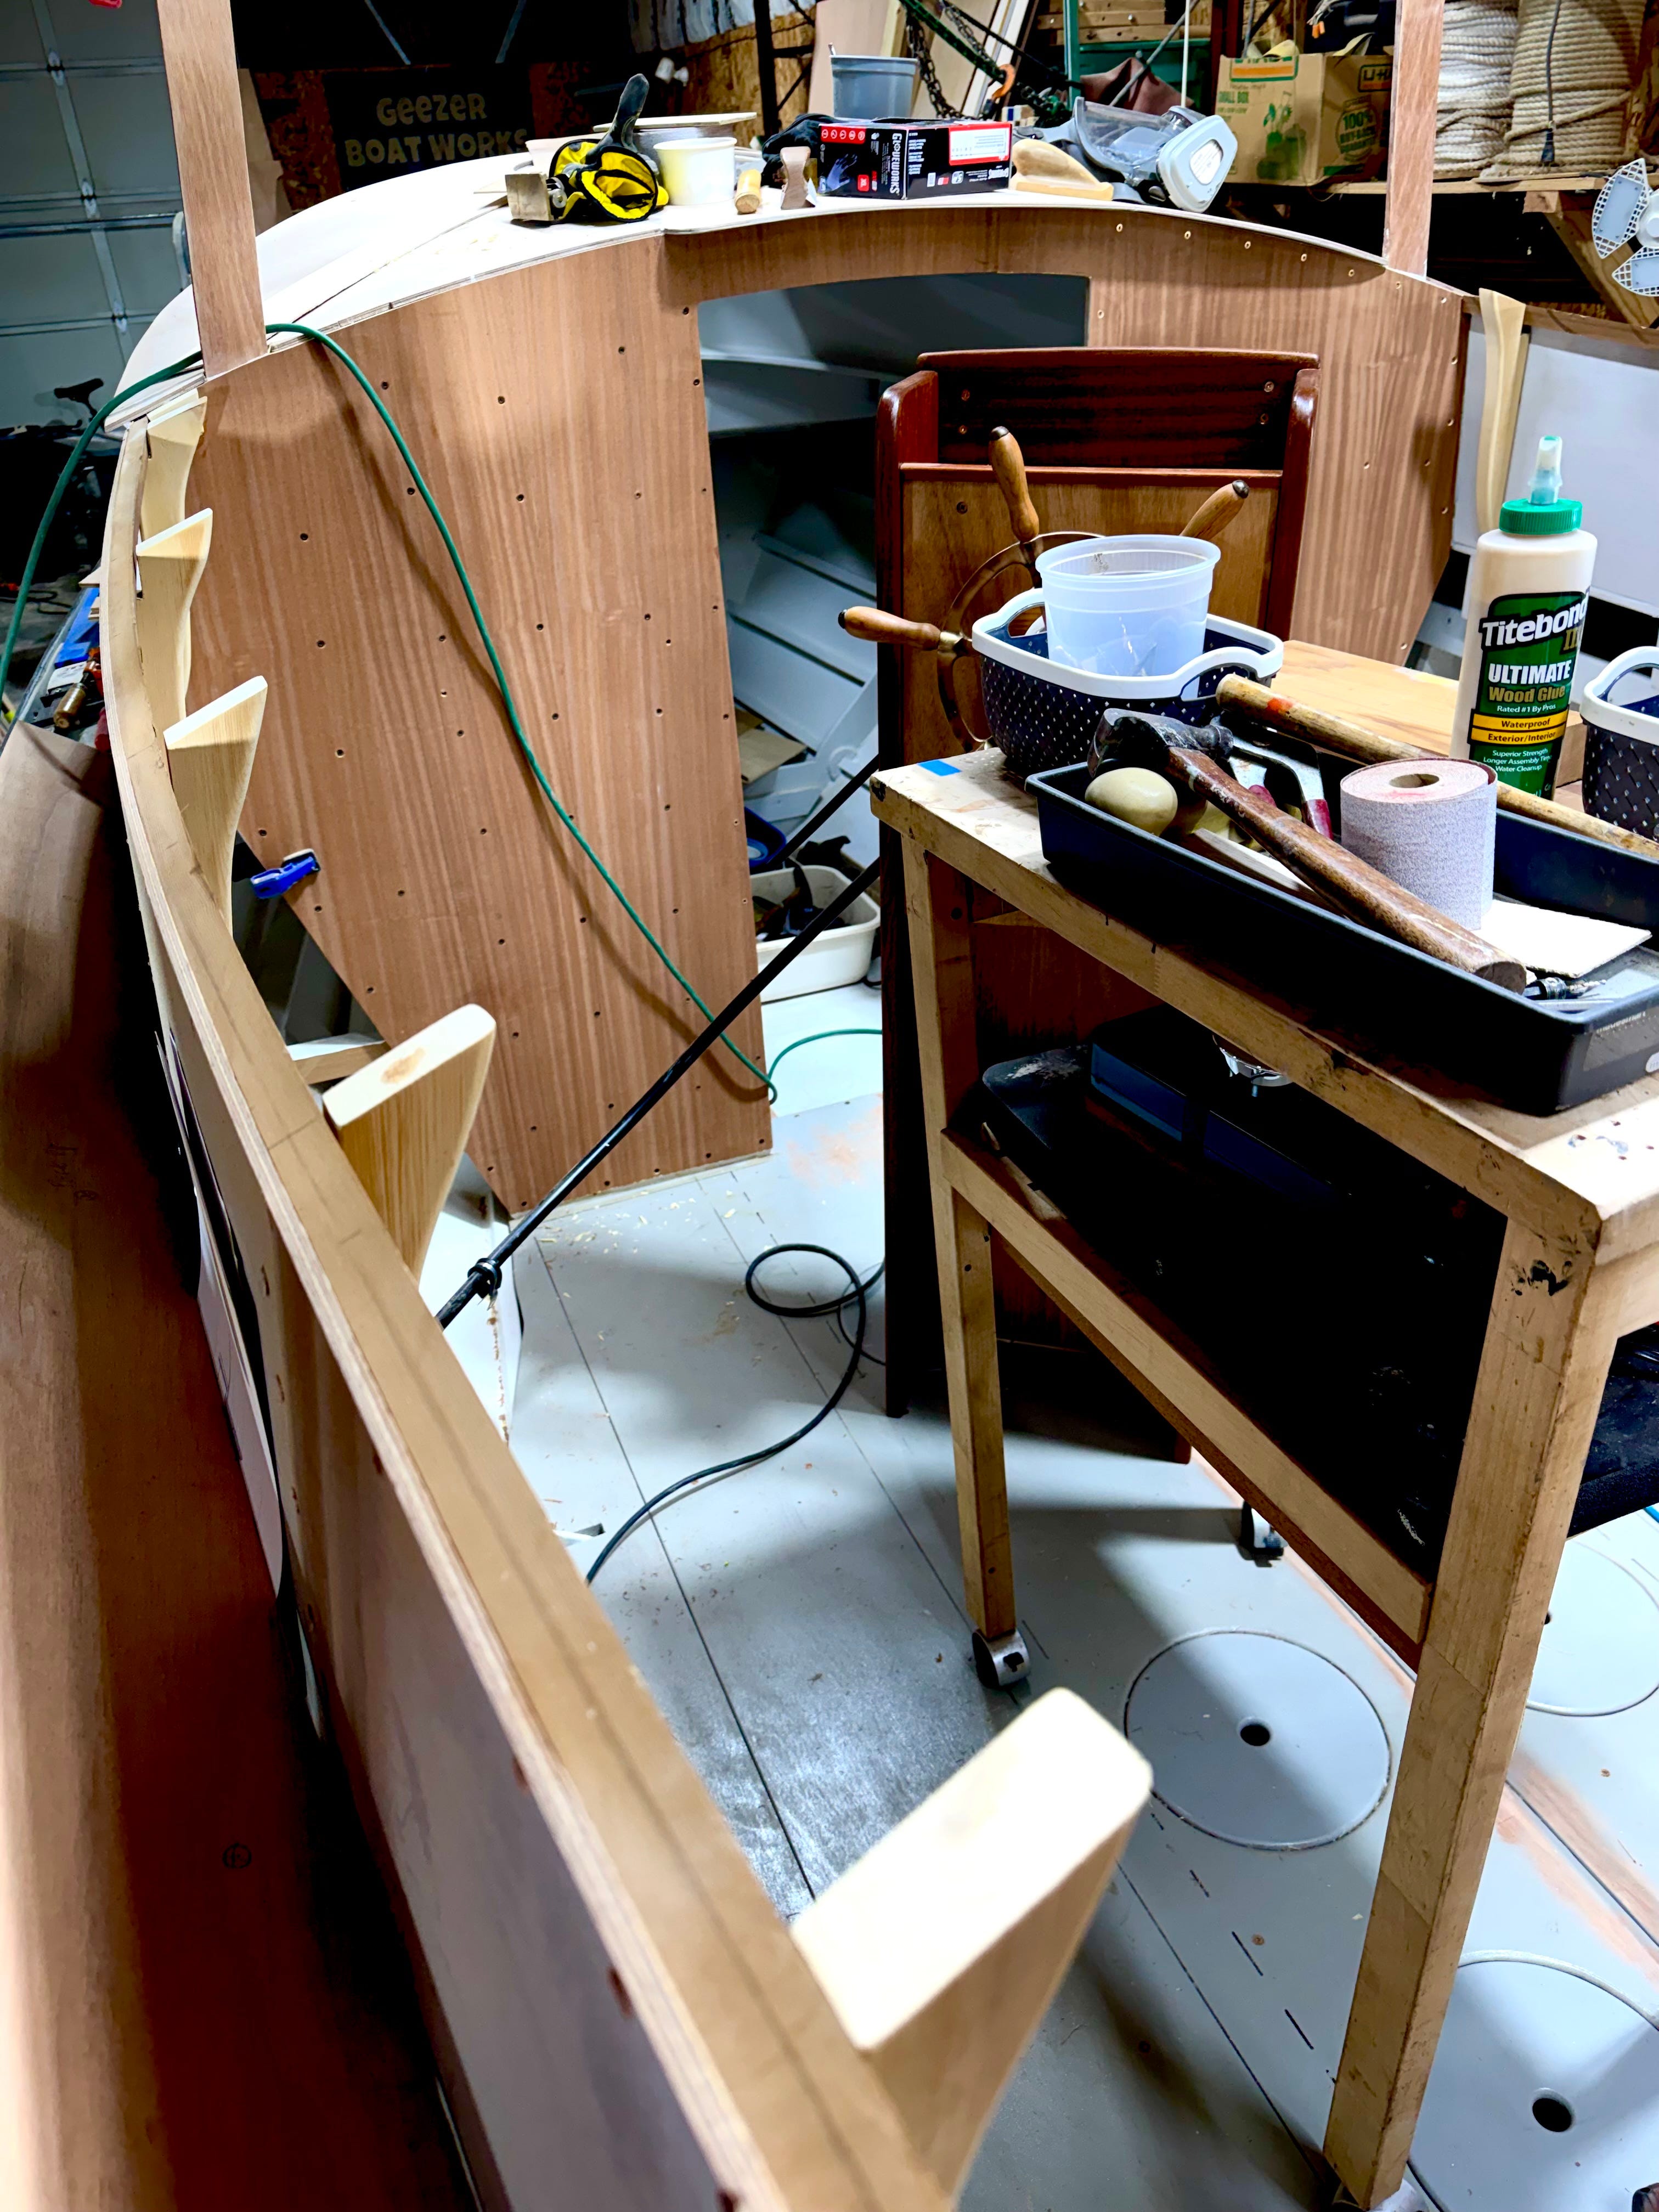
Above - Another view of knees supporting the starboard side decks, along with a first coat of Epifanes Matte varnish applied to the 6mm ribbon-grain covering panel decorating the forward pilothouse bulkhead. (This is the side that’ll host our dinette table and two upholstered seats…definitely just a table for two, since the tabletop will be only about 22” x 32”. The wood screws you see will be hidden behind a seat back and mahogany molding.)
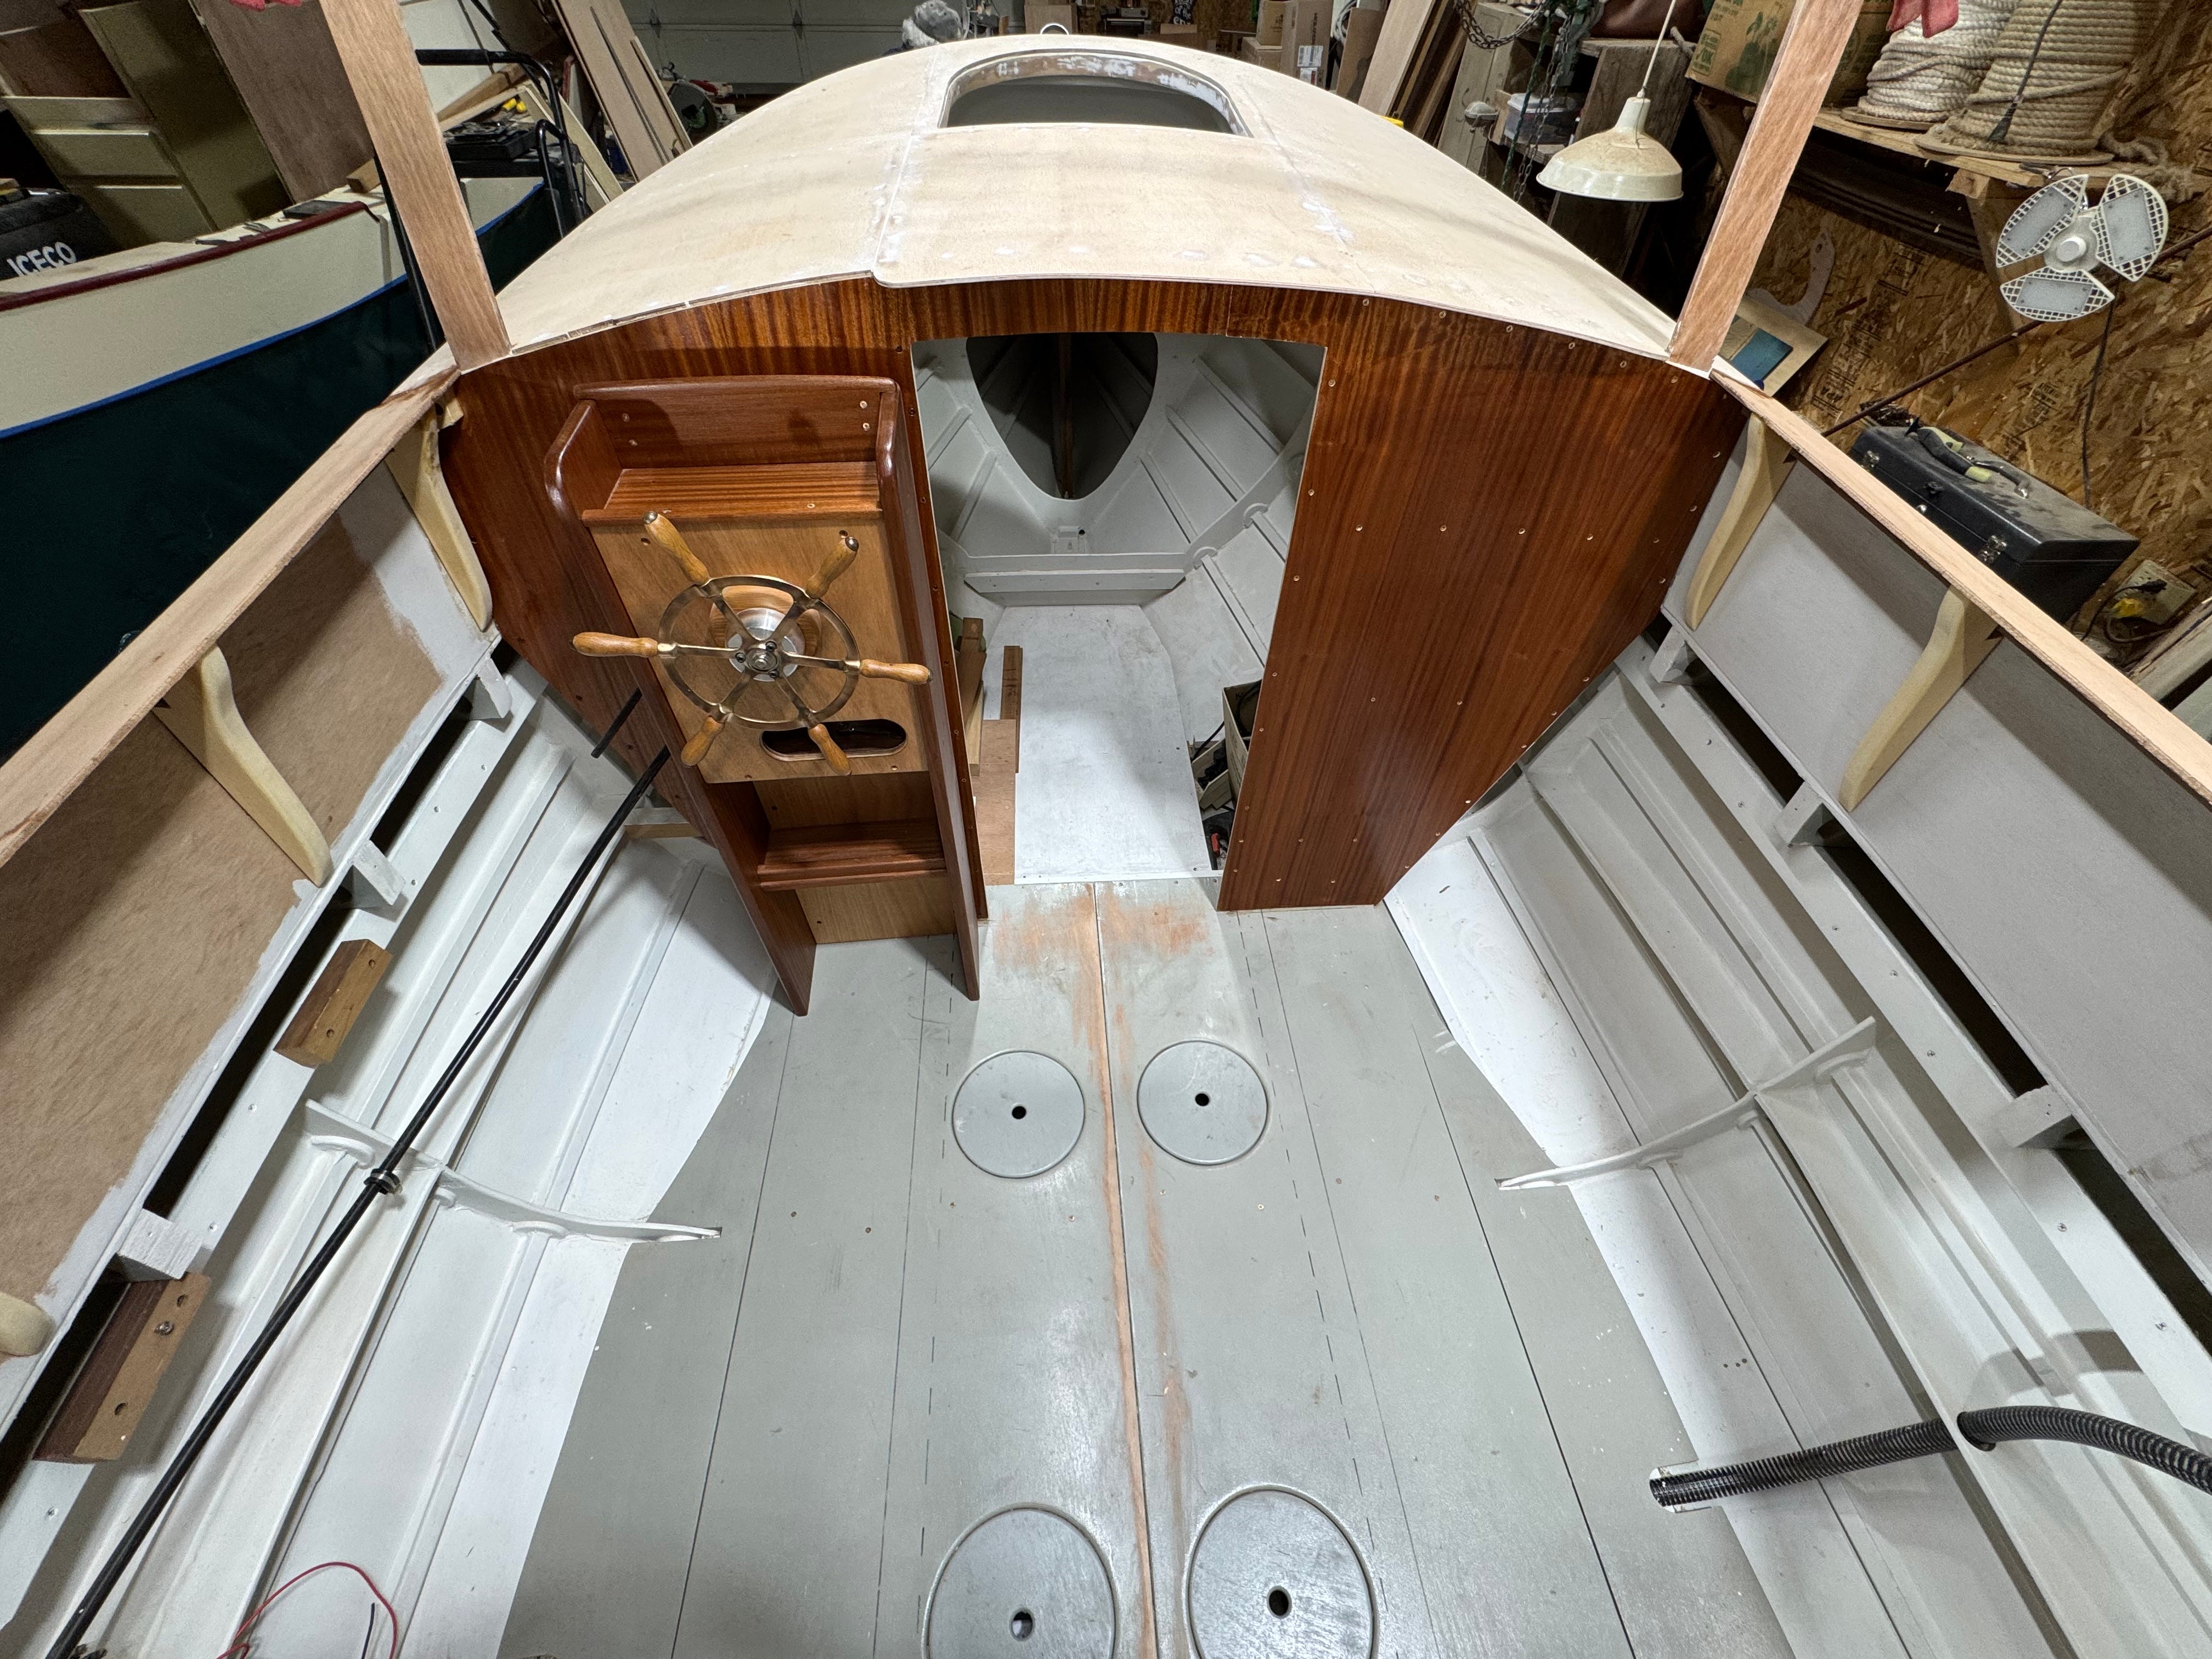
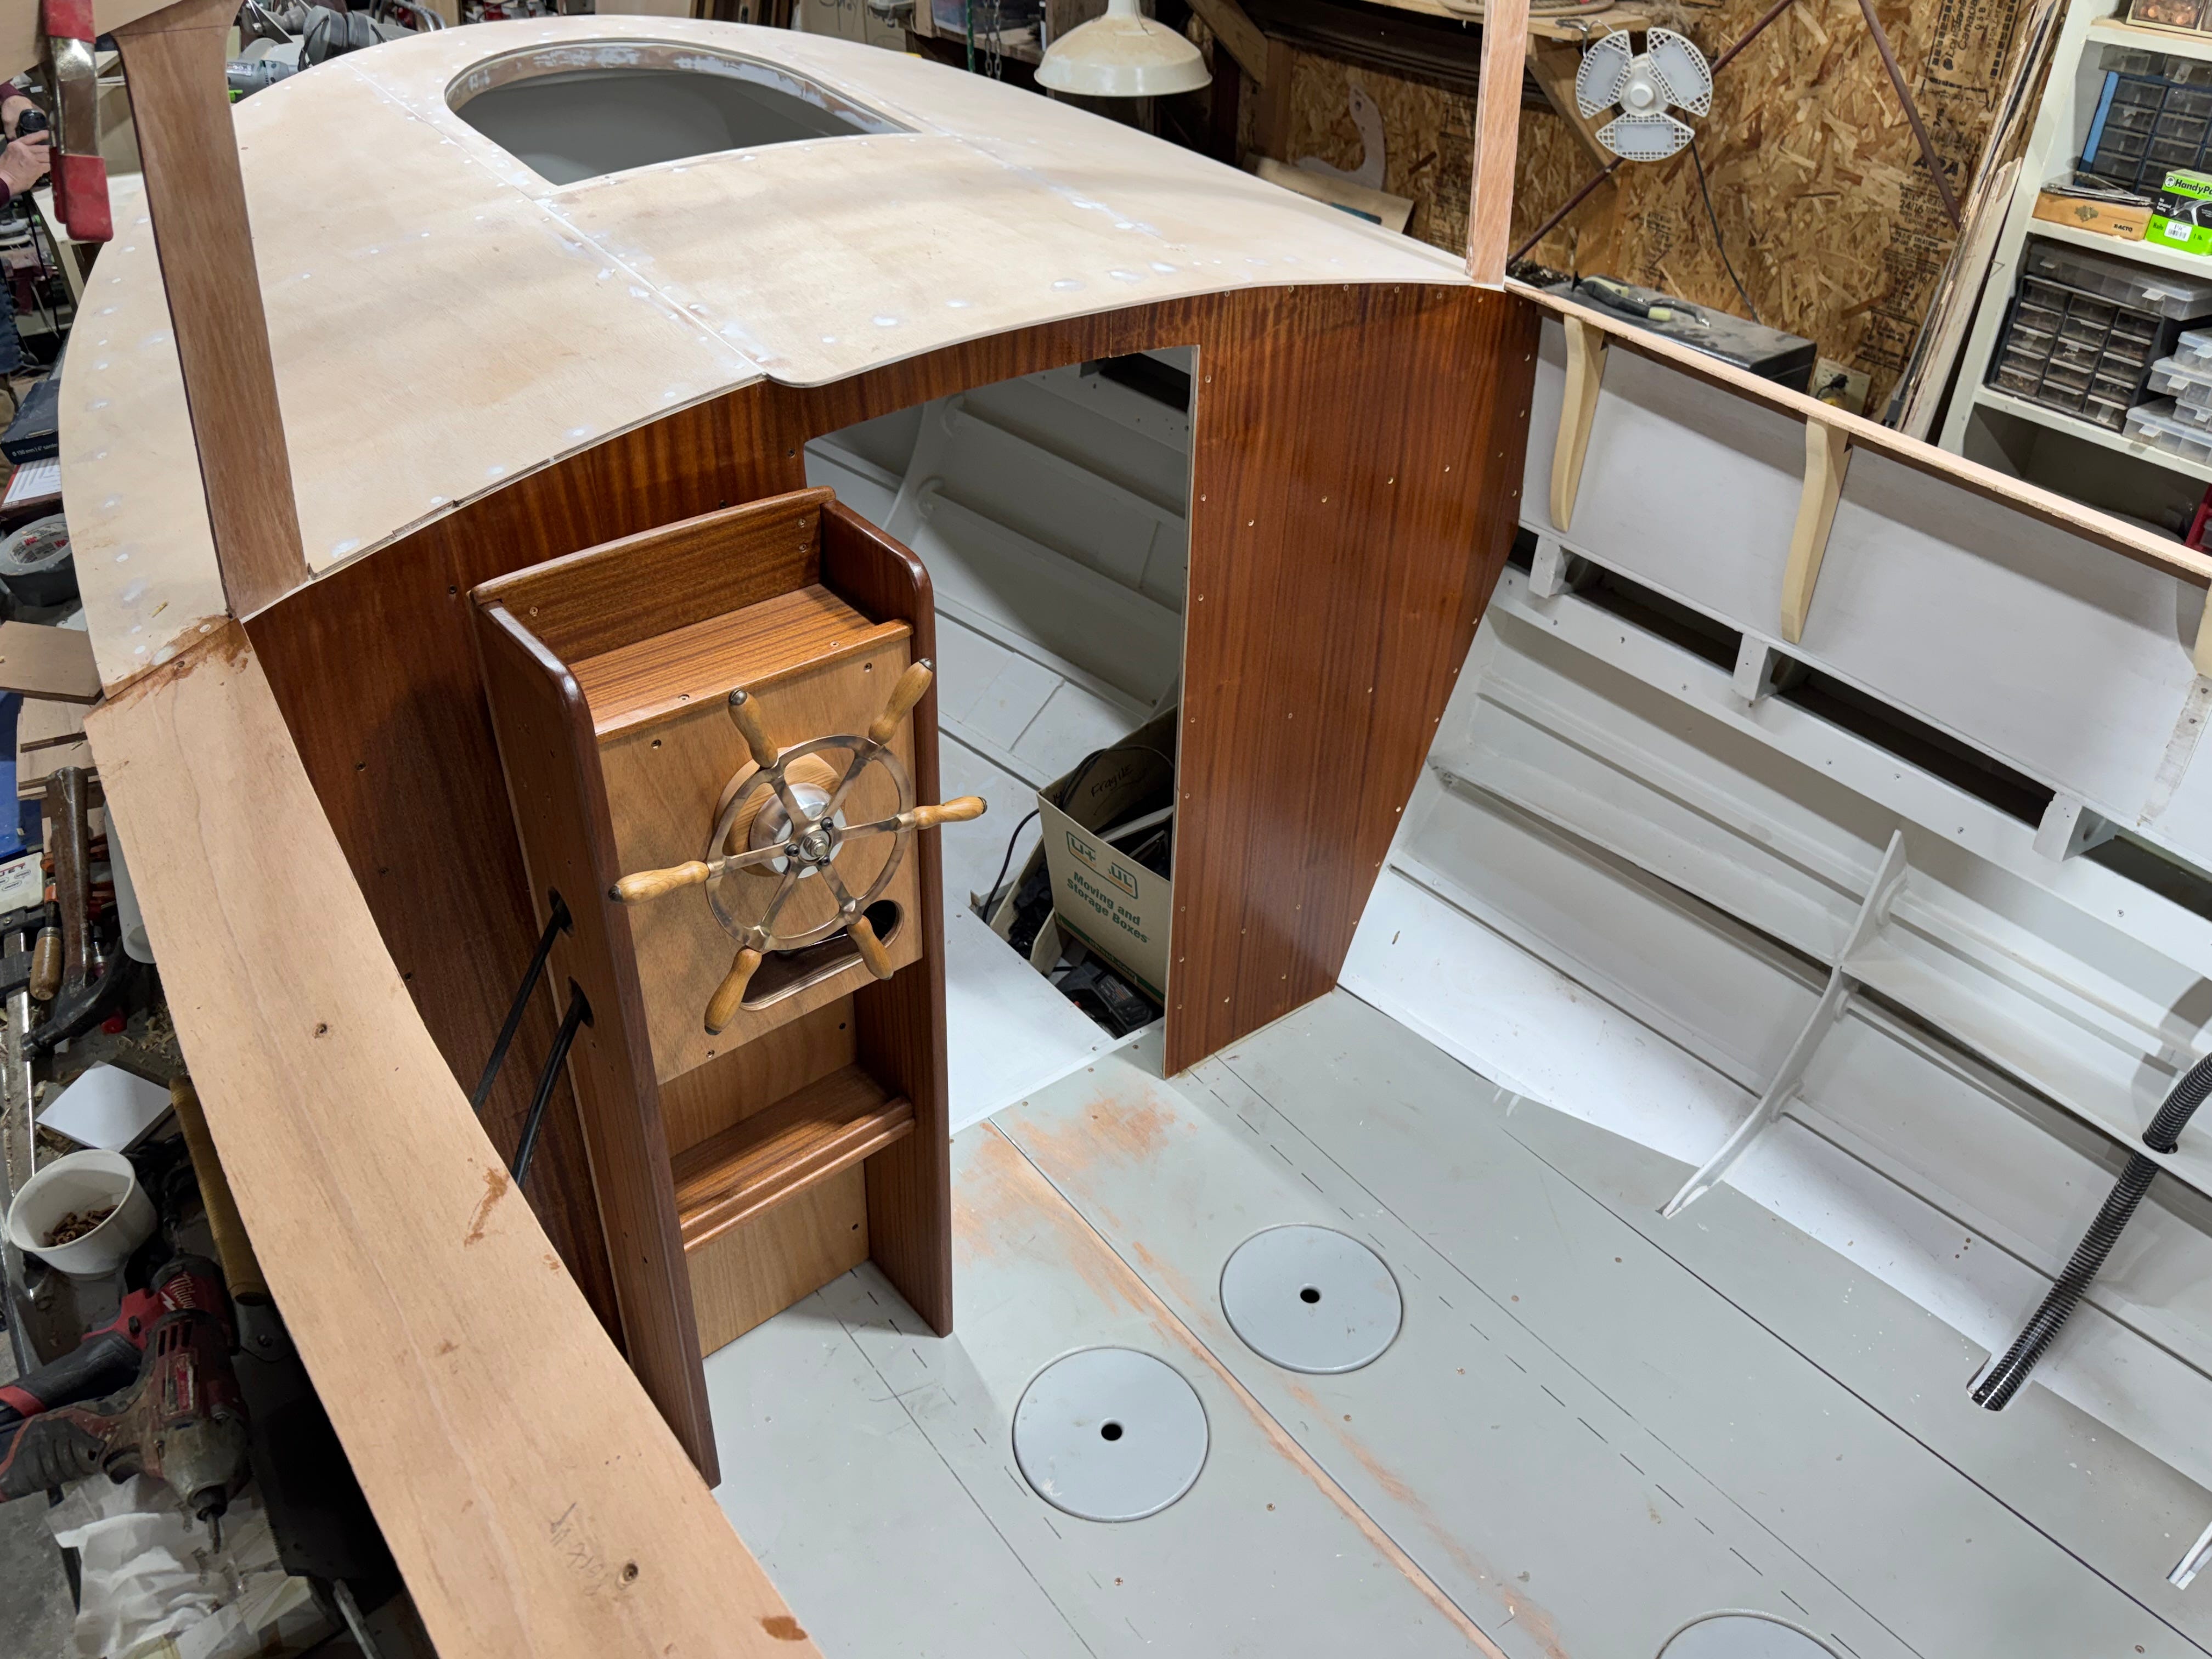
Above - Overview of the forward half of the pilothouse, with doorway leading into the berth. There will be a 24”-wide aisle down the center, outside of the round bilge hatches. To port will be a galley counter, and to starboard the dinette table with seating. (The two vertical posts you see are temporary, helping support the cambered pilothouse roof until the three-pane windshield frame is built atop the forward cabin. Once finished, the posts you see will be cut away and discarded.)
A Note About Our Boat’s Name…
For most installments in this series, our little cabin cruiser has carried the name TATOOSH, referring to the rocky island at the northwest tip of the Lower 48 states—for centuries a summer camp of the coastal Makah Tribe. We’d earlier considered naming the boat in honor of our wonderful boat kitty, Scout—a much-loved pal for 16 years. When we lost Scout to old age recently, the decision was made: The boat is SCOUT, for good.


That’s it for today—just a brief update as we regain momentum on SCOUT, our outboard cruiser project.
Thanks, as always, for reading! - Marty