


Budget Offshore Cruiser
by David Omick
About 25 years ago I expressed to Pearl a desire to someday sail to the South Pacific. When she asked why I wasn’t doing it then, I replied that it was something we could save for older age, embarking on more physically strenuous adventures while we were still young and able. About two years ago, as my 60th birthday approached, she commented “You know, if we’re ever going to take that trip, we’d better get started.”
Since we’ve always put a high value on freedom and on doing things rather than having things, the challenge of acquiring and outfitting a suitable boat was the first chapter in our adventure. Philosophically, we had little interest in the usual six-figure investment that a boat for such a voyage involves. In fact, our intention was to spend roughly an order of magnitude less. The costs of purchasing and outfitting a boat, in both money and time, increase rapidly as the size of the boat increases. We wanted a boat that could be purchased and outfitted over the course of months, rather than the years that are more typically required, which for us meant that we’d begin with a small boat.
Over the course of this past summer, we fully outfitted our venerable little craft and it now lies rigged and ready for the voyage. Our plan is to set sail in early February 2017. The first leg of our voyage, from Southern California to the Marquesas Islands in French Polynesia, will be the longest at around 3000 miles.
Much of our search for a small, blue-water capable boat was met with headwinds, largely because relatively few small boats are suitable for offshore sailing. On the way to finding our little vessel, we looked at more boats than we can remember.
What were we looking for? Basically, a boat that was affordable, seaworthy and had the carrying capacity for us and our stores for the longest leg of our planned voyage.


First, she had to be affordable. That meant she was probably going to be a used boat. It’s well known among experienced sailors that the most boat for the money is typically a used boat. Adding to the value, they often come equipped with ground tackle, sails and quite a bit of incidental gear that adds up quickly when trying to outfit a new boat.
We were open to either a monohull or a multihull, and having voyaged in a small multihull before, I knew the right design could be capable. Nonetheless, the pool of small multihulls fit for a long ocean voyage is quite limited. By far the best value is in a small, used monohull.
In the realm of small boats, there are some fine examples of offshore-worthy designs. Flicka, some of the Pacific Seacraft boats and others come to mind. Capable as these are though, they’re relatively expensive and thus weren’t of interest to us. We hoped to find a boat for under $5000, as we knew that outfitting her for offshore voyaging would require another $5000 or more.
Second, she had to be seaworthy. For us that meant she was strongly built, designed to keep out the sea, and self-righting in case of capsize. Those requirements narrowed the field of potential boats considerably. Many of the boats we looked at had hulls that flexed noticeably when we pressed on them, indicating that their strength for offshore sailing was marginal. Some had spindly, inadequately stayed rigs. Others had enormous cockpits or large cabin hatches, neither of which would dependably shrug off boarding waves. Many were too beamy or too shoal to be self righting.
Finally, she needed to have enough weight carrying capacity for the two of us, plus ground tackle and other equipment, and all the water and food needed for many weeks at sea. Water will be the heaviest item. We expect to carry three quarts of water per person per day. Since our longest leg will likely take four to six weeks, our water supply alone will come to nearly 600 pounds. Food will add another 200 pounds or more. Ground tackle, stove fuel and miscellaneous other equipment can easily add yet another several hundred pounds. Add our weight and the boat needs to be able to carry upwards of 1500 pounds without becoming over burdened.
The more boats we looked at the clearer it became that some of the sturdily built fiberglass boats from the 1970s, such as those by Pearson, Bristol, Westerly, Cape Dory, etc. offered the best combination of the characteristics we desired. It also became clear that flexible thinking was required to work around some of the less-than-ideal design or construction characteristics of even these boats.
The more boats we looked at the clearer it became that some of the sturdily built fiberglass boats from the 1970s, such as those by Pearson, Bristol, Westerly, Cape Dory, etc. offered the best combination of the characteristics we desired.
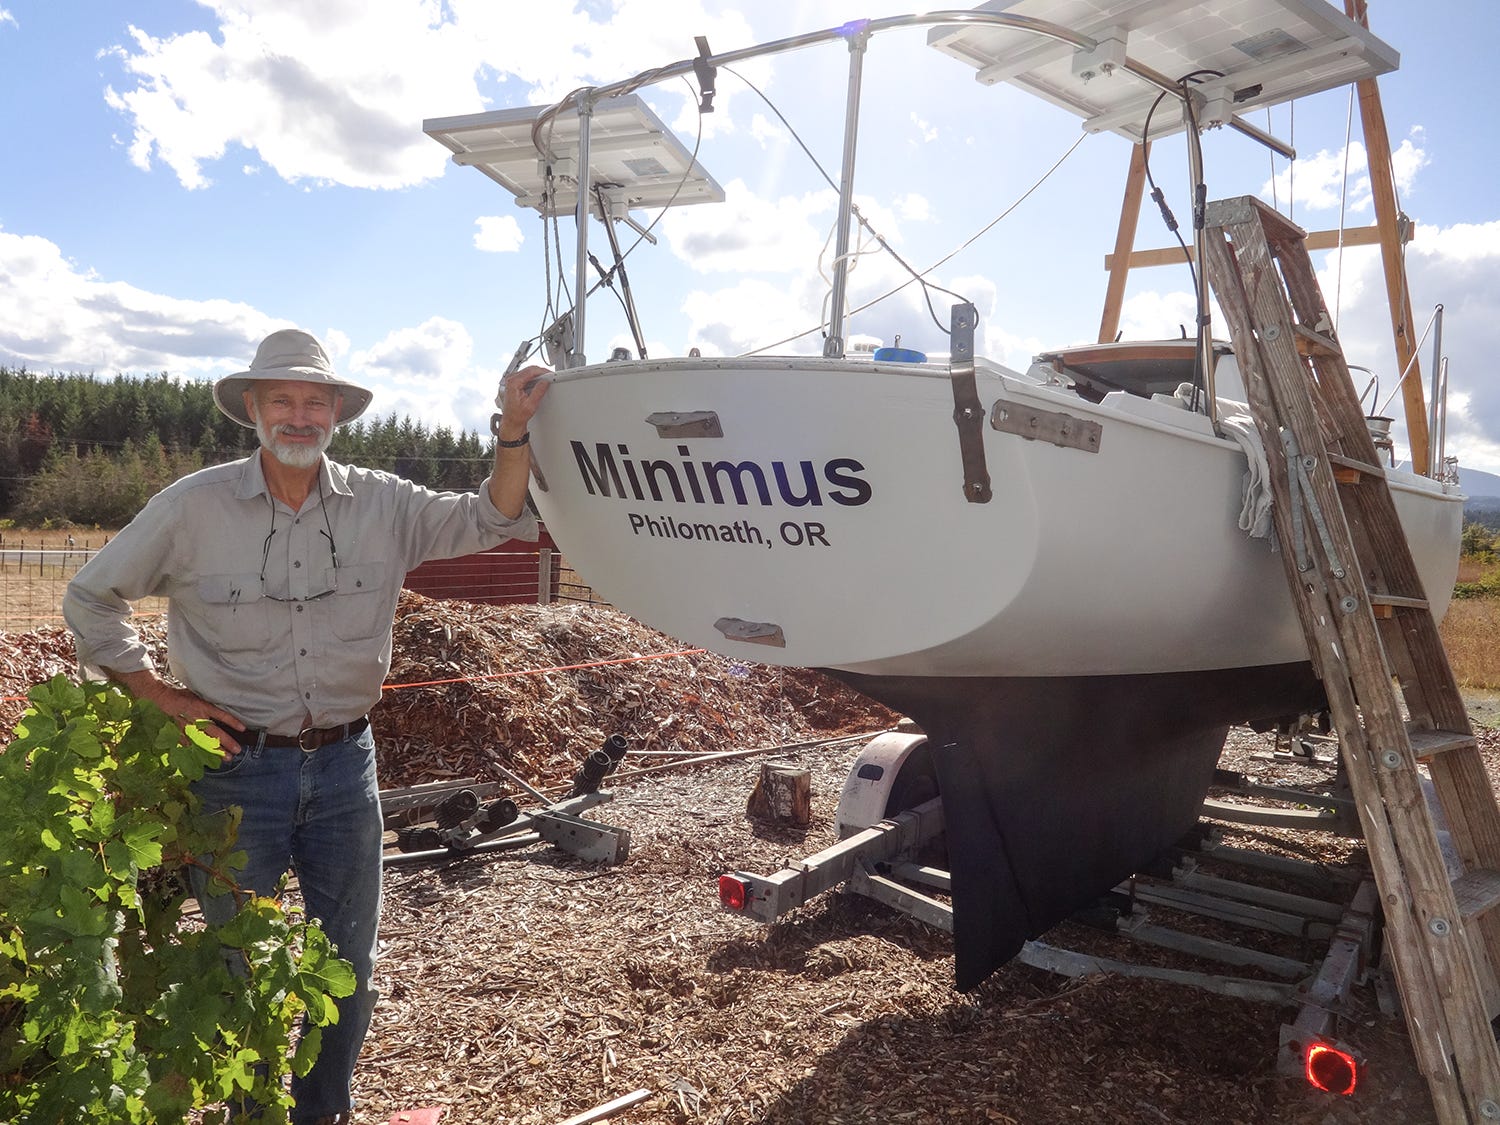
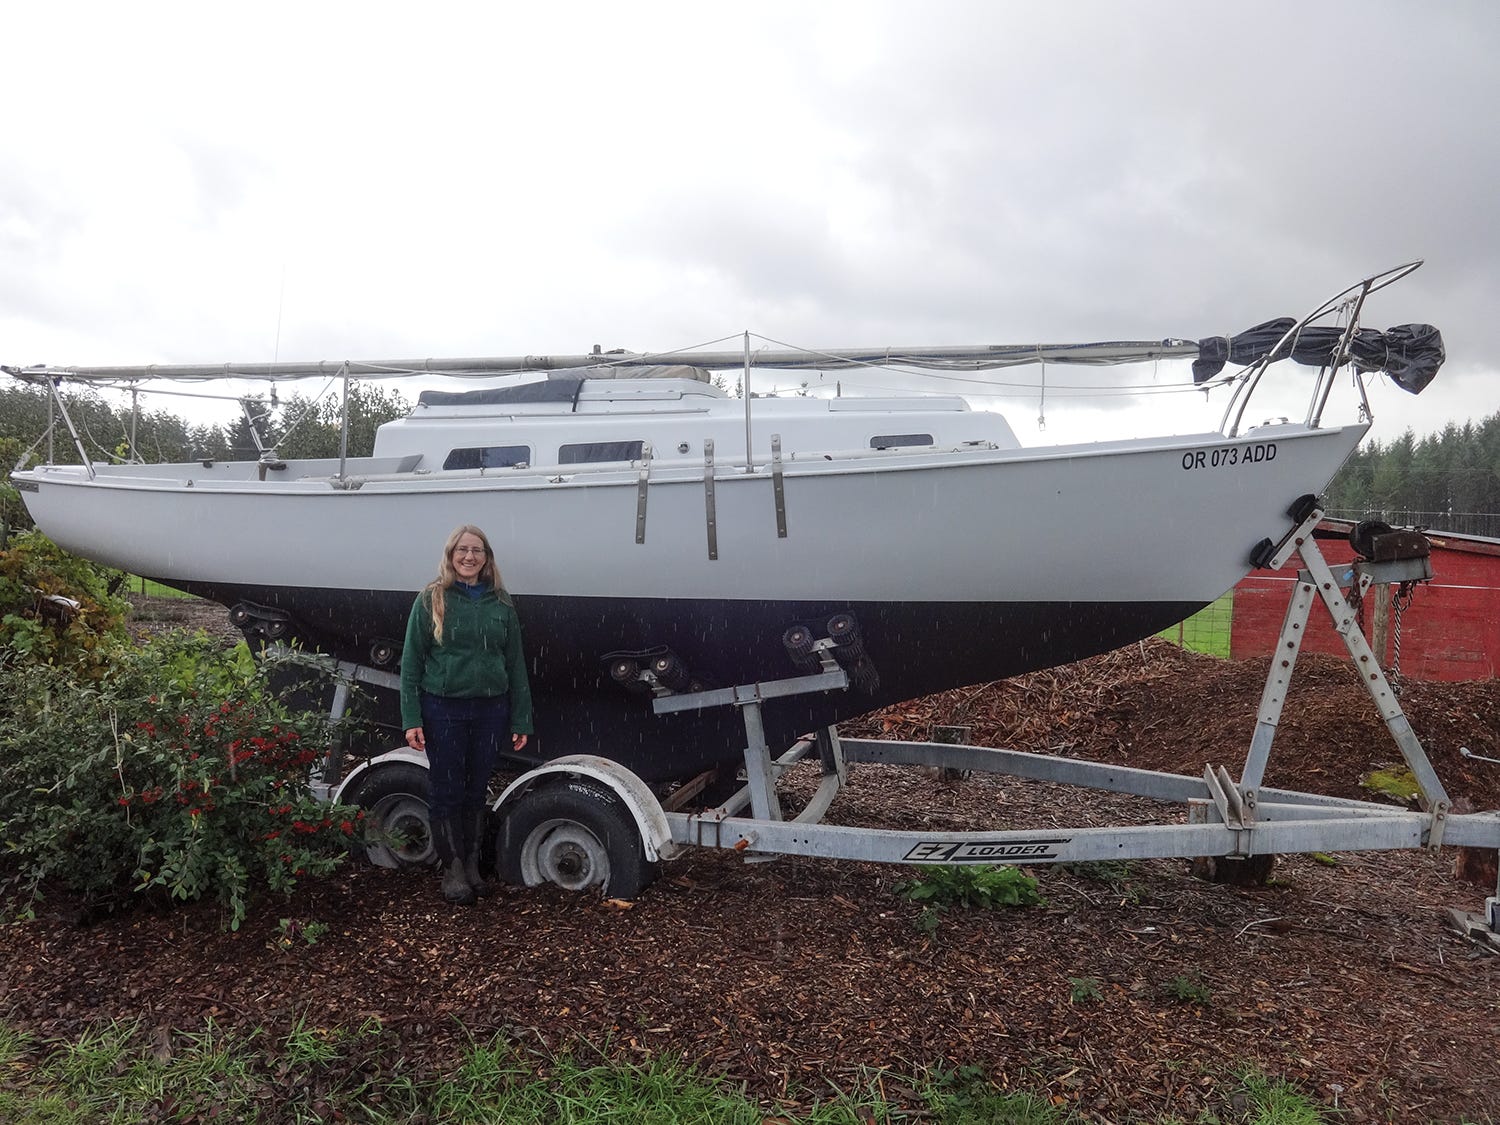
One day, as we perused the extensive collection of trailerable sailboats at Skookum Marine in landlocked Eugene, Oregon, I spied a beleaguered Cape Dory 25 and knew that we were finally getting close to what we were looking for. Where Pearl saw a moldy, neglected mess, I saw a diamond in the rough. My impression was confirmed over the course of several hours, as we went over her with a fine-tooth comb. Happily, it revealed that despite her looks, she was basically sound.
Among her appealing attributes were strong construction to take the relentless stress of offshore voyaging, a relatively narrow beam and high ballast ratio to ensure self-righting, a long keel for good tracking, internal lead ballast to eliminate concerns about the integrity of keel bolts, and a well-protected keel-hung rudder.
She wasn’t ideal in every respect, but we’d looked at enough boats to know that insisting on the ideal boat was an exercise in frustration, and probably a contradiction in terms as well. We knew that our time and money were better spent finding a boat with the major characteristics we wanted and then modifying the less-important ones that weren’t.
By way of example, I prefer an outboard rudder, as it’s easier to repair, and a low volume cockpit as it’s more seaworthy. Our Cape Dory has both an inboard rudder and a large cockpit. We solved the rudder issue by incorporating an auxiliary rudder into the self steering system and the cockpit issue by reducing its volume.
Following our second multi-hour survey we made an offer. It was accepted and we were soon trailering home our new $2500 boat. If the price sounds like we’re missing a decimal point, we saw online ads for nearly a dozen other Cape Dory 25s around the country, all for under $6000, depending on condition and equipment.
Over the winter we worked on several projects in our spare time, including re-cutting some of the sails, sewing a series drogue, splicing a new set of standing rigging and fabricating new chain plates.
The real work though waited for the following summer. It’s the nature of boat work that it usually takes longer to do than one expects. That’s where we really appreciated another of the many virtues of a small boat. Despite Pearl working full time as a nurse and I working part time elsewhere, we were still able to transform Minimus into an ocean-worthy voyaging boat over the course of several months.
That’s not to say that we didn’t work hard and put in some long days, just that our blue-water boat took only months to create, not the years so often required for outfitting a large boat.
The long list of tasks began with stripping every fitting off the deck and cockpit, including toe rails and port lights. One of our main concerns was to confirm that the balsa core deck was sound, so we drilled more than a dozen small test holes in various parts of the deck and cockpit floor. Every hole confirmed our initial tests that the balsa core deck was sound. That was a major relief, as replacing deck core isn’t a fun job.
That was followed by sanding the deck, cockpit and cabin top. As is so often the case in older fiberglass boats, there were a number of gelcoat cracks in the deck. These were cosmetic rather than structural, but we wanted to ensure that water didn’t eventually get into the balsa core. Rather than patch them individually, we added a layer of fiberglass cloth in epoxy resin to the deck from cockpit to bow, which also added strength to the deck. We then rolled on three coats of good quality semi-gloss acrylic latex paint. Using latex paint was just one of the many unorthodox methods we used in the outfitting process. Latex is considerably less expensive than marine paint and much quicker and easier to apply.

To give better traction, we sprinkled sand on virtually every horizontal surface before the first coat dried. Two more coats completed the non-skid surface. After a summer’s worth of traffic, the non-skid deck still looks like new.
We also built new and larger toe rails to give more secure footing. Instead of the original screws, we bolted them through the hull-to-deck joint, further strengthening that critical area.
Every deck fitting, including the port lights, was re-bedded with butyl tape, which is wonderfully easy to use compared to the mess of caulk in tubes. Every fitting was tested a few months later when a record rainfall dumped more than 8 inches in a week. Not a drop came below.
The cabin interior came next, beginning with the removal of nearly everything, including the main bulkhead. That was followed by the usual sanding and painting, once again using acrylic latex paint.
Except for the navigation lights, we also gutted the entire electrical system. The breaker and switch panel was located, as is so often the case, right beside the companionway. In my experience it’s an illogical placement that guarantees a saltwater bath from time to time, so we relocated it to the driest part of the boat, at the forward end of the cabin. A couple of 50 watt solar panels, a small charge controller, inverter and deep cycle battery completed the electrical system.
The main bulkhead was strengthened and redesigned to carry the compression load from the mast down to the bottom of the hull. It’s now much stronger than the original.
Cape Dory had an unfortunate practice of fastening all the U-bolt shroud and stay anchors to reinforcing plates made of mild steel. Those of course had rusted to oblivion in the 44 years since she was built. Clearly, that was not acceptable in an offshore boat, so we fabricated and installed all new exterior stainless steel chain plates through-bolted to epoxy coated plywood backing plates on the inside of the hull.
To address the too-large cockpit, which would take on a dangerous weight of water should it be filled by a wave during heavy weather, we installed a bridge deck and a raised cockpit floor with storage under. Securing buoyant gear in this space significantly reduces the cockpit volume. The raised cockpit floor can be easily removed while in port.

The cockpit drain holes were also far too small to effectively drain a cockpit full of water. We fixed that by adding a one-way flapper door in the opening between the footwell and the lazarette, allowing water in the cockpit to rapidly drain into the lazarette and out through what had been the outboard motor well.
The original washboards were replaced with a permanently mounted board that will help to keep water out of the cabin even if the cockpit is filled by a wave. A single washboard can be strapped tightly into place above it to securely close the companionway.
Turning our attention below the waterline, the rudder had quite a bit of play. This was partly due to a rudder post that had corroded badly, as stainless steel is prone to do when underwater for long periods. Stainless steel was still the most practical metal to replace it, but we coated the new post with epoxy and added a sacrificial zinc, so we hope it will last at least as long as the original.
Hull work came next, with the removal of countless layers of old bottom paint topping the list of odious jobs, as it always does. We soon settled on citrus-based paint remover from the local hardware store, applying it thickly, then covering it with thin plastic sheeting. Six to eight hours later, it was relatively easy to scrape off. It was a slow, messy process, but way better than sanding in a cloud of toxic bottom paint dust. Odious as the process was, we were once again grateful to have a small boat that required far less time than a large boat would have.
Since the old waterline had mostly disappeared, we leveled long boards perpendicular to the bow and stern, then used a string to mark a new waterline. Below the line we applied three coats of ablative bottom paint and on the topsides we rolled on two coats of semi-gloss latex paint. That will probably be the big test of the acrylic latex paint, as water will be splashing over it for many months.
Minimus still carried her original standing rigging, so we replaced it with all new stainless steel wire rope one size larger than the original. We hand-spliced the ends of each shroud and stay using Flemish eye splices and also fabricated all new stainless steel mast tangs and deadeyes. The shrouds and stays will be tensioned using Dyneema lanyards. Not only is the rig now much stronger, but it cost significantly less than any other way we could have done it.
My long ago experience as a sailmaker came in handy as we turned to sail and canvas work. Five sails came with the boat, a main and four headsails, varying from fair to good condition. We installed three sets of reef points on the mainsail and triple stitched every seam.
Although it’s often thought that sails must be in top condition for voyaging, my experience doesn’t bear that out. As long as the fabric is sound and not sun rotted, it’s amazing how much wear can be had from older sails. Since we anticipate mostly sailing off the wind, even the shape isn’t too critical.
The basic boat work done, we turned to a long list of less critical but still important projects.
A counter and stove were added to the cabin to form a galley. We deliberated at length about what type of stove would be best suited to our situation, then went with a very unconventional choice. We decided on a multi-fuel backpacking stove because it could burn a wide variety of liquid fuels including kerosene, diesel, gasoline and more. That will help to ensure that we can find fuel no matter where we are. The ability to burn relatively safe, non-volatile fuels like kerosene or diesel was a major plus.
We didn’t have room for a gimbaled stove, so secured it firmly to the countertop and added three adjustable pot restrainers to hold cooking vessels securely in place regardless of how far the boat heels.

Although we plan to avoid cyclone season in the South Pacific, I know from past experience that heavy weather preparations are best done before venturing offshore, rather than jury-rigging them during the event. Toward that end, as we equipped the cabin we periodically imagined the boat upside down as it would be in a capsize. That exercise encouraged us to securely strap down everything of any significant weight.
Also with an eye toward storm management at sea, we constructed a series drogue. Heaving-to and other heavy weather tactics are fine up to a point, but once that point has passed, the series drogue has a proven record as the go-to technique for small boats. A typical Jordan series drogue consists of a hundred or more small cones attached to a long line deployed from the stern of the boat.
As with so many of our preparations, we wanted to push the envelope of accepted practice. Sewing the seemingly endless number of cones is a notoriously mind-numbing task, so we engineered an easier-to-construct drogue with far fewer, but much stronger, cones. We look forward to deploying it in practice, but hope we’ll never need it for real.
In more typical sailing conditions, the prospect of steering for weeks on end encouraged us to explore the options for self steering. Electric auto pilots were appealing due to their relative simplicity, but are too power hungry and unreliable for our use. The simplicity of sheet-to-tiller self steering was also appealing, but can be difficult to employ on a downwind course.
That left traditional windvane self steering systems. The downside of these was cost, which could have been more than we paid for the boat. In the end we chose to build a rudder head mounted design developed by Jan Alkema, a Dutch engineer and sailor. Ours employs an auxiliary rudder, which affords the added benefit of serving as an emergency rudder if the main rudder is damaged.

One piece of equipment, the engine, required very little discussion between us. Neither of us wanted one. Instead, 12-foot-long sweeps will be our primary auxiliary power. Given that we’ll mostly be in the trade winds, hopefully they’ll get minimal use.
It wasn’t a merely pragmatic decision, though it’s true that Minimus couldn’t carry enough fuel to do us much good. More importantly, it wasn’t what we were going sailing for.

More than any other aspect of our somewhat unconventional approach to voyaging, sailing engineless seems to evoke a sense of heresy among other sailors. I’d like to be able to trot out some rational defense of engineless sailing, but I don’t have one. My first boat had an engine and I swore it would be the last one that did. I’ve kept my word on that, owning three other small voyaging boats since, all engineless.
It’s not that there haven’t been times when an engine would have been welcome. Rather, it has more to do with my mindset, with what I go sailing for. I prefer being in a situation in which I have to be more aware of my surroundings, of weather and currents, in closer partnership with the boat, and above all, more patient. Not having an engine to rely on gives me that. Once the anchor is weighed, I simply have no choice.
I’m fortunate in that Pearl is very much in agreement. Once, as I was working elbow deep in engine oil on a friend’s boat, she pointedly said “On our boat, it’s either me or an engine, but not both.”
It was only after we felt satisfied that we had the essentials of a sound boat, a sturdy rig, serviceable sails and reliable ground tackle that we finally turned our attention to electronics.
Whereas paper charts and celestial navigation once served me well, the siren song of electronics grows ever louder. We’ll still have a plastic sextant as a back up, but mostly we’ll be using a tablet and smart phone for navigation, both with built-in GPS. Onto each device we’ve loaded Dave Register’s great chart plotter app Open CPN for Android, along with free electronic NOAA charts for U.S. waters.
For foreign waters we have another chart plotter app, Navionics HD, and a full set of electronic Navionics charts for the South Pacific. The grand total investment for these two chart plotters and all the charts is less than $100. We also have a couple of handheld GPS units for backup.
We debated whether to get an AIS receiver until we looked at the live chart of global shipping at marinetraffic.com. The online chart there shows global shipping in real time. Zooming in on the large number of ships off the U.S. West Coast is an eye opener. Although one of us will always be on watch, it’s comforting to know that the AIS alarm will alert us to ships in our vicinity.
The last addition to our electronic paraphernalia is a satellite messenger that will allow us to post daily updates during the voyage. It will also allow others to follow our progress via an online chart. For details see our blog at:
www.omick.net/adventure/sailing/sailing_offshore/sailing_offshore.html
Year after year our land life is rich and full, sometimes too full with activities and obligations. Once in a while we feel the need for a sea change, a time to break with the rhythms of a life we know so well and instead to live outside our comfort zone for a while. That time is rapidly approaching and both of us are excited about the prospect of a sabbatical year at sea. •SCA•
David’s adventuring in small boats began in 1976 when he sailed a 14-foot West Wight Potter from Seattle to Skagway, Alaska. In 1980 he sailed a 23-foot Wharram catamaran from San Diego to Cabo San Lucas, Mexico and then to Hilo, Hawaii. In 1982-83, he spent a year sailing a 20-foot monohull from Seattle to southern Mexico, eventually landing at Padre Island, Texas where he spent the next 10 years in the sailmaking and marine canvas trade. After a long hiatus from bluewater sailing, he, along with his partner Pearl, look forward to heading back to sea in 2017.
(As first appeared in issue #105.)
I would like to read a follow up to this article. How did the trip go, etc, is that available?
I know David Omick as the inventor of a respected dry toilet system with treatment through thermophilic composting. I should have guessed he would figure out how to outfit a small boat for incredible blue water adventures.