
DIY Electric Outboard (PT 3)
DIY Electric Outboard (PT 3)

Article by Jerry Culik
Here’s the latest on my project to repurpose a vintage Johnson outboard by replacing its locked-up gas engine with a low-cost “scooter” motor. I figured that 1.8 kW of power would be good enough for cruising below hull speed. And I decided to operate the motor at a 48VDC to keep the current low and the size and cost of the power cables reasonable. Since I already had a DC power supply that was big enough to run the motor, I didn’t need to buy batteries to test the rig in my 55-gallon test tank. The motor is air cooled, and I had removed the outboard’s water pump impeller, so I ran the outboard for hours in the tank, pushing water with the outboard’s stock prop, mainly to see how hot the motor and controller would get while keeping the power at what, I hoped, would translate to low cruising speeds. Without any fan cooling, the temperature of both the motor and controller remained below 50℃. Encouraged by those results, it was time to buy some batteries, add the under-the-hood fan cooling, clean up the throttle linkage and wiring, and then test the outboard out on the water.
The cheapest way to build a 48V battery bank is by stringing up eight 6V “flooded” lead-acid golf cart batteries in series. But they’re heavy, and they require a lot more attention charging and “equalizing” them than I’m willing to sign up for (been there, done that…). AGM batteries take less maintenance, but cost a lot more, and they are just as heavy (and weight is a major issue on any electrically propelled boat, where power consumption is a critical factor impacting range). LFP (lithium-iron-phosphate) batteries require no maintenance, weigh a fraction of lead-acid batteries, and are good for thousands of charge-discharge cycles (compared to hundreds for lead-acid batteries). But lithium-ion batteries are expensive, aren’t they? It depends…US-based Battle Born’s 100Ah 12V LFP Battery (with 1,250 W-hr of storage capacity) is currently selling for $925; a Dakota Lithium 100Ah LFP Battery is only $699 (but is currently “out of stock”). Even economical Miller Tech LFP batteries are selling at close to $600. In contrast, a 105 A-hr AGM “dual purpose” battery from West Marine costs around $400. But while lead-acid batteries might still appear to be the cost winner, the prices for “drop-in” LFP batteries from many of the on-line suppliers have been falling. As I’m writing this article, high-quality 12V/100 A-hr LFP batteries are currently selling on-line for less than $250 (and by the way, even if a battery is “assembled” in the US, the cells inside and the BMS are all made in China; the difference in LFP battery prices seems to be largely a function of local/phone support versus on-line sales, service, and possibly warranty).
I decided to operate the motor and controller at 48V primarily to keep the battery cables easy to handle and to save money on wire and connectors. That voltage is also low enough that it doesn’t present a shock hazard or require “high voltage” components. Golf carts typically operate with 48V deep-cycle lead-acid batteries, and high-voltage LFP batteries are now widely available as replacements for them. An integrated 51.2V/100 A-hr LFP golf cart battery from LiTime, for example, lists for $1,260. The Group 8D battery is physically big and weighs about 80 lbs – and that’s too much for portable applications such as mine.
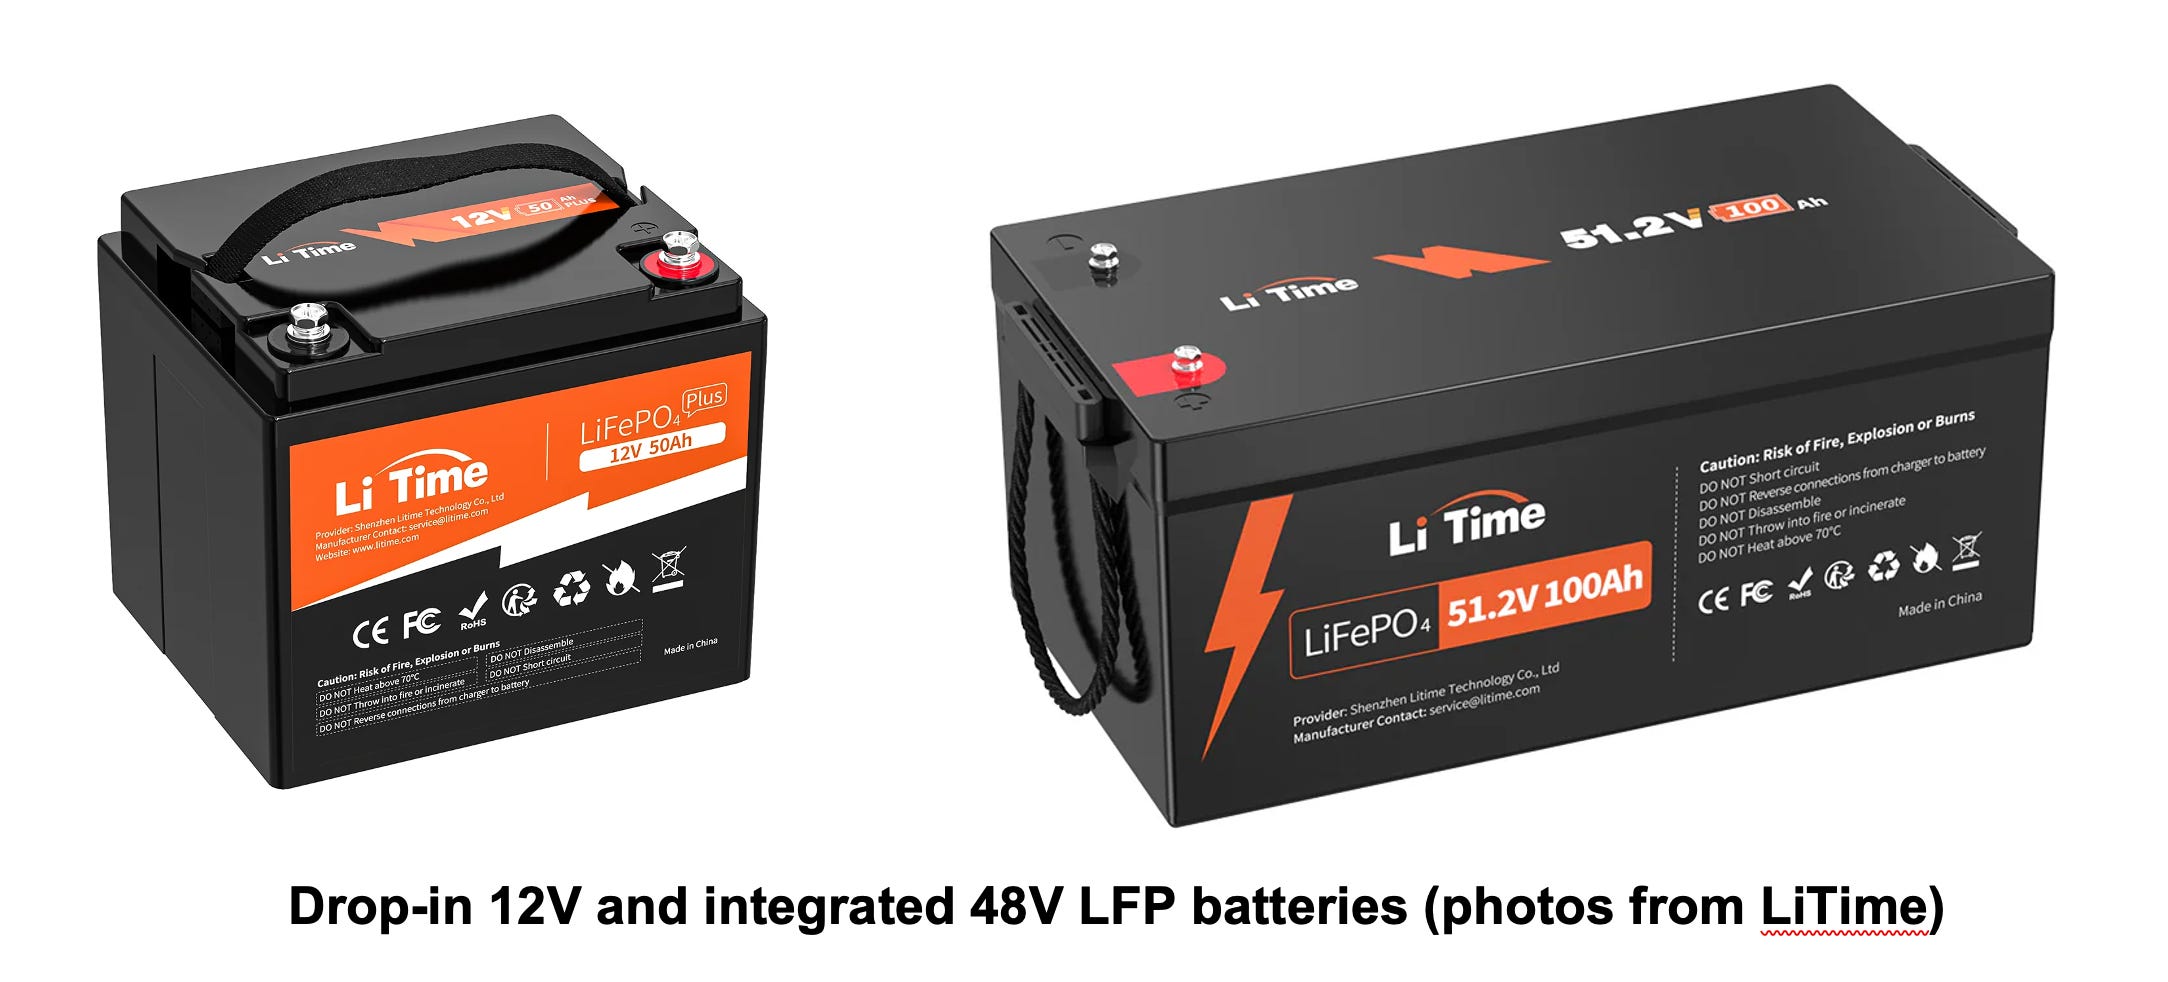
Although I couldn’t run my converted outboard anywhere near full power in the test tank, I did learn that it was able to push a lot of water using only 4 amps of current. And the temperatures of the motor and the controller, without any cooling, remained well within my comfort range, even after running continuously for hours. Based on those results, I figured that 50 A-hr of battery capacity should easily provide more than 10 hours of comfortable cruising time, and still allow for occasional high-power bursts. Since one nice feature of most 12V “drop-in” LFP batteries is that they can be arranged in series and in parallel to increase the total storage capacity, buying lower-capacity batteries, and then adding more to build a bigger battery bank, is (usually…make sure you check the specs!) an option. And even though 100 A-hr LFP batteries are the lowest cost, capacity-wise, and are available from dozens of on-line suppliers, the smaller 50 A-hr batteries would be lighter and easier to move around (useful if you’re planning a portable installation, or not quite as fit as you used to be…)—and the battery bill would be significantly lower.
Since there’s less demand for lower-capacity LFP batteries, it’s a little harder to find them in stock. I looked at two battery suppliers who have excellent product reviews. LiTime (previously known as AmpereTime) is an on-line seller with a phone number that’s obviously in China. The motor that I’m using could draw a maximum of 36 amps at 50 volts. A bare-bones 50 A-hr battery from LiTime is rated for 50 amps continuous (and 100 amps for 5 seconds), which is more than enough surge capacity. It lists for $160 and comes with a 5-year warranty. Epoch Batteries has a U.S. phone number for sales and service; their 50 A-hr battery is capable of 100 amps continuous (enough to run a 5 kW motor!), plus it has a heater (for use in sub-freezing conditions) and Bluetooth monitoring. The full-featured batteries from Epoch sell for $199 and have an 11-year warranty, but they are 10 pounds heavier and take up a lot more space than the LiTime batteries. Therefore I bought four of the small LiTime batteries, and got them on sale for about $550—or less than the cost of one name-brand 100 A-hr LFP battery. But be aware that while lower-cost LFP batteries might be easy to buy on-line and have what looks like a great warranty, they probably lack any US-based service if there are any problems (so once again, check!).
Unlike lead-acid batteries, all “drop-in” LFP batteries have a built-in BMS (“battery management system”) that is programmed to protect the individual lithium-ion cells in the battery from overcurrent, overvoltage, overheating, and overcharging. Since there are four independent BMSs in my series string, if any battery is fully discharged (or its overcurrent limit is reached), then that battery’s BMS will effectively shut down the whole string! Many LFP batteries will then require a separate 12V “charge” voltage to reset the BMS and turn the battery back on (again, check!). So even though an integrated 48V battery is more expensive, power management and charging is just a little easier because there is only one BMS to contend with. As a footnote, the BMS – and its designed-in ability to completely “shut down” the battery power if one of the protective limit is reached—appears to be the biggest criticism of these “drop-in” LFP batteries because this “dump load” behavior could become a very expensive problem —particularly if you charge the batteries from an alternator. But if you charge them using solar modules, or from an inverter, it’s just a potential annoyance to be aware of, and to plan for, should it occur.
Once the LiTime 50 A-hr LFP batteries were delivered (it took a bit of time, and a couple of emails), they needed to be fully charged and “balanced” before connecting them into a series string. The recommended charge rate for these batteries is 10 amps, although they can take up to 50 amps. If you’ve never worked with them, the charging profile of LFP batteries is very different from the lead-acid batteries. The LiTime specs call for a charging voltage between 14.2 to 14.6 volts, and I used a bench power supply set for 10 amps of current. The voltage across the battery hovered at around 13.7 volts (“absorption charge”) for a couple of hours. The current then dropped to zero, and the voltage jumped to 14.4 volts, signaling that the battery was fully charged. My understanding is that the battery’s internal BMS balances the individual cells when the voltage reaches the high voltage. All four batteries were then jumpered together in parallel and allowed to “equalize” for 24 hours, per the instructions in the manual that was packed along with the batteries. Once this was accomplished the batteries could finally be connected into a series string.
If I didn’t have a bench power supply for the initial charging, LiTime sells a 10A LFP Battery Charger to complete the initial charging on the individual batteries. While it could be used to charge each of the batteries, one by one, once they’re connected in series, it’s more convenient and efficient to charge all four at once using a high-voltage charger specifically designed for the purpose. Epoch Batteries sells a 48V/15A Battery Charger for their LFP golf cart batteries that can supply the 57.6 volts (4 x 14.4V) needed to charge the series-connected string; it lists for $235. Form has a similar looking 48V/15A Golf Cart Battery Charger that sells for $200. Both of them are rated IP67 (dustproof and waterproof) and can fully charge the 50 A-hr string in three or four hours (the batterys’ specs say they can be charged at up to “1C,” or 50 amps). That’s another advantage of LFP over lead-acid batteries—you can charge them a lot faster. LiTIme’s “waterproof” 48V/18A Battery Charger lists for $200. And Big Battery has a similar-looking 48V/20A IP65 Battery Charger that can handle 110/220 VAC; it’s $300.
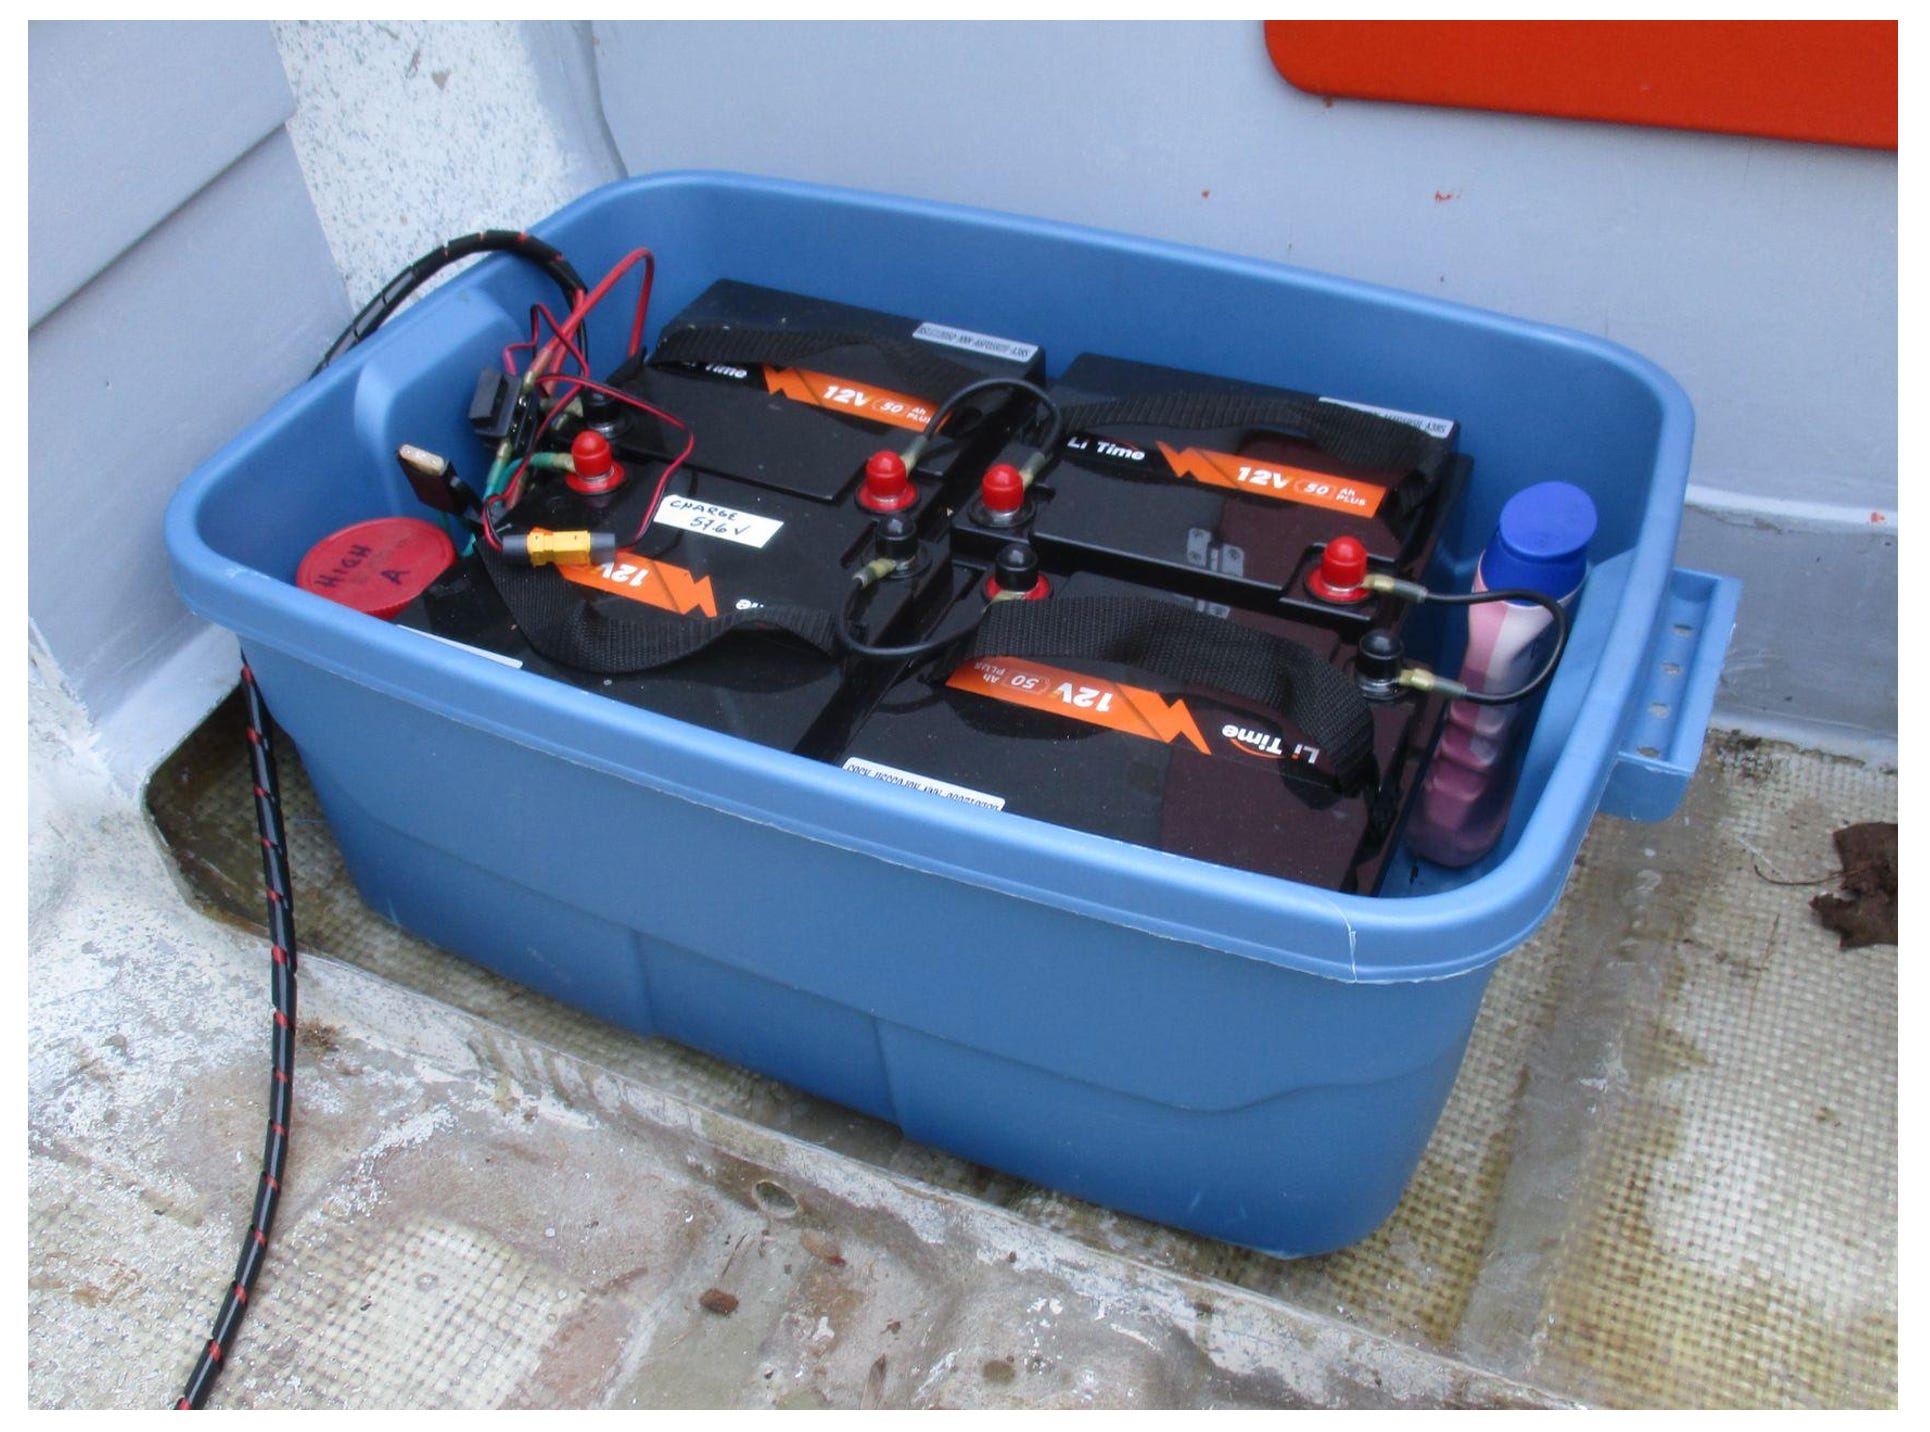
While both the LiTime and Epoch LFP batteries discussed above have sealed ABS plastic cases, LiTime’s battery is only rated IP65 (splash and spray tolerant). The Epoch battery is rated IP67 (immersion resistant), which is highly recommended for marine applications. Even though my cruising mini-trawler will provide plenty of protection from splash, spray—and immersion (!!), I arranged the batteries in a 10-gallon covered tote that also houses the protective fuse, a relay/contactor, and the system disconnect interlock. The covered tote adds protection for the electrical components and makes it easy to move the batteries around for charging or when I decide to use the outboard motor on other boats (and I can keep spare fuses close by, right in the box). The finished battery box weighs in at about 50 pounds (for comparison, 3 gallons of gas weighs about 20 pounds). That’s still light enough to carry around, and it’s just about the same weight as my converted electric outboard.
Although 48 volts is too low to cause shock, the battery bank’s ability to supply up to 150 amps means arcing and sparking are very possible, so safe work practices and wiring designs are still important. Based on the tank testing, I figured that I would never reach the motor’s rated power for cruising below the “displacement hull speed” of a small boat, so I downsized the battery cables to reduce their cost. Powerwerx sells silicone-insulated hook-up wire that’s super flexible and is rated for 200℃; and the fine multi-strand conductors are tinned, which is essential for reliable marine applications. I bought spools of red and black 12 AWG wire (around $17 each for 25 feet of wire), some waterproof ring connectors, and a Klein Tools 3005CR ratcheting crimper. I installed a 25A blade fuse at the battery string’s positive connection to protect the cables; if you do the math, this should limit the power to the controller to about 1.3 kW—well under the motor’s power spec and the batteries’ continuous current spec. Right after the fuse there’s an 80A sealed relay that will disconnect the power. A switch at the battery bank closes the relay and sends power to the outboard. A second remote switch (at the helm) in series is used to cut off power. The relay does use a small amount of power; installing a disconnect switch on the battery box that’s spec’d for 48VDC (e.g., Ampper Battery Disconnect Switch) would eliminate that load. I used low-cost XT60 connectors (commonly found on RC planes and cars), which are rated to carry up to 60 amps of current, on all of the power cables. However, based on my frustrated efforts to solder 12 AWG cables to them, I’d suggest spending a little more and investing in Anderson Powerpole Connectors connectors, which are crimped, but can also be soldered. They are also available from Powerwerx, along with the flexible wire.
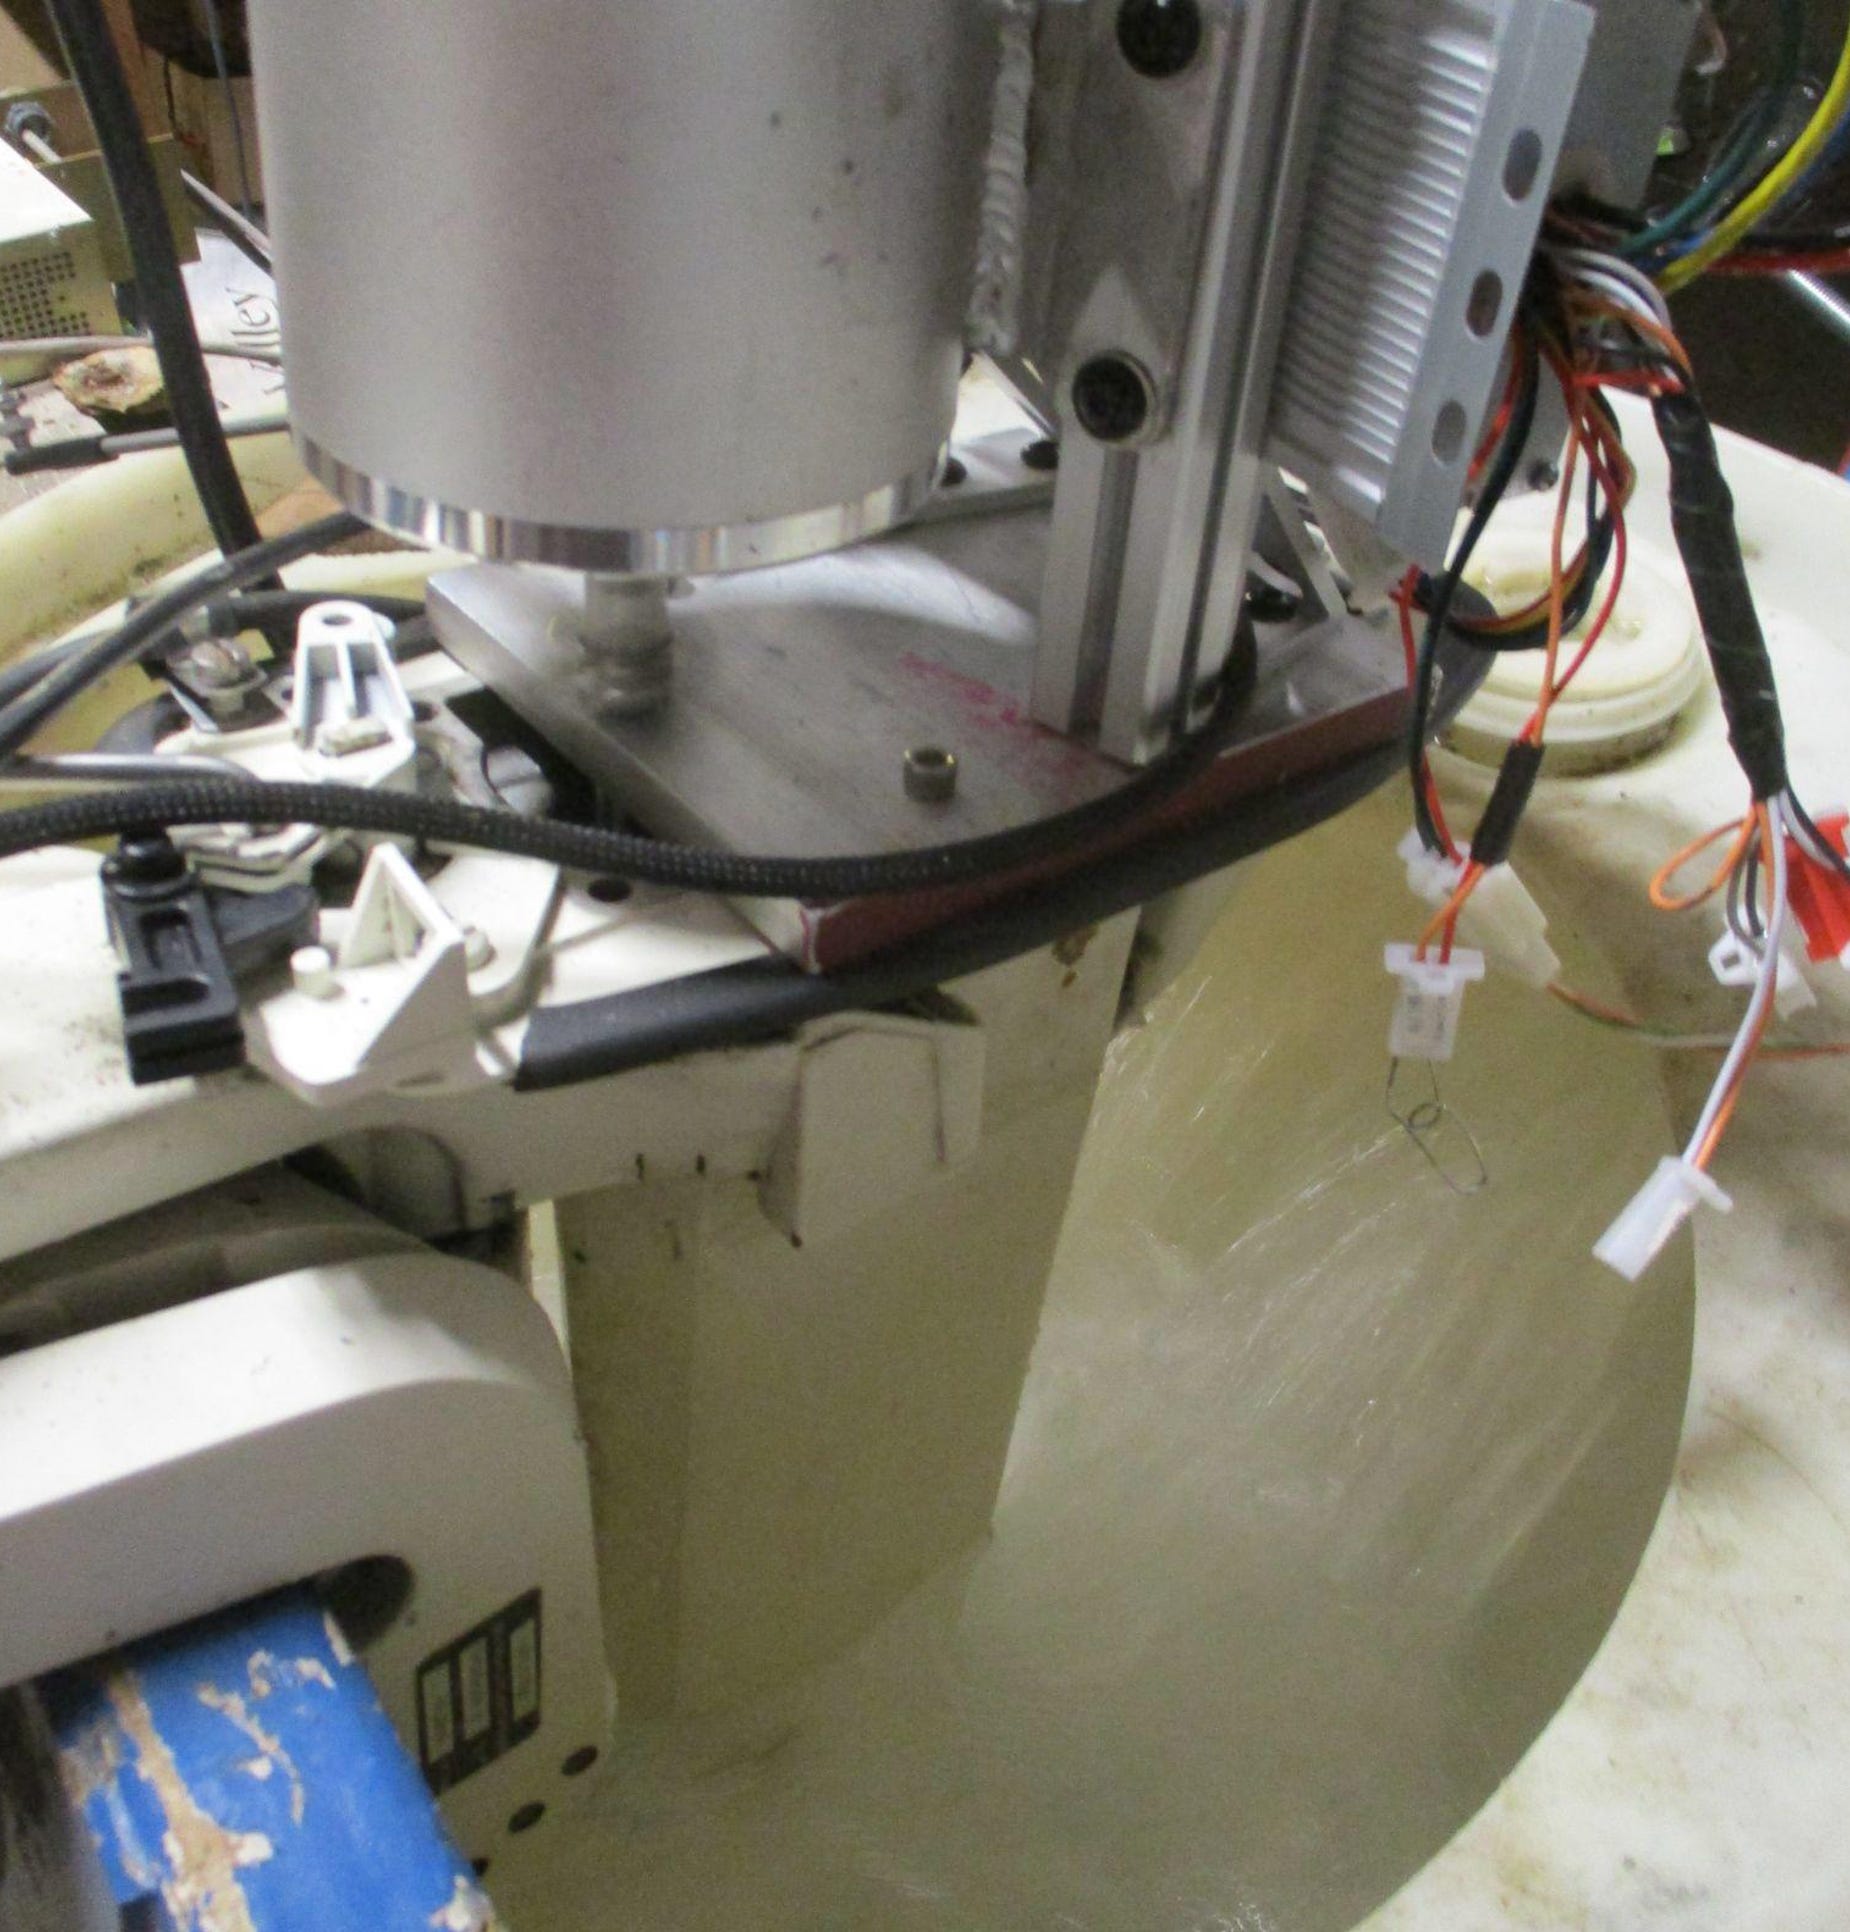
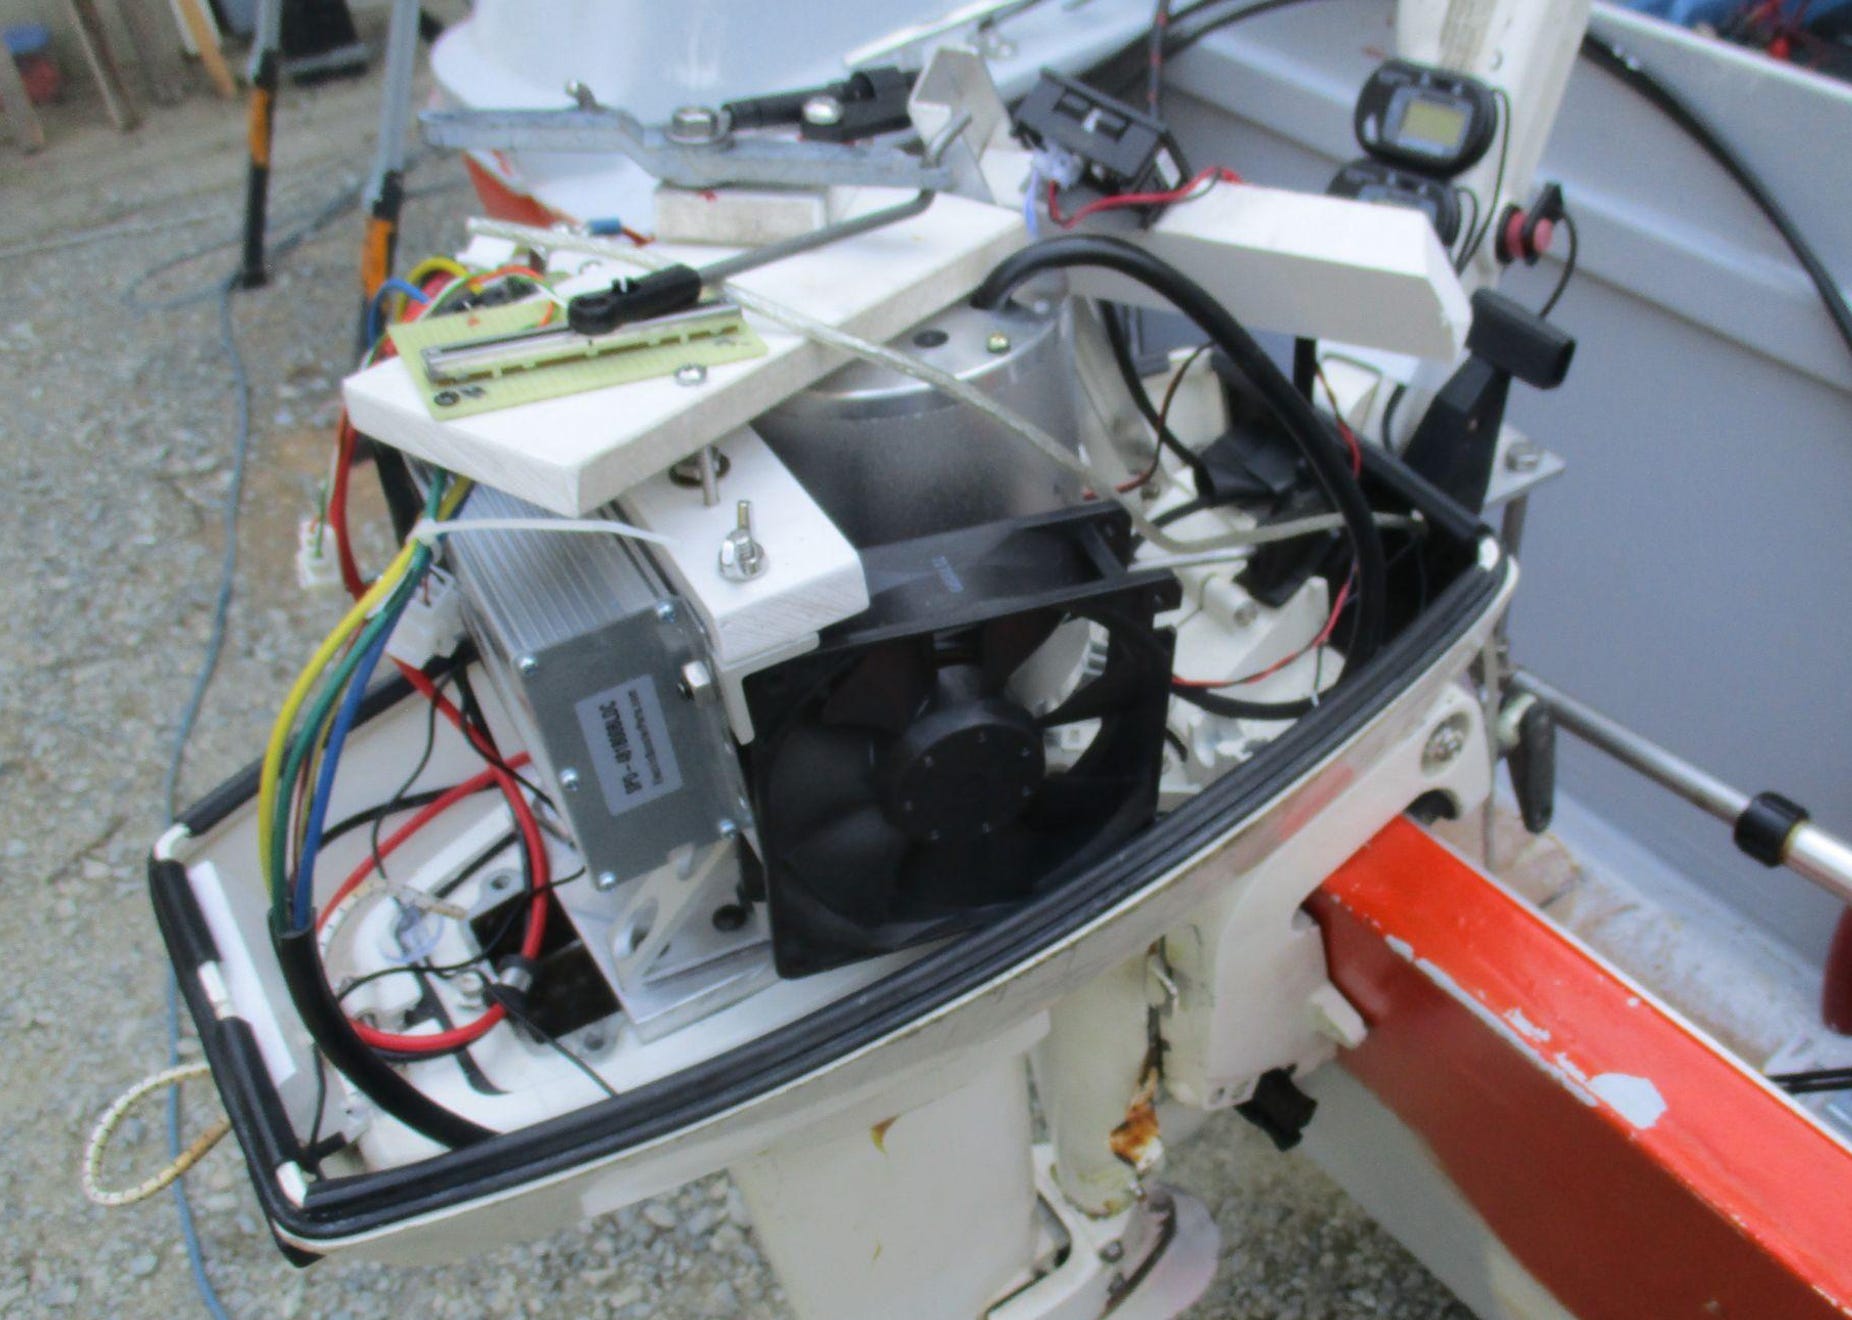
I used some scrap PVC lumber for the throttle control. The original carburetor linkage now moves the wiper on a linear potentiometer that is soldered to a “project” PC board and wired to the connector to the controller. The power controller I’m using has overcurrent and overspeed protection. But does not appear to have any protection against overheating. It’s generally accepted that when the motor case approaches 140℉ (60℃), or if it’s too hot to keep your hand on it, then it’s time to throttle back the current. Although the outboard motor’s water pump was in good condition, I installed a 48V muffin fan because the motor is designed to be “air cooled.” The 108 cfm fan conveniently bolted right onto the T-slotted extrusion of the motor mount frame. It’s normally on and draws about 0.2 amps. But when the motor is running at very low speed, or off, I reused the safety switch on the tiller handle to shut off the fan to save battery power.
With everything connected and successfully bench tested, and the battery fully charged, I installed the converted electric outboard on my mini-trawler, a conversion based on a 14-foot 1960 Cutter runabout that had seen much better days before I acquired her. After stripping out everything from the hull, I added a lightweight cabin, and I drive from a helm station amidships that’s within easy reach of the motor. The trawler’s rebuilt transom can actually carry two small outboards, and previously I used two vintage Evinrude Fisherman motors (which are easy to maintain and a joy to run – and sync!). Now the gas motors and fuel tanks were replaced by the electrified Johnson outboard and its battery box.
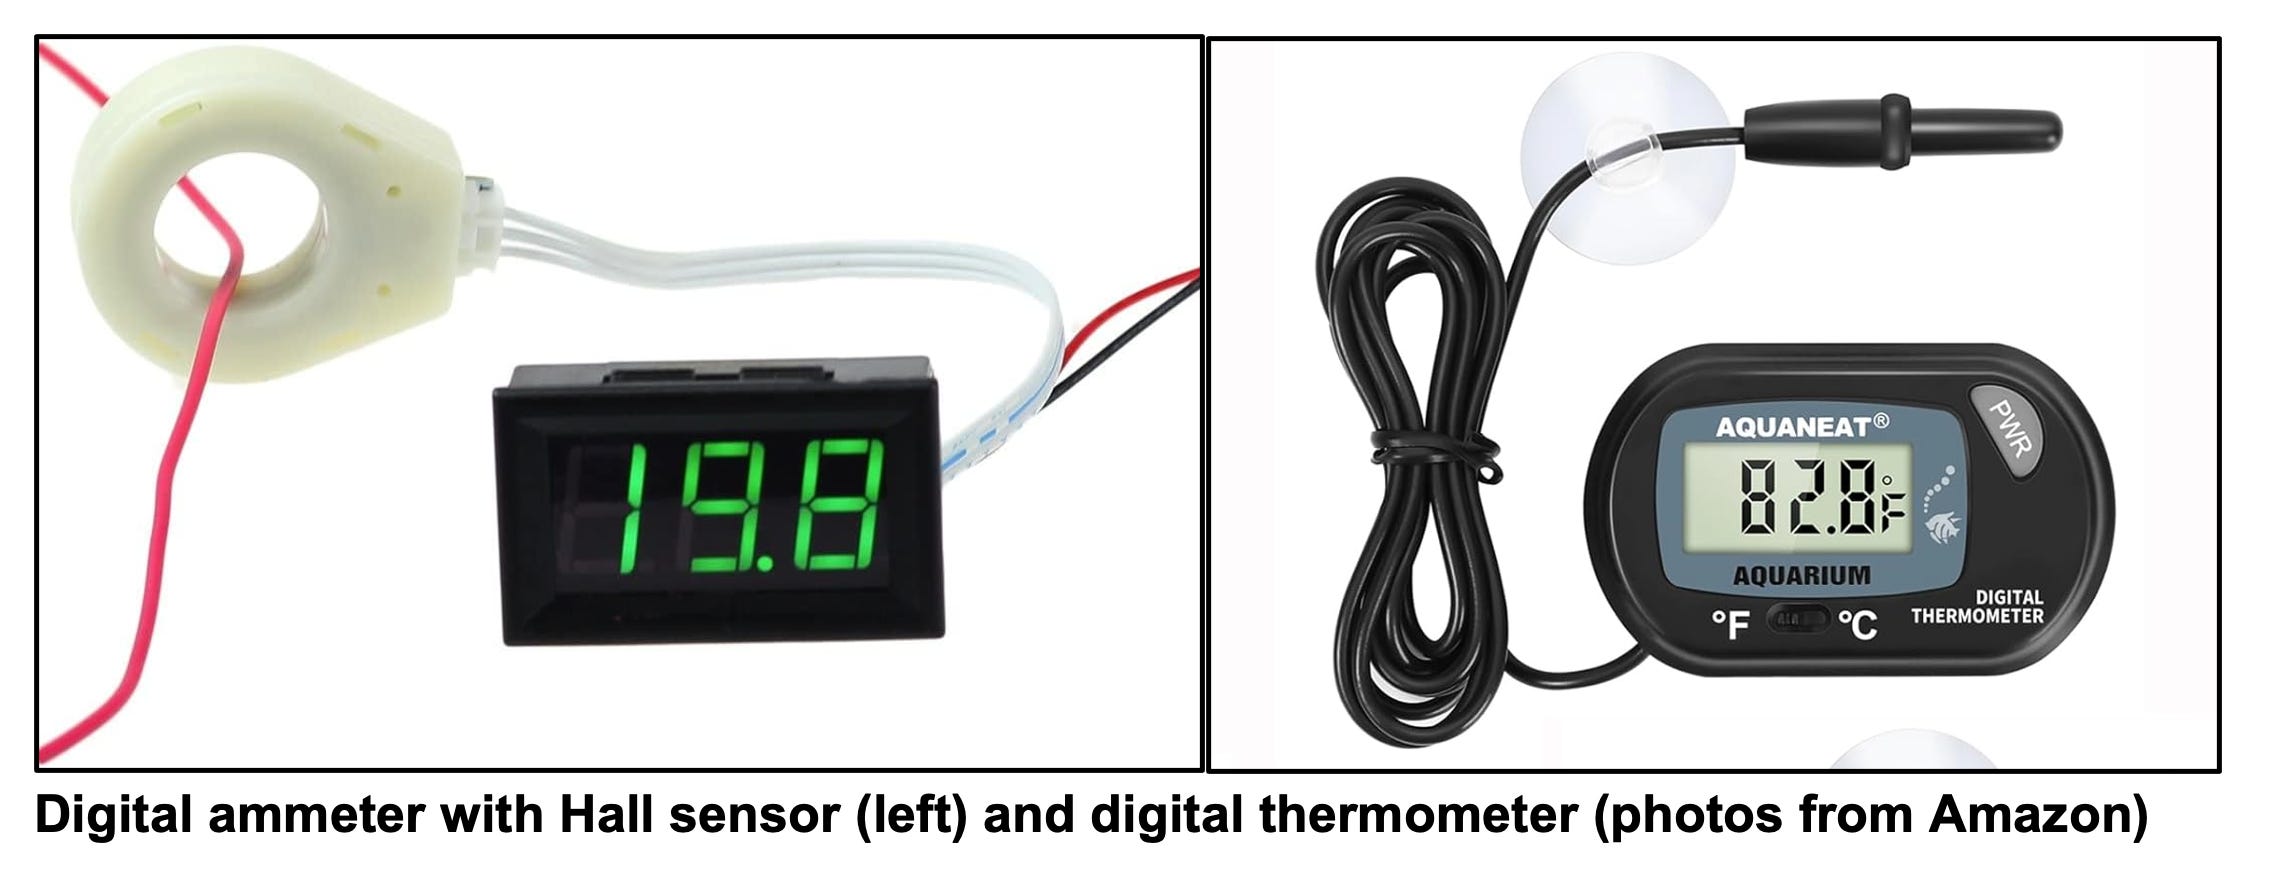
My first set of on-water tests involved measuring speed, power, and temperatures, primarily to see if any changes were needed before investing more time and money in the project. Determining the power of any electric outboard is easy: it’s just voltage times current. The motor current and voltage on my outboard is measured using a Bayite Digital Ammeter ($18 on Amazon) that can handle DC current up to 100 amps using a Hall sensor that’s around one of the battery cables. That particular device eliminates a couple of connections that would be needed to use a traditional current shunt. This meter automatically switches between voltage and current into the controller—a nice feature that eliminates a separate voltmeter. Monitoring the real-time motor and controller temperatures while cruising are the absolute minimum needed for reliable operation and I used a couple of low-cost aquarium thermometers, taped to the motor and the controller. You can see the displays attached to the tiller handle in the photo above.
For the initial on-water tests I took the motor to a nearby reservoir. I used my handheld Garmin GPS to monitor boat speed, and I ran a course up and back and averaged the numbers to help reduce the effect of wind. The cooling fan was running at full power and with the hood in place, and I constantly monitored the temperature of the motor and the controller to make sure that I didn’t overstress either of them (the opening for the original recoil starter is the new “air scoop”).
The first results, with the maximum current limited to around 10 amps, were encouraging. But the winds were gusty, and since my mini-trawler has a good amount of windage, that made it difficult to get really accurate results. However, I did learn that only 3 amps of current (about 150 watts of power) would drive the boat at around 2 knots, even into the wind. And increasing the current to 10 amps sped the boat up to over 3 knots, whether up—or downwind. The temperatures of the controller and motor never exceeded 35 C, which is an excellent result since motor heating is a big concern and will limit how much power from the motor can be safely used. Another interesting observation was that, once the throttle/power level was set, at these low speeds the current didn’t vary much, no matter what the “wind load” was.
My second test session was much more organized than the first, and the winds were a little lighter and more cooperative. I replaced the 15A battery pack fuse with one rated for 25 amps so that I could run at higher current settings. And I also replaced the tiller throttle with a remote throttle (a 5,000 ohm potentiometer with a big knob) that provided much finer control of the motor power levels, and much better data. With only 2.1 amps of current to the controller, the boat speed jumped around (due to the boat’s windage) but averaged about 1.7 kts over a couple of upwind and downwind runs. Using all 50 A-hrs of battery capacity, I could theoretically run the motor for 24 hours at that speed and travel about 40 nm! This was a highly encouraging result…At 5.2 amps the speed increased to 2.5 kts, which seemed like a better cruising speed with more control of heading. But the potential runtime dropped to about 9 hours, with a range of about 24 nm. At 11.3 amps the boat speed increased to perky 3.3 kts; with an estimated running time of 4.4 hours the range dropped to 14.5 nm. My last test run was with the current set at 19 amps. The speed now averaged 3.9 kts, and there was a bit of a wake. At this rate of discharge I’d expect the battery to last only about 2.5 hours, and the potential range is only about 10 nm. Although the “displacement hull speed” of my boat is around 4.6 kts, I didn’t try to go any faster than 4 kts due to the current limiting fuse. Throughout the test runs I monitored the motor and controller temperatures, but never saw them climb higher than 42℃, which is well within the safe range (less than 60℃).
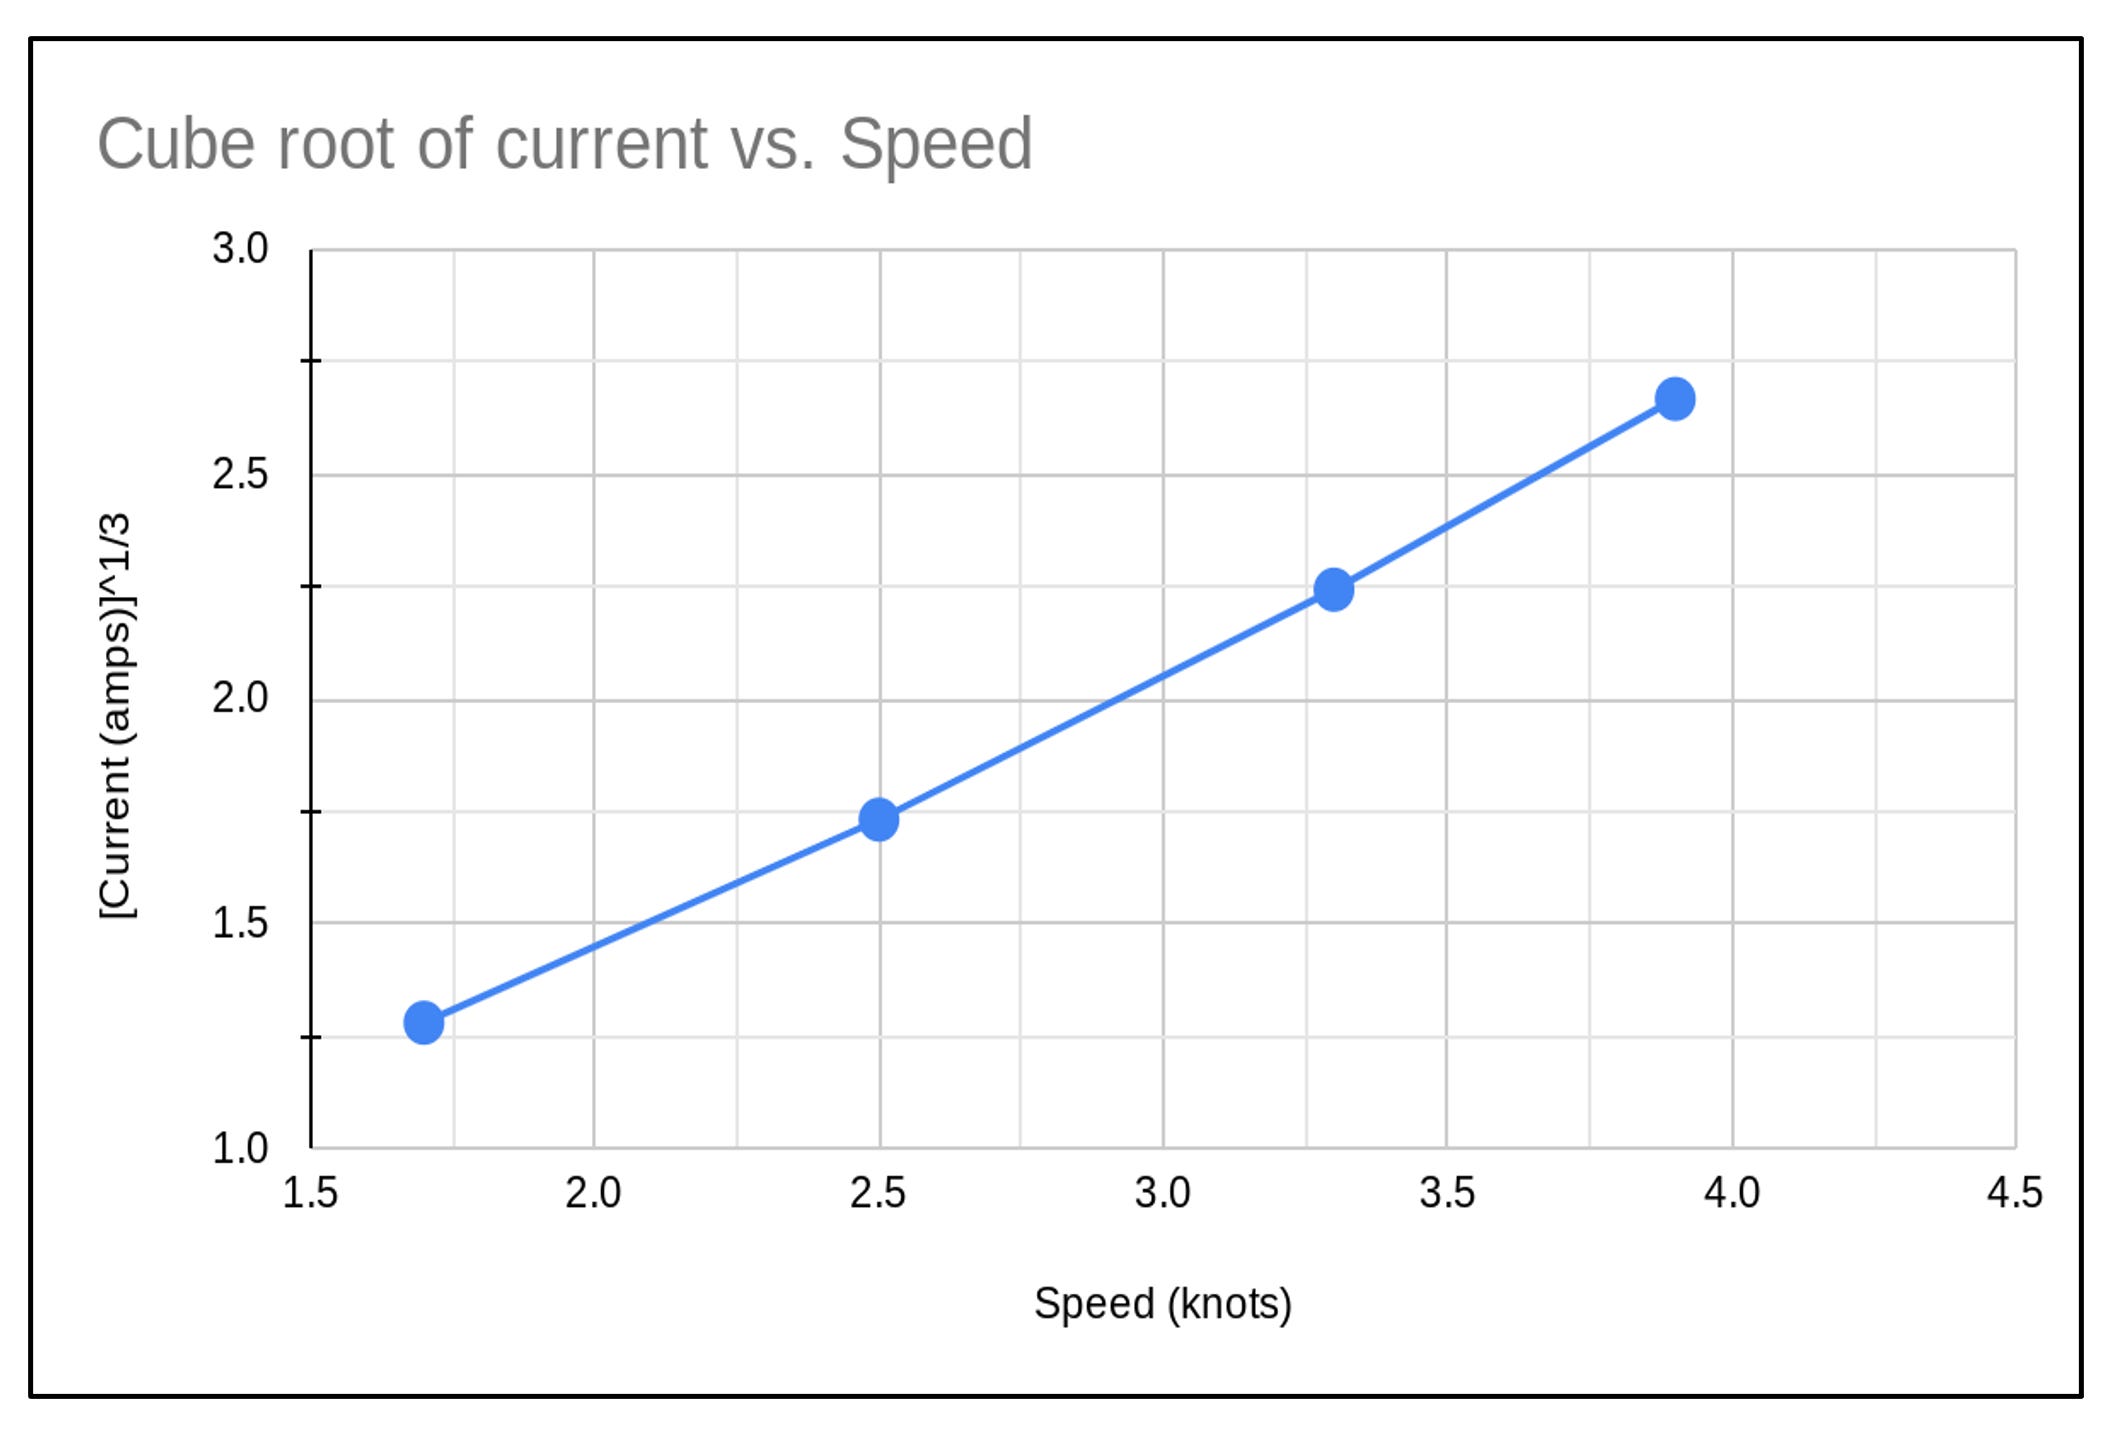
For a hull being driven in displacement mode by an electric motor, the power (in this case, current times voltage) typically increases with the cube of the boat speed; Tom Hrubry succinctly discusses the so-called “propeller law” and provides further electric boat design guidance in Plug-In-Boats. Assuming that the voltage to the motor remained constant, I plotted the cube root of the current (sorry if I’m causing any painful high school flashbacks…) against the boat speed. Assuming that the specific power-speed trend remains linear, the current will rise to around 30 amps at the mini-trawler’s displacement hull speed. The power will still remain below the 1.8-kW motor’s rating, so that using a bigger prop might be worth trying.
•SCA•
 | A guest post by
|
I'm working on a similar project for my boat. I think with all the little e-foil and e-bike components cheaply available and the excellent qualities of lifepo4 this is the way to go and as you noted much cheaper than a production electric outboards with proprietary connectors and heavily marked up batteries with very limited charging capabilities. Thanks for documenting it! -Alan
Thanks Jerry for describing your project so well. I would like to add some more information on LiFePO4 batteries ( I talked about this at the Port Townsend Wooden Boat Festival a few weeks ago). As you mention, there is a wide price difference between the "drop-in" batteries and this is where one needs to read the fine print on the product descriptions. The cells used are graded as Grade A , B, and C. Grade B cells may only have 1/4 the life span of Grade A cell. If the product description does not specify Grade A I would suspect that they are Grade B.
As you mentioned, the BMS is a critical part of the Li battery and the one most prone to have problems in the long run. Most of the negative comments I have found on-line talk about problems with the BMS. In addition to shutting the system down if an individual cell starts overcharging or reaches full discharge, it balances the cells. The current that shunts the charging power when one cell in the series reaches its maximum voltage before the others is usually 1000 mA or less. What I have found is that after 5-6 years of use the balancing current is no longer adequate ( I have some LiFePO4 cells in use now for 12 years!). It is important therefore to be able to monitor the voltage of each individual cell. The more expensive batteries have a bluetooth option that lets you monitor each cell as it charges. If an individual cell is out of balance enough that it does not fully charge, I use a bench top power supply and keep charging at a rate (Amps) that is lower than the balancing current of the BMS. That way I can fully charge the one or two cells that fail to fully charge.
You also mention the waterproof rating of a battery. I consider that a very important factor in my choice. Most batteries are rated to IP65, but I do not consider this adequate protection. The last sentence on the description of IP65 is "some ingress (of water) permitted." And that is under the light spray that is the rating for this level. I consider IP66 much better since it protects against water from a 3" hose at 3ft.
Finally, I have found that battery chargers that have internal fans with a grill to the outside fail very quickly in the marine environment. They also need to have an IP66 or IP67 rating. Chargers with internal fans succumb to humidity very quickly. I learned this the hard way as the ones I tried never lasted more than one year. I finally tracked down the specs on some of them and found out they are rated only to a humidity of 80-90%. However, the older tech ferro-resonant chargers from outfits like QuickCharge are pretty much bomb proof, though less efficient, and need to be special ordered for Li batteries.
Tom Hruby